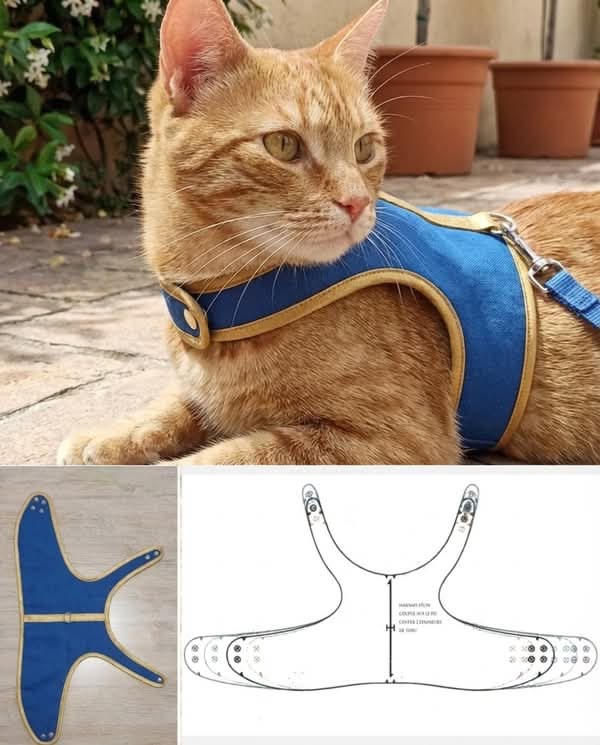
Easy Pet Collar - Tutorial

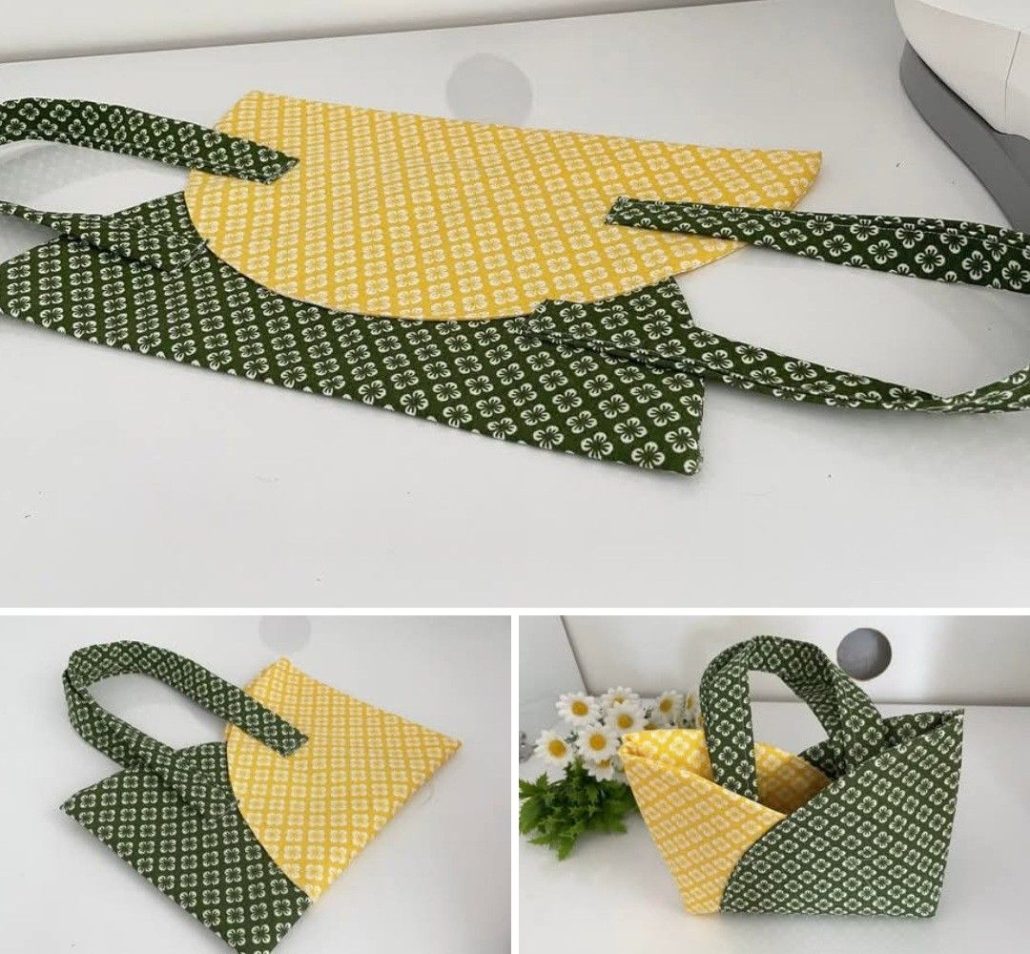
The Fabric Bag – TUTORIAL is a practical and creative sewing project that combines style, functionality, and handmade charm into one versatile accessory. Whether you are new to sewing or already experienced with quilting and fabric crafts, following a Fabric Bag – TUTORIAL is a fun and rewarding way to create a useful item for everyday life.
Creating a Fabric Bag – TUTORIAL allows you to transform fabric into a reusable and personalized bag that can be used for shopping, travel, organization, or fashion. Handmade fabric bags are not only eco-friendly but also a great way to showcase your creativity through colors, prints, and unique details.
One of the best things about the Fabric Bag – TUTORIAL is its versatility. You can customize the size, shape, handles, and pockets to suit your needs and style preferences. In this guide, you will learn how to create a fabric bag step by step while exploring different ways to personalize your design.
Selecting the right materials is essential for achieving a durable and stylish Fabric Bag – TUTORIAL. Since bags are designed for daily use, strength and structure are important considerations.
Cotton fabric is one of the most popular choices because it is easy to sew, widely available, and comes in countless prints and colors. Quilting cotton works especially well for lightweight bags.
For stronger and more durable bags, canvas, denim, or linen blends are excellent options. These fabrics provide extra support and help the bag maintain its shape.
Interfacing or batting can be added to give the bag more structure and stability. Fusible interfacing is commonly used because it is easy to apply.
You will also need matching thread, scissors, pins, a sewing machine, and measuring tools to complete your project successfully.
Optional materials such as zippers, magnetic snaps, buttons, or decorative trims can enhance both the appearance and functionality of your Fabric Bag – TUTORIAL.
Before starting your project, it is important to understand how the Fabric Bag – TUTORIAL is constructed. Most fabric bags include a main body, handles, and optional lining or pockets.
The main body forms the structure of the bag and can be designed in many shapes, such as tote bags, drawstring bags, or shoulder bags.
Handles can be short or long depending on how the bag will be carried. Reinforced handles are especially important for heavier items.
Lining fabric is often added inside the bag to provide a clean finish and extra durability.
Pockets, both interior and exterior, can increase functionality by offering storage for smaller items.
Understanding the structure beforehand helps ensure your Fabric Bag – TUTORIAL is both attractive and practical.
Once your materials are prepared, you can begin creating your Fabric Bag – TUTORIAL. Careful sewing and accurate measurements will help you achieve a polished result.
Start by cutting all fabric pieces according to your chosen pattern. This usually includes the outer fabric, lining, handles, and any pocket pieces.
If using interfacing, apply it to the appropriate fabric pieces before assembly. This helps strengthen the bag.
Sew any pockets onto the lining or outer fabric before joining the main pieces together.
Create the handles by folding and sewing the fabric strips securely. Reinforce the stitching for added durability.
Sew the outer bag pieces together and repeat the process for the lining. Leave a small opening in the lining for turning later.
Attach the handles, then place the outer bag and lining together with right sides facing inward. Sew around the top edge.
Turn the bag right side out through the opening, close the gap with a neat stitch, and press the bag for a clean finish.
Your Fabric Bag – TUTORIAL is now complete and ready to use.
The final stage is where your Fabric Bag – TUTORIAL becomes unique and expressive. Personal touches allow you to create a bag that reflects your personality and creativity.
Choosing bold prints or coordinating colors can completely change the look of the bag, from modern and minimalist to colorful and playful.
Patchwork designs are a great way to use fabric scraps while adding texture and visual interest.
Embroidery or appliqué details can personalize the bag even further, making it perfect for gifts or special occasions.
Decorative trims, lace, or quilting stitches can enhance the overall design and create a more professional appearance.
You can also experiment with different closures such as zippers, buttons, or drawstrings depending on the style of bag you prefer.
The versatility of the Fabric Bag – TUTORIAL allows you to create endless variations for different uses and occasions.
Yes, many simple fabric bag designs are suitable for beginners and involve basic sewing techniques.
Cotton is ideal for lightweight bags, while canvas and denim are better for stronger and more durable designs.
Interfacing is optional but highly recommended if you want the bag to hold its shape better.
Most simple bags can be completed in a few hours, depending on the design complexity.
Yes, most fabric bags can be machine washed, especially those made from cotton fabrics.
Yes, handmade fabric bags are very popular at craft fairs and online marketplaces, especially when they feature unique designs.
Creating a Fabric Bag – TUTORIAL is a wonderful way to combine sewing skills, creativity, and functionality into one practical handmade project. From selecting materials and understanding the structure to sewing and decorating the bag, every step contributes to a stylish and useful final result.
This project is perfect for personal use, eco-friendly shopping, thoughtful gifts, or even small business opportunities. A handmade fabric bag adds a personal touch that mass-produced items often cannot match.
We hope this guide has inspired you to create your own Fabric Bag – TUTORIAL with confidence. If you have already made a fabric bag or are planning to start, feel free to share your honest opinion and suggestions—we would love to hear your ideas and creative experiences.