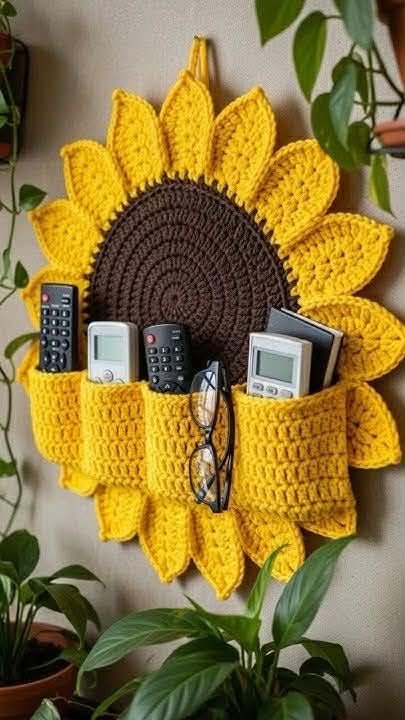
Sunflower Wall Organizer – TUTORIAL

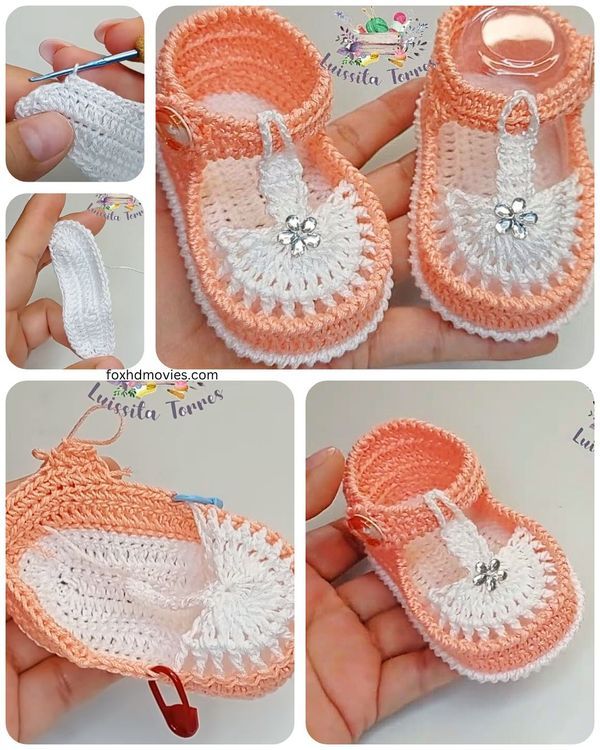
The Crochet Adorable Baby Sandals – Pattern is a must-try project for crochet lovers who enjoy creating cute and practical items for little ones. This charming design combines creativity and functionality, giving you the chance to make soft and stylish sandals that are perfect for newborns and babies. Whether you are a beginner looking for your next fun project or an experienced crocheter wanting to try something new, this tutorial will guide you step by step. Handmade baby items are always special, and sandals created with your own hands carry even more love and care.
Learning how to crochet baby sandals is not only rewarding but also a wonderful way to use leftover yarn from other projects. Since they are small, these sandals don’t require much material and can be finished in a short amount of time. They also make great baby shower gifts, and their unique handmade touch will always stand out compared to store-bought alternatives. The Crochet Adorable Baby Sandals – Pattern is versatile, allowing you to play with colors, buttons, and straps to create different looks.
In this article, we will walk through the process of making these sandals, explain the best materials to use, and share tips for customization. You will also find a detailed Crochet Adorable Baby Sandals – Pattern that you can follow to create your own version. This guide is written to be beginner-friendly but also includes ideas that advanced crocheters can explore to add their own creative spin. Let’s dive into the world of baby footwear and discover how you can bring these adorable sandals to life.
When starting the Crochet Adorable Baby Sandals – Pattern, the first step is gathering the right materials. For a project this delicate, the yarn choice matters a lot. A soft, baby-friendly cotton yarn is usually the best option because it is gentle on sensitive skin and durable enough to keep the sandals in shape. Acrylic blends may also work, but natural fibers are often more breathable and comfortable for little feet.
Another essential tool is a good crochet hook that matches your yarn’s thickness. Most baby sandal patterns work best with hooks ranging from 3 mm to 4 mm, but this can vary depending on your yarn weight. Using the right hook ensures that your stitches stay consistent and your sandals have a neat finish.
Buttons or snaps can be added for closure, making it easier to put the sandals on and off. Choose baby-safe, lightweight closures that don’t pose a choking hazard. Some crocheters also like to add decorative flowers, bows, or even tiny appliqués to personalize the sandals further.
A pair of scissors and a yarn needle are also necessary. The scissors will help you trim excess yarn neatly, while the needle will assist in weaving in the ends securely. Keeping everything tidy and well-finished is key to creating baby items that are both safe and beautiful.
Stitch markers may also be handy, especially if you are a beginner. Since the Crochet Adorable Baby Sandals – Pattern involves shaping soles and straps, having markers in place will help you avoid mistakes and keep track of your rounds.
Finally, remember to have a soft measuring tape on hand. Babies grow fast, and being able to measure their tiny feet ensures that your sandals fit perfectly. You can easily adjust the pattern by increasing or decreasing stitches to suit different sizes.
The Crochet Adorable Baby Sandals – Pattern begins with creating the sole, which is the foundation of the sandal. Typically, you start with a chain stitch, then work single crochet, half double crochet, and double crochet stitches in the round to shape the base. The length of your starting chain will determine the overall sandal size.
Once the sole is finished, you will work on building the upper part of the sandal. This often includes a toe strap or band to keep the foot secure. Depending on the design, you can make a wide strap across the front or multiple smaller straps that resemble classic sandals. Experiment with stitch variations to add texture and style.
After the front strap is complete, it’s time to make the back heel or ankle strap. This part is crucial because it helps keep the sandal in place. You can create a simple strap with a button closure, a tie strap that you can knot gently, or even an elastic loop to make them easy to wear.
The next step is assembly. Carefully sew or crochet the straps onto the sole, making sure they are evenly placed. Symmetry is important, as uneven straps can cause discomfort or make the sandal look unbalanced. This is where stitch markers from the earlier step can help you keep everything aligned.
Once the sandals are assembled, weave in all yarn ends securely. Babies tend to pull on loose threads, so it’s essential to make sure nothing is sticking out. A neat finish will also make your sandals look more professional and gift-ready.
Finally, block your finished sandals if necessary. Lightly dampening and shaping them can help the stitches settle and give the sandals a polished look. This step is optional but highly recommended for a flawless finish.
One of the best parts of following the Crochet Adorable Baby Sandals – Pattern is that you can personalize it in endless ways. For example, color choices can completely change the look of the sandals. Soft pastel shades are perfect for newborns, while bright and playful colors work well for toddlers. You can even make themed sandals for holidays or special occasions.
Adding embellishments is another way to make your sandals stand out. Tiny crocheted flowers, bows, or stars can be sewn onto the straps for a sweet decorative touch. Some people also like to add beads, but make sure they are securely attached and safe for babies.
Changing stitch patterns can also make your sandals unique. For example, you can use puff stitches or shell stitches to add texture to the straps, or work with ribbed stitches for a sporty look. Simple adjustments like these can make your design one-of-a-kind.
You can also experiment with strap styles. Instead of a single ankle strap, try crisscross straps for extra support and style. Or make a sandal that ties at the back with a little bow for added charm. Small design changes often have a big impact on the final result.
Another fun idea is to make matching sets. Pair the Crochet Adorable Baby Sandals – Pattern with a crocheted hat, baby blanket, or dress to create a complete outfit. These sets make wonderful handmade gifts that families treasure.
Lastly, don’t forget about sizing. Since babies grow so quickly, you can easily adapt the pattern by increasing your foundation chain and stitch counts. This way, you can make sandals that fit newborns, infants, and toddlers.
The Crochet Adorable Baby Sandals – Pattern is an excellent choice for beginners because it uses basic stitches like single crochet, double crochet, and slip stitch. These are easy to learn, and practicing them in a small project helps beginners gain confidence. The step-by-step structure of the pattern also ensures that you don’t feel overwhelmed.
For more advanced crocheters, this pattern provides a great opportunity to experiment. You can play with complex stitch designs, intricate strap patterns, or even multi-colored yarns to create a more detailed and artistic pair of sandals.
The pattern is also rewarding because it can be completed quickly. Unlike larger projects such as blankets or sweaters, baby sandals can be finished in just a few hours. This makes it a satisfying project for crocheters who want instant results.
It’s also a very practical pattern. Babies need comfortable footwear, and these sandals are lightweight, breathable, and customizable. Unlike heavy baby shoes, crocheted sandals are soft and flexible, allowing little feet to move naturally.
Another advantage is the affordability. Since the sandals require very little yarn, they are a cost-effective project. Even leftover yarn from previous projects can often be used, making it a sustainable choice as well.
Finally, the joy of gifting or using handmade sandals is priceless. Parents love receiving unique items for their babies, and these sandals can become keepsakes that are cherished long after the child outgrows them.
1. What size are the Crochet Adorable Baby Sandals meant for?
The standard pattern usually fits newborns to 6 months old, but you can adjust the foundation chain and stitches to create larger sizes.
2. What type of yarn works best for baby sandals?
Soft cotton yarn is the most recommended, as it is gentle on baby skin and holds its shape well.
3. Are buttons safe for baby sandals?
Yes, as long as they are securely attached and baby-safe. Alternatively, you can use crochet ties or snaps.
4. Can I make the sandals for boys too?
Absolutely. You can use neutral or bold colors and simple strap designs to make them suitable for boys.
5. How long does it take to complete the sandals?
Most crocheters can finish a pair in 2–4 hours, depending on their skill level.
6. Do I need to block the sandals after finishing?
Blocking is optional but recommended to help the sandals keep their shape and look neat.
The Crochet Adorable Baby Sandals – Pattern is a delightful project that blends practicality with creativity. From choosing the right materials to customizing with colors and embellishments, this guide has shown how easy and fun it is to make baby sandals. Whether you’re a beginner or an experienced crocheter, this project offers satisfaction and plenty of room for personal touches.
Now that you’ve learned the steps and tips to create your own pair, why not give it a try? Share your thoughts, experiences, and suggestions in the comments—we’d love to hear your honest opinion and see how your sandals turned out!