
Sewing Hearts & Nine Patch

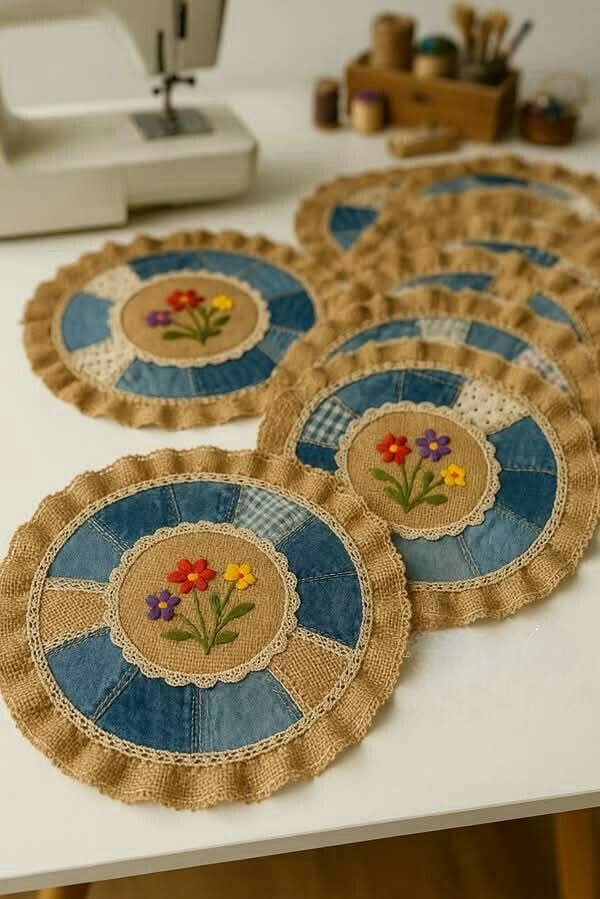
The Embroidered Patchwork Coaster – Tutorial is a charming quilting project that combines traditional patchwork with delicate embroidery details. These handmade coasters are perfect for protecting surfaces while adding a decorative and personal touch to your table setting.
With the Embroidered Patchwork Coaster – Tutorial, crafters can explore small-scale quilting techniques, fabric piecing, and simple embroidery stitches. This project is ideal for beginners who want to practice patchwork skills, as well as experienced sewists looking for a quick and creative craft.
In this complete guide, you will learn how to make your own Embroidered Patchwork Coaster – Tutorial step by step. The result is a beautiful and functional accessory that can also make a thoughtful handmade gift.
To begin your Embroidered Patchwork Coaster – Tutorial, select a few small pieces of quilting cotton fabric. Using different colors or prints can create an attractive patchwork design.
You will also need embroidery thread to add decorative stitching or small motifs.
Basic sewing tools include scissors, pins, a sewing machine, rotary cutter, quilting ruler, and measuring tape.
Batting or a small piece of felt is used between the fabric layers to give the coaster structure and insulation.
Additional tools for embroidery may include an embroidery needle and hoop.
Before starting the Embroidered Patchwork Coaster – Tutorial, wash and press your fabric pieces to ensure smooth sewing.
The Embroidered Patchwork Coaster – Tutorial begins with cutting several small fabric squares or rectangles.
Arrange these pieces in a pattern that you like, forming the patchwork design.
Sew the pieces together using straight seams, pressing each seam flat as you go.
Once the patchwork top is complete, trim it evenly so the coaster has a clean shape.
Place the patchwork top over the batting and backing fabric to prepare for the next steps of the Embroidered Patchwork Coaster – Tutorial.
One of the highlights of the Embroidered Patchwork Coaster – Tutorial is the decorative embroidery. Simple stitches such as backstitch, satin stitch, or French knots can be used to add charming details.
You might embroider small flowers, leaves, hearts, or geometric accents.
Embroidery can be placed in the center of the coaster or along the patchwork seams for a decorative effect.
Take your time with this step to ensure neat and even stitching.
These embroidery details make every Embroidered Patchwork Coaster – Tutorial unique and personal.
To finish your Embroidered Patchwork Coaster – Tutorial, place the patchwork top, batting, and backing fabric together and sew around the edges.
You can quilt through the layers with simple lines or decorative stitching to secure them.
Trim the edges evenly and add binding or a folded edge for a clean finish.
Press the finished coaster carefully so it lies flat.
Completing these final steps ensures your Embroidered Patchwork Coaster – Tutorial looks polished and durable.
Is this project suitable for beginners?
Yes, the Embroidered Patchwork Coaster – Tutorial is beginner-friendly and a great introduction to patchwork and embroidery.
What fabric should I use?
Quilting cotton works best because it is easy to sew and durable.
Do I need batting?
Yes, batting helps give the coaster structure and insulation.
How long does it take to make one coaster?
Most coasters can be completed in about one hour.
Can I customize the embroidery design?
Absolutely. You can add any small motif or decorative stitch you like.
Is this a good gift idea?
Yes, handmade coaster sets make wonderful gifts for friends and family.
The Embroidered Patchwork Coaster – Tutorial is a lovely quilting project that blends patchwork and embroidery into a small yet beautiful handmade item. In this guide, you learned how to prepare materials, create the patchwork base, add embroidery details, and finish the coaster with professional techniques.
These coasters are both practical and decorative, making them perfect for everyday use or as thoughtful handmade gifts. They are also a great way to use fabric scraps and practice creative sewing techniques.
Now it’s your turn to try the Embroidered Patchwork Coaster – Tutorial. Share your honest feedback and leave your suggestions—your ideas can inspire even more creative quilting projects!


