Urban Constellation - PATTERN

The Cardinal Quilt Block – Tutorial is a beautiful and symbolic quilting project that captures the elegance of one of nature’s most beloved birds. Known for its vibrant color and graceful form, the cardinal design adds warmth and meaning to any quilt, making it a favorite among quilters of all skill levels.
With the Cardinal Quilt Block – Tutorial, you can explore piecing techniques, appliqué methods, and color coordination to create a striking quilt block. This project is perfect for seasonal quilts, wall hangings, or heartfelt handmade gifts.
In this complete guide, you will learn how to create your own Cardinal Quilt Block – Tutorial step by step. Whether you are a beginner or an experienced quilter, this tutorial will help you achieve a detailed and professional-looking result.
To begin your Cardinal Quilt Block – Tutorial, selecting the right fabrics is essential. Cotton fabric is the most popular choice due to its ease of handling and durability.
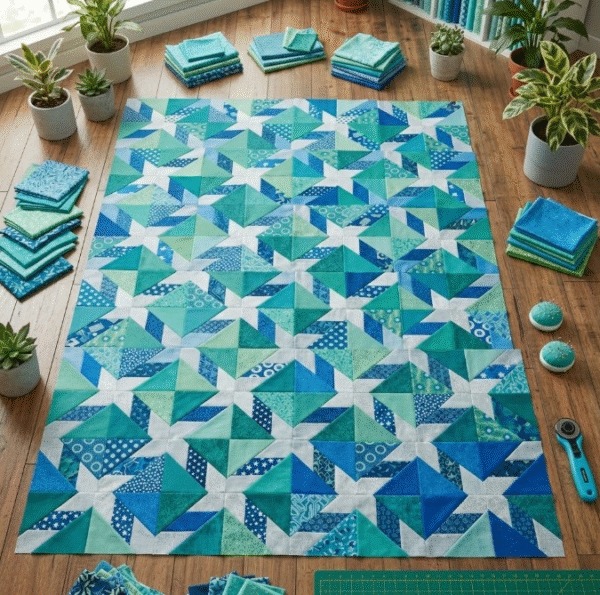
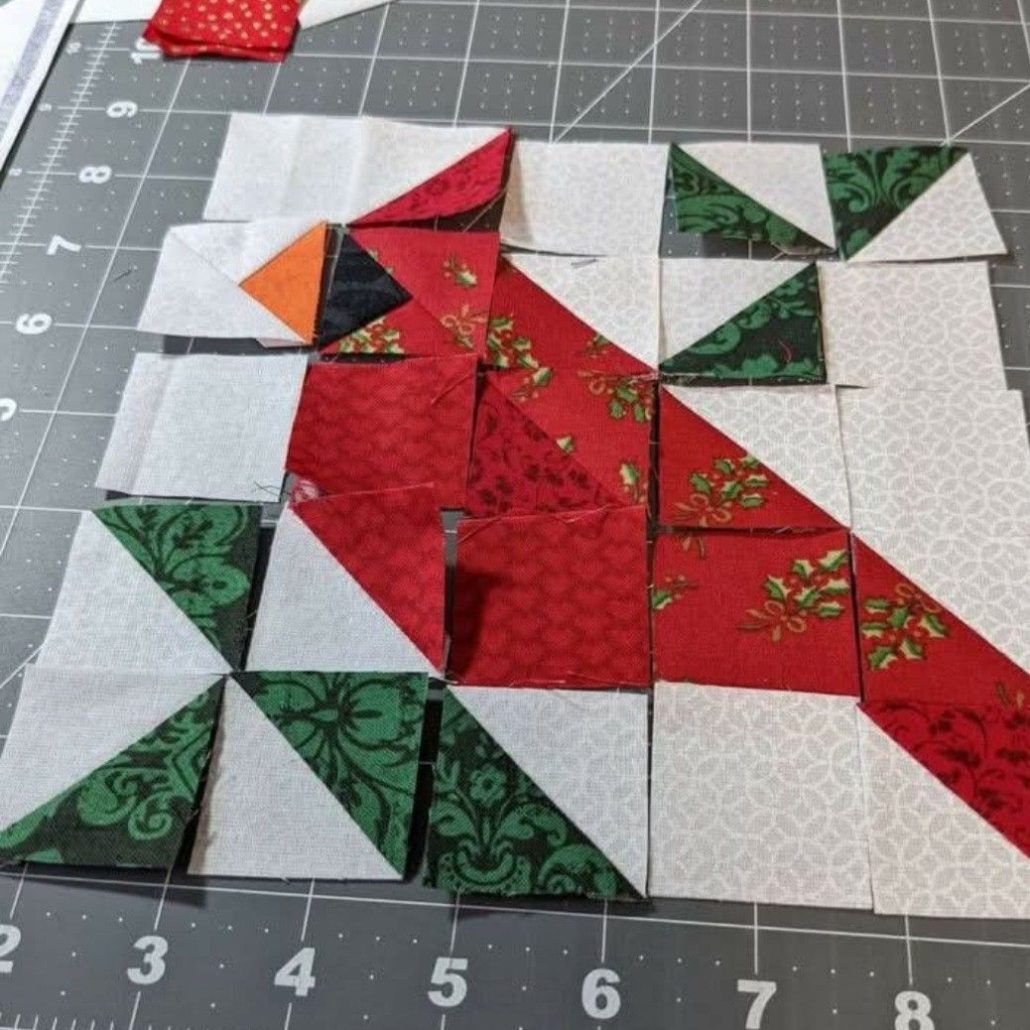
Bright red fabric is typically used for the cardinal, while neutral or natural tones like beige, white, or brown work well for the background.
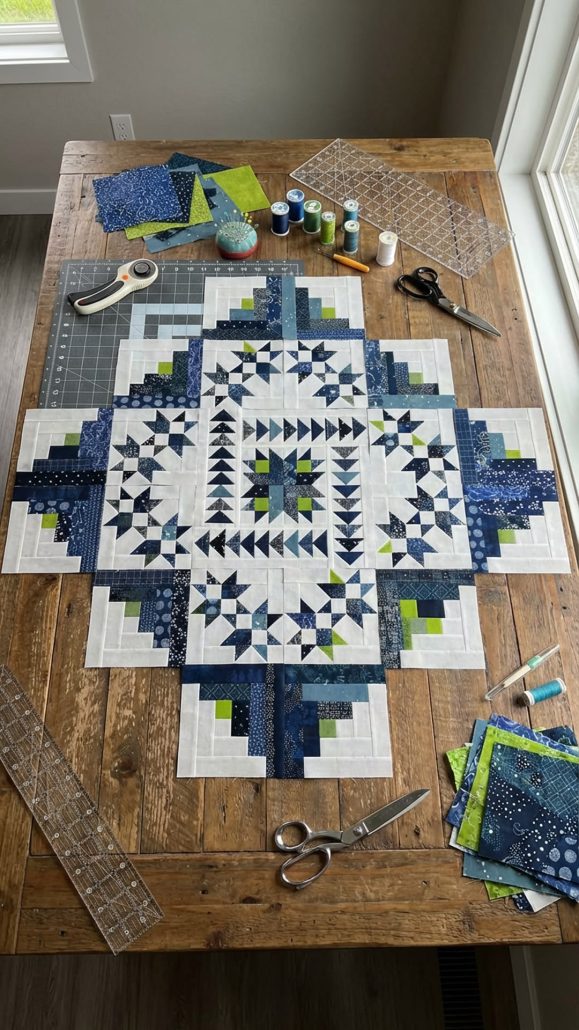
Basic tools include scissors, pins, a sewing machine, rotary cutter, quilting ruler, and measuring tape.
You will also need thread that complements your fabric choices, along with optional fusible interfacing for appliqué work.
Batting is not required for a single block but will be needed if incorporating it into a quilt.
Before starting, wash and press all fabrics to ensure your Cardinal Quilt Block – Tutorial results in a clean and polished finish.
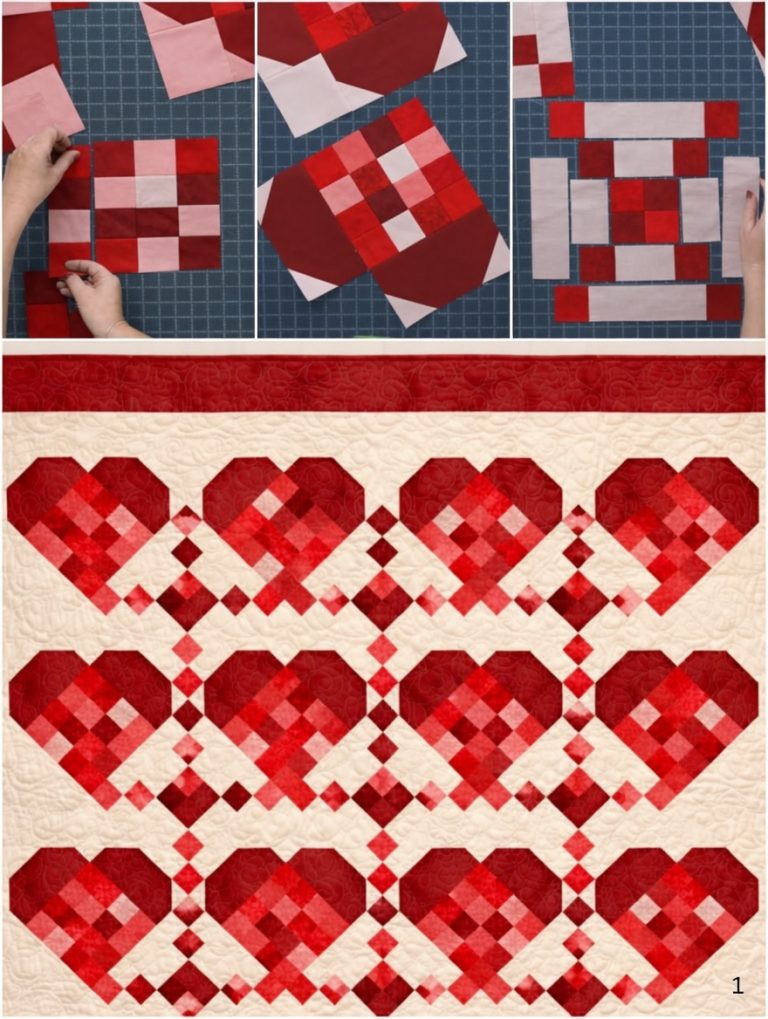
The Cardinal Quilt Block – Tutorial begins with cutting fabric pieces according to the pattern template. These may include geometric shapes and bird appliqué components.
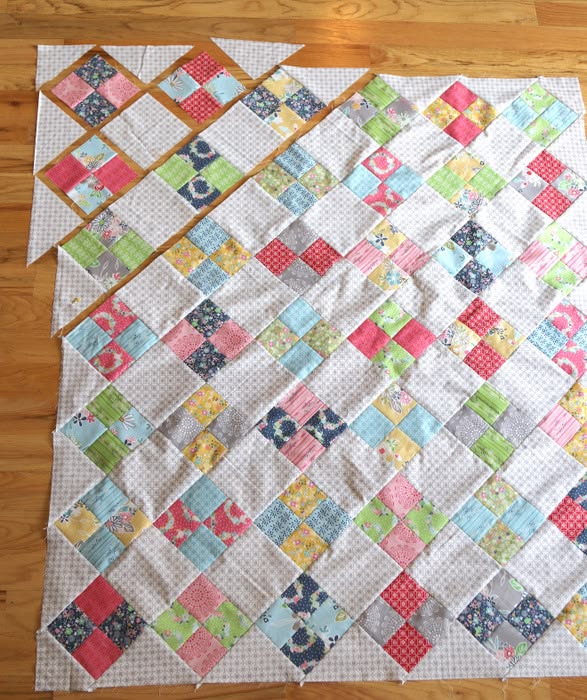
Arrange your pieces on a flat surface to visualize the layout before sewing.
Start by assembling the background using basic piecing techniques.
Next, position and attach the cardinal shape using appliqué methods such as raw-edge or fusible appliqué.
Sew carefully around the edges to secure the design and maintain clean lines.
Once assembled, press the block to finalize the structure of your Cardinal Quilt Block – Tutorial.
One of the most enjoyable aspects of the Cardinal Quilt Block – Tutorial is customization. You can experiment with different background fabrics to create seasonal or thematic designs.
Adding embroidered details such as feathers or branch textures can enhance realism.
You can adjust the size of the block to fit various quilt layouts.
Incorporating additional elements like snow, trees, or berries can create a more detailed scene.
Using different shades of red can add depth and dimension to the cardinal.
You might also create multiple blocks with slight variations using the Cardinal Quilt Block – Tutorial.
Finishing your Cardinal Quilt Block – Tutorial properly ensures a professional and lasting result. Trim the block edges evenly to match your desired dimensions.
Press all seams carefully to maintain a flat and smooth surface.
If incorporating into a quilt, join with other blocks and add batting and backing layers.
Quilt through all layers to secure the design and add texture.
This project is both decorative and meaningful, often symbolizing warmth, remembrance, or seasonal beauty.
The Cardinal Quilt Block – Tutorial is also a great way to improve quilting skills, especially in appliqué and detailed piecing.
Is this project suitable for beginners?
Yes, the Cardinal Quilt Block – Tutorial can be adapted for beginners with basic sewing skills.
Do I need appliqué experience?
Basic appliqué knowledge is helpful but not required.
What fabric is best?
Cotton fabric is recommended for ease and durability.
Can I customize the design?
Absolutely. You can change colors, background, and details.
How long does it take to complete?
It usually takes a few hours for one block.
Can I use it in larger quilts?
Yes, it works beautifully as part of a larger quilt design.
The Cardinal Quilt Block – Tutorial is a creative and meaningful quilting project that combines artistic design with practical techniques. In this guide, you’ve learned how to select materials, assemble the block, customize your design, and finish it professionally.
With its vibrant appearance and symbolic charm, this quilt block is perfect for adding beauty and personality to any quilting project. Whether used alone or as part of a larger quilt, it’s a timeless and rewarding creation.
PATTERN VIDEO:
Now it’s your turn to try the Cardinal Quilt Block – Tutorial. Share your honest feedback and leave your suggestions—your ideas can inspire even more creative quilting projects!