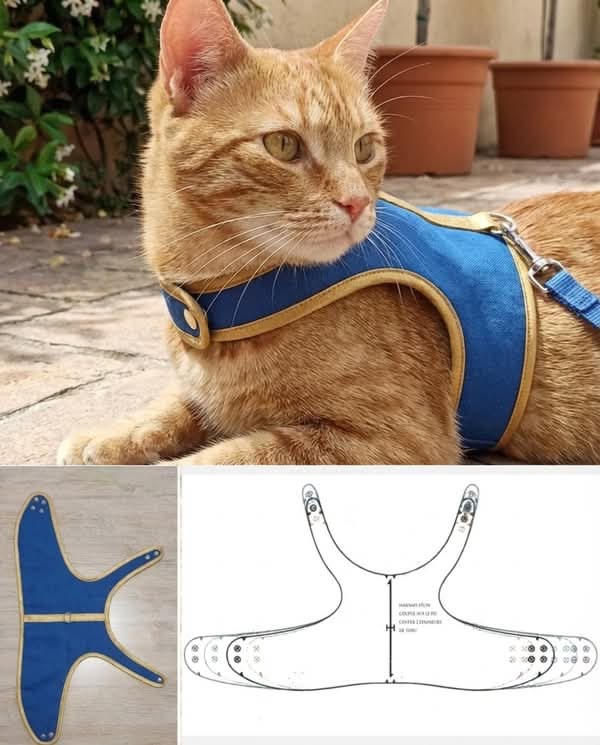
Easy Pet Collar - Tutorial

The Circular Hat – Quilt Pattern is a creative and stylish project that brings the world of quilting into the realm of fashion accessories. Unlike traditional quilt blocks, this design focuses on crafting a beautifully structured circular form that combines comfort, texture, and artistic flair. Perfect for beginners and advanced quilters alike, this project allows you to explore fabric layering, shaping, and decorative stitching in a fresh and modern way.
Creating your own Circular Hat – Quilt Pattern is a fun way to express individuality while learning valuable quilting skills. Whether you want a cozy hat for cooler days or a lightweight accessory for style, this project can be adapted for any season. By mixing fabrics, colors, and quilting patterns, you can create something that truly reflects your personality.
In this tutorial, you’ll discover everything you need to know to design, cut, assemble, and finish your Circular Hat – Quilt Pattern. We’ll guide you through material selection, step-by-step instructions, styling tips, and essential tricks for achieving a professional result. Get ready to transform your quilting passion into a wearable piece of art!
Before starting your Circular Hat – Quilt Pattern, make sure to gather all the right materials. Choosing quality fabric and batting is crucial for both comfort and structure. For the outer layer, use cotton quilting fabric or linen for a breathable finish. For the inner lining, soft cotton or flannel works beautifully to ensure comfort.
You’ll also need a lightweight batting to provide body and warmth. Make sure it’s flexible enough to curve easily when forming the circular shape. Polyester or cotton blend batting is usually the best choice.
Other essentials include scissors or a rotary cutter, pins, fabric chalk, measuring tape, sewing needles or a machine, and coordinating thread. A circular ruler or a compass can help create perfect round templates.
Before cutting, pre-wash your fabrics to prevent shrinking after the project is finished. Iron them flat to remove wrinkles and make accurate cutting easier.
If you plan to quilt decorative lines or motifs onto your hat, prepare your design in advance. You can choose classic concentric circles, floral motifs, or geometric stitching for a personalized touch.
Having all materials organized before you start will make your sewing process smoother, faster, and more enjoyable.
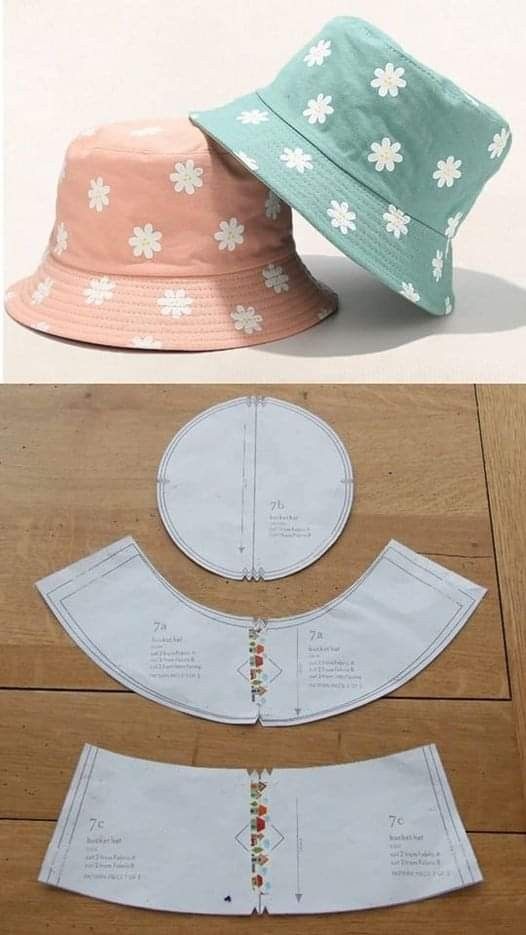
Start your Circular Hat – Quilt Pattern by cutting two large circles of fabric — one for the outer layer and one for the lining — along with one circle of batting. The diameter should match the desired size of your finished hat, usually between 14 and 16 inches for adults.
Place the batting between the two fabric layers, with the right sides facing out. Pin the layers together carefully to prevent shifting. Quilt through all layers using your preferred pattern — straight lines, swirls, or free-motion stitching all work well. This quilting step not only adds texture but also reinforces the fabric for durability.
Once quilted, cut a smaller circle in the center of the fabric to create the hat’s crown opening. The size of this inner circle determines how snug the hat will fit. Use a piece of elastic or a fabric band to finish the inner edge and ensure comfort when worn.
Next, cut a strip of quilted fabric for the brim. The length should wrap around the head opening, and the width can vary depending on the style you want — narrow for a simple look or wide for a dramatic, sunhat effect.
Attach the brim to the circular base using a straight or zigzag stitch. Make sure the seams are even and smooth all the way around. Press them with a warm iron to create a polished finish.
For extra structure, you can sew thin interfacing inside the brim or topstitch along the edges. This helps the hat maintain its shape over time. When done, your Circular Hat – Quilt Pattern will have a professional, well-structured look that’s both practical and stylish.
The Circular Hat – Quilt Pattern is highly versatile, allowing you to experiment with colors, fabrics, and embellishments to suit any mood or season. You can easily adapt it for summer or winter wear depending on your fabric choices.
For a bright, cheerful hat, use floral prints, pastel shades, or patchwork-style fabric combinations. These give your design a light and playful appearance, perfect for sunny days.
If you prefer a more elegant or sophisticated look, opt for neutral or monochrome fabrics with subtle quilted details. Shades of gray, beige, or navy add a touch of timeless charm.
You can also personalize your hat by adding decorative stitching, small embroidered motifs, or applique designs. Try sewing a quilted butterfly, leaf, or geometric pattern for a unique touch.
Another fun idea is to use scrap fabrics to create a multicolored patchwork version of the Circular Hat – Quilt Pattern. This not only makes it visually interesting but also gives new life to leftover materials from previous projects.
Consider adding a chin strap or decorative ribbon bow to complete the design. A fabric flower or button on the side of the brim can also elevate the look. With endless customization options, every hat you make becomes a one-of-a-kind creation.
To achieve flawless results with your Circular Hat – Quilt Pattern, pay attention to a few key details. Start by keeping your circles perfectly symmetrical — any uneven cuts may cause distortion when sewing the brim. Using a circular template or compass ensures precision.
When quilting your layers, avoid using heavy batting unless you’re making a winter hat. Lighter batting keeps the shape flexible and comfortable to wear.
Always use pins or basting stitches to hold layers together before sewing. This prevents puckering and keeps your quilting lines smooth and even.
Press seams carefully after each step. A warm iron helps flatten layers and gives your hat a more professional look.
If you’re using patterned fabric, align the design carefully before cutting. This ensures the final product looks balanced and visually appealing.
Finally, don’t rush. Take your time when sewing curves, especially around the brim, to maintain a clean and symmetrical shape. The more attention you give to detail, the more polished your finished quilted hat will appear.
1. Is the Circular Hat – Quilt Pattern suitable for beginners?
Yes! This pattern is beginner-friendly, requiring only basic quilting and sewing skills. It’s a great introduction to shaping and fabric layering.
2. What type of fabric works best for this project?
Lightweight cotton, linen, or quilt-weight fabrics are ideal. They’re easy to sew, breathable, and hold the circular form well.
3. Can I make the hat reversible?
Absolutely! Use two contrasting fabrics for the outer and inner layers, and your hat will be reversible for double the style options.
4. How can I adjust the size of the hat?
Simply increase or decrease the diameter of the main circle and the center opening to fit your head comfortably.
5. What kind of quilting design should I use?
Concentric circles, waves, or simple grid lines all look great. Choose a design that complements your fabric and personal taste.
6. Can I wash the finished hat?
Yes, hand wash gently with mild detergent and air dry flat to maintain the shape and quality of your quilted hat.
Conclusion
The Circular Hat – Quilt Pattern is a wonderful blend of creativity, craftsmanship, and practicality. It allows quilters to step outside the traditional square format and explore curved design in a functional way.
With just a few materials and a bit of imagination, you can craft a stylish, comfortable, and one-of-a-kind accessory that showcases your quilting skills. Whether you make it for yourself or as a handmade gift, this pattern offers endless opportunities for personalization and fun. Try it today and share your honest opinion and suggestions — your creativity helps inspire new quilting adventures for everyone!