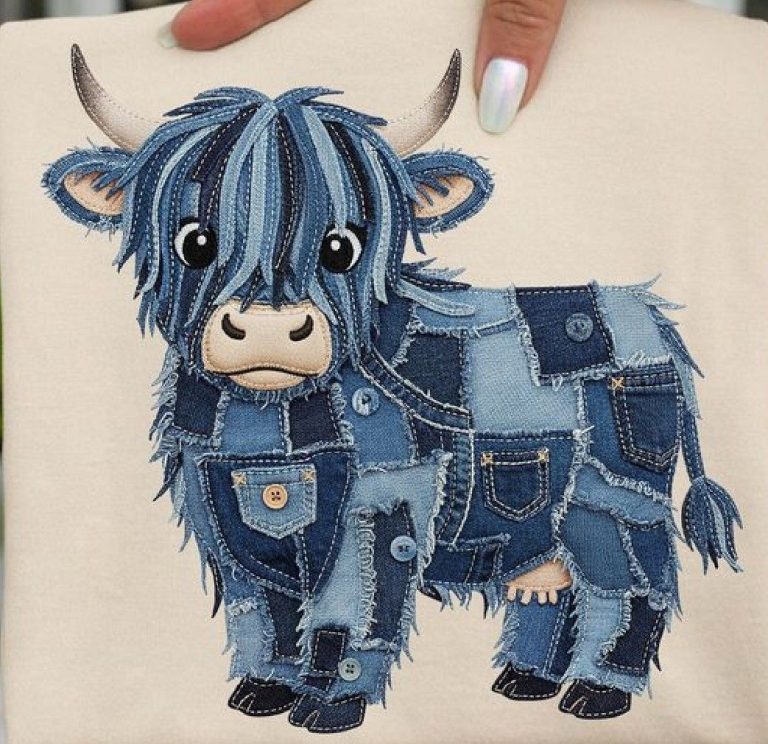
DIY Denim Patchwork Highland Cow Appliqué

Creating a Windblown Quilt Block – TUTORIAL is a wonderful way to explore motion and elegance in quilting. This dynamic pattern captures the feeling of swirling wind through its clever use of triangles and directional shapes. It’s a timeless design that blends simplicity with sophistication, making it a favorite for quilters of all skill levels. Whether you’re crafting a wall hanging, a cozy throw, or a full-sized quilt, the Windblown block adds a sense of movement and charm to your project.
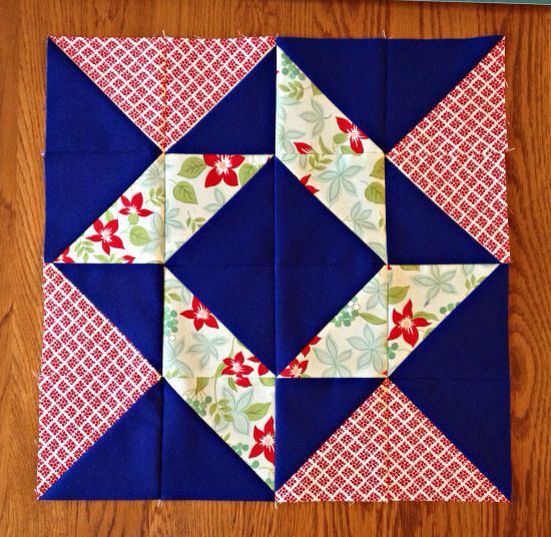
The Windblown Quilt Block – TUTORIAL is especially appealing because it’s made from basic units that come together to form a stunning visual effect. The illusion of spinning motion is created by careful placement of half-square triangles (HSTs) and contrasting fabrics. With just a few fabric pieces and a sewing machine, you can create a block that looks intricate but is surprisingly simple to assemble.
This pattern is perfect for experimenting with color and texture. You can use a two-color palette for a bold, modern look or play with a range of prints to create depth and dimension. The versatility of the Windblown Quilt Block – TUTORIAL makes it ideal for beginners learning about color value and for experienced quilters seeking a creative challenge.
Before you begin your Windblown Quilt Block – TUTORIAL, it’s essential to gather the right materials. You’ll need fabric in at least two contrasting colors—one for the background and one for the “wind” effect. High-contrast fabrics, such as light versus dark or solid versus print, make the design truly pop.
A rotary cutter, quilting ruler, and self-healing cutting mat are indispensable tools for precise cutting. Accuracy is crucial in this block since small measurement differences can affect how the pieces align later.
Begin by cutting your fabric into squares for your half-square triangles. Most Windblown blocks start with 4-inch or 5-inch squares, depending on the desired finished size. You’ll also need a few extra squares for trimming and alignment.
When choosing fabric, consider how your color scheme will influence the illusion of movement. Cool tones like blues and grays give a calm, breezy effect, while warm tones like reds and oranges create a sense of lively motion.
Press your fabrics before cutting to ensure they lay flat. This simple step helps achieve cleaner seams and more precise piecing throughout the project.
Finally, prepare your sewing machine with a ¼-inch quilting foot and thread that matches your fabric tones. A consistent seam allowance will ensure your Windblown Quilt Block – TUTORIAL turns out perfectly square and professional-looking.
Once your fabric is ready, it’s time to start assembling the Windblown Quilt Block – TUTORIAL. The key component of this design is the half-square triangle unit, which gives the block its motion and flow.
To make an HST, place two fabric squares right sides together and draw a diagonal line from one corner to the other. Sew ¼ inch away from both sides of this line, then cut along the line to create two HST units. Press the seams toward the darker fabric to maintain contrast.
Trim all HSTs to the exact same size—accuracy here is the foundation of a crisp, symmetrical block. Square edges ensure all pieces fit together without distortion.
Next, lay out your HSTs and background pieces on a flat surface or design board. Arrange them so the triangles form a pinwheel-like swirl in the center. The layout may look complex at first, but once you see how the pattern flows, it becomes intuitive.
Sew the pieces together row by row, pressing seams in alternating directions to reduce bulk. Then join the rows to complete your block, ensuring all points align neatly at the intersections.
To finish this step, press the completed block flat from the back, being careful not to stretch the fabric. Your Windblown Quilt Block – TUTORIAL should now display a sense of spinning energy, as if caught in a gentle breeze.
One of the most exciting aspects of the Windblown Quilt Block – TUTORIAL is its flexibility. By simply changing color placement, fabric patterns, or block size, you can achieve vastly different results.
Try using ombré fabrics for a gradient effect that makes the windblown pattern look like it’s in motion. Alternatively, use prints with subtle textures to add depth without overwhelming the design.
If you prefer a modern aesthetic, opt for solid colors in high-contrast combinations such as black and white or navy and cream. For a softer, vintage appeal, pastel fabrics or floral prints work beautifully.
Experiment with the scale of your block, too. Large blocks make a bold statement on their own, while smaller ones can be combined into a full quilt for a mesmerizing repeating pattern.
You can also alternate color directions between blocks to create new patterns when the quilt is assembled. This method enhances the overall flow and adds visual complexity to the final piece.
Finally, don’t be afraid to add a third color to your palette. A pop of accent color—perhaps a bright yellow or teal—can draw attention to specific areas and create a lively focal point.
After assembling your Windblown Quilt Block – TUTORIAL, it’s time to think about how to finish it. This step allows you to personalize your project even further.
First, decide how many blocks you’d like to include in your quilt. A single Windblown block can serve as a striking mini wall hanging, while multiple blocks make an eye-catching throw or bedspread.
Next, choose a quilting design that complements the sense of movement. Swirling or circular quilting patterns work beautifully, echoing the block’s natural motion. Straight-line quilting can also enhance the clean geometry of the design for a more modern look.
Use batting that matches the desired thickness of your quilt. Lightweight batting gives a crisp, flat look, while thicker batting adds warmth and softness.
Binding fabric choice can also elevate your project. Select a border that complements your color scheme without overpowering the block. A narrow, contrasting binding often provides a professional finish.
If you’d like, add embellishments such as hand embroidery or appliqué to highlight certain sections of the design. These details make your Windblown Quilt Block – TUTORIAL truly unique and personalized.
Lastly, don’t forget to label your quilt with your name, the date, and the title of the pattern—it’s a beautiful way to preserve your creative legacy for years to come.
FAQ – Windblown Quilt Block – TUTORIAL
1. What skill level is required for the Windblown Quilt Block?
This block is beginner-friendly, though precise cutting and consistent seam allowances are essential for best results.
2. What size should I cut my fabric squares?
Common starting sizes are 4-inch or 5-inch squares, but you can adjust them depending on your desired finished block size.
3. How can I ensure my points match perfectly?
Trim all half-square triangles carefully and use a consistent ¼-inch seam allowance when sewing pieces together.
4. What fabrics work best for this pattern?
High-contrast solids or small prints are ideal for highlighting the motion of the design.
5. Can I make this block scrappy?
Yes! Scrappy versions with different fabrics for each triangle create a lively, patchwork effect that’s full of character.
6. What quilting designs suit the Windblown pattern?
Free-motion swirls or echo quilting enhance the spinning look, while straight-line stitching provides a clean, contemporary feel.
Conclusion
The Windblown Quilt Block – TUTORIAL is a beautiful example of how simple shapes can create movement and energy within a quilt. By mastering this pattern, you gain not only technical skill but also the freedom to experiment with color and design. Whether you create a single decorative block or an entire quilt, the result is always stunning.
PATTERN VIDEO:
We hope you enjoyed this tutorial and feel inspired to try it yourself. Please share your honest opinions and suggestions below—we’d love to hear how your Windblown creations turned out!