Rose Twirl Quilt - Pattern

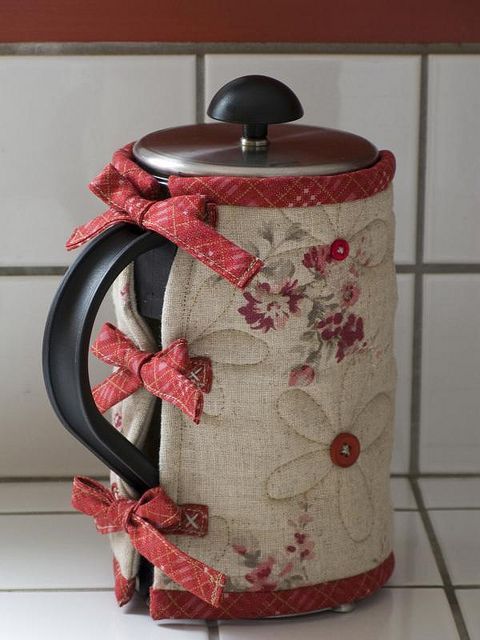
The Thermos Bottle Cover – TUTORIAL is a practical and creative sewing project that combines functionality with style. Whether you use your thermos daily for coffee, tea, or cold drinks, having a handmade cover not only protects the bottle but also adds a personal touch. With the help of fabric scraps, quilting techniques, and basic sewing skills, you can design a cover that is both durable and beautiful.
Making your own thermos bottle cover allows you to experiment with different fabrics, patterns, and colors. This project is perfect for beginners who want to practice quilting and sewing while creating something useful. The Thermos Bottle Cover – TUTORIAL offers step-by-step guidance so that even someone new to sewing can enjoy a satisfying result.
Aside from protecting your bottle from scratches and dents, a quilted cover also improves insulation. That means your drink stays hot or cold longer while you get to enjoy a stylish handmade accessory. It’s a simple way to combine creativity with practicality, and it makes a thoughtful gift as well.
The Thermos Bottle Cover – TUTORIAL is built around the concept of quilting layers of fabric together to create a sturdy yet flexible sleeve. This sleeve is shaped to fit snugly around your thermos, often with a drawstring or zipper closure for convenience.
One of the main goals of this project is functionality. The quilted layers provide cushioning to protect your thermos if it’s carried in a bag or backpack. At the same time, they act as an insulating barrier, helping your beverage maintain its temperature longer.
From a creative standpoint, this tutorial allows for plenty of design options. You can choose bright fabrics for a cheerful look, neutral tones for a minimalist feel, or even seasonal patterns for a festive touch.
The project is also scalable. Whether you have a small coffee flask or a large thermos, the same method applies. You simply adjust your measurements to fit the size of your bottle.
This tutorial is especially appealing because it merges quilting with practical sewing. It’s not just about making something decorative—it’s about crafting an accessory that will be used daily.
Finally, the Thermos Bottle Cover – TUTORIAL is an excellent eco-friendly option. Instead of buying plastic or synthetic covers, you can create a reusable fabric one from materials you already have at home.
To start the Thermos Bottle Cover – TUTORIAL, gather your basic sewing supplies and fabrics. Cotton fabric works well because it is easy to quilt and wash, but you can also use canvas for extra durability. A lining fabric is also recommended to give the inside a neat finish.
You will need quilt batting to add thickness and insulation. This layer goes between your outer fabric and lining, giving the cover its cushioned and quilted appearance.
Other supplies include sewing thread, scissors or a rotary cutter, a ruler or measuring tape, pins or clips, and a sewing machine. If you prefer, you can also hand-sew, though it will take more time.
For closures, you can use elastic, Velcro, a zipper, or a drawstring with cord stops. The choice depends on how you want to secure your thermos inside the cover. A handle or strap can also be added for easy carrying.
Before cutting your fabric, measure your thermos carefully. You will need to account for its height, circumference, and the seam allowance. Adding a little extra space ensures the bottle fits comfortably inside the cover.
Once you’ve gathered everything, organize your materials in a way that makes sewing smoother. Having all supplies ready before starting helps you focus on the creative process instead of searching for missing items.
The Thermos Bottle Cover – TUTORIAL begins with measuring and cutting your fabric pieces. You will need one piece for the outer fabric, one for the lining, and one for the batting, each cut to the same size.
After cutting, layer the outer fabric and batting together, securing them with pins or clips. You can now quilt the fabric by sewing straight lines, diagonal grids, or any pattern you prefer. This step gives texture and stability to the cover.
Next, sew the side seam of your quilted fabric to create a cylindrical shape. Do the same for the lining fabric, leaving a small opening at the bottom for turning later.
To create the base, cut two circles of fabric and batting. Sew them onto the bottom of the cylinder, one for the outer fabric and one for the lining. This forms the round bottom of the thermos cover.
Once the pieces are assembled, place the lining inside the outer fabric with right sides facing each other. Sew around the top edge, then turn the cover right-side out through the opening in the lining. Close the opening with a simple stitch.
Finally, add your chosen closure—whether it’s a drawstring, zipper, or elastic band. At this stage, you can also attach a fabric handle or strap for carrying. Your thermos bottle cover is now complete and ready to use.
One of the exciting aspects of the Thermos Bottle Cover – TUTORIAL is how customizable it is. You can experiment with different quilting designs, fabric patterns, and embellishments to make each cover unique.
For a playful look, consider patchwork designs made from colorful fabric scraps. This not only reduces waste but also results in a one-of-a-kind thermos cover.
If you want a more elegant style, choose solid fabrics in muted colors and use decorative quilting stitches to add subtle details. This creates a sophisticated accessory that pairs well with everyday use.
Personalization is another great idea. You can embroider initials, add fabric appliqués, or sew on a small pocket for tea bags or a spoon. These details make your cover practical as well as stylish.
Beyond thermos bottles, this pattern can be adapted for water bottles, baby bottles, or reusable coffee cups. The same principles apply, and you only need to adjust the measurements.
Lastly, handmade thermos bottle covers make wonderful gifts. Pair one with a thermos or coffee set, and you’ll have a thoughtful and practical present for friends or family.
Is the Thermos Bottle Cover – TUTORIAL beginner-friendly?
Yes, this project is suitable for beginners who are comfortable with basic sewing and quilting techniques.
What kind of fabric works best?
Cotton is the most common choice, but canvas or denim adds durability, while decorative fabrics add personality.
Can I wash the thermos cover?
Yes, most fabric covers are machine washable, especially if made with cotton and polyester batting. Always check the fabric type before washing.
Do I need a sewing machine?
A sewing machine makes the process faster, but it can be done by hand if you prefer. It will just take more time.
Can I make the cover fit any thermos size?
Absolutely. Simply measure your thermos and adjust the fabric pieces accordingly. The tutorial can be adapted to any size.
How long does the project take?
Most people can complete the thermos cover in an afternoon, depending on quilting complexity and finishing touches.
The Thermos Bottle Cover – TUTORIAL is the perfect project for combining practicality with creativity. By following the steps, you can create a quilted cover that protects, insulates, and adds personality to your thermos. With endless fabric and design options, each cover can be as unique as its maker.
PATTERN VIDEO:
This tutorial is beginner-friendly, quick to complete, and adaptable for different bottle sizes. It’s not only a fun sewing activity but also a chance to make something useful for everyday life or as a gift. Try it out, enjoy the process, and let us know your thoughts and suggestions—we’d love to hear how your thermos cover turns out.