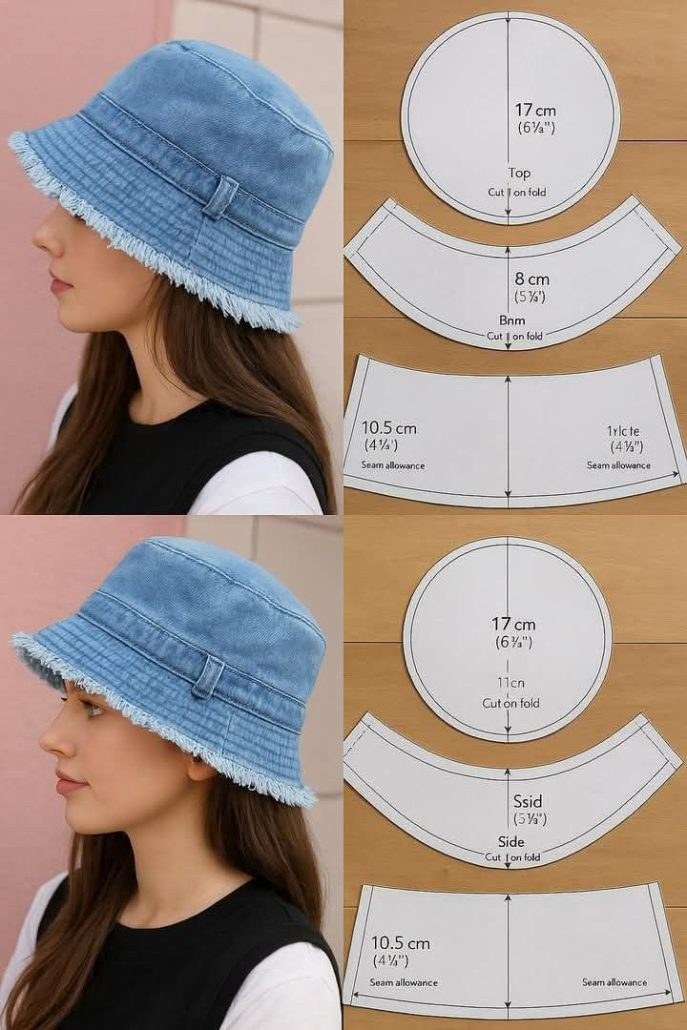
How to Cut and Sew a Bucket Hat

Spinning Me Around – tutorial is a dynamic and visually captivating quilt pattern that creates the illusion of movement through carefully arranged shapes and colors. By following the Spinning Me Around – tutorial, you can craft a quilt that feels full of energy, depth, and artistic expression, making it a standout piece in any space.
One of the most fascinating aspects of the Spinning Me Around – tutorial is how it plays with geometry and color contrast to simulate a spinning effect. With the right fabric choices and layout, the quilt appears to rotate or swirl, giving it a modern and eye-catching appeal that both beginners and experienced quilters will enjoy exploring.
In this complete Spinning Me Around – tutorial, you will learn how to select fabrics, cut precise pieces, assemble the spinning blocks, and finish your quilt with professional techniques. This project is ideal for those who want to experiment with movement and visual impact in quilting.
The first step in the Spinning Me Around – tutorial is gathering the right materials to ensure a smooth and enjoyable quilting process.
High-quality cotton fabric is recommended for its durability and ease of handling.
Choosing contrasting colors is essential in the Spinning Me Around – tutorial to highlight the spinning effect.
A rotary cutter, cutting mat, and quilting ruler are necessary for precise cutting.
Thread that complements your fabric will help create a cohesive design.
Batting is needed to give the quilt structure and warmth.
An iron is essential for pressing seams and maintaining accuracy.
Accurate preparation is a key part of the Spinning Me Around – tutorial, as precision directly affects the final look.
Begin by carefully measuring and marking your fabric pieces according to the pattern.
Cut shapes such as triangles, squares, or strips depending on the design layout.
In the Spinning Me Around – tutorial, even small inaccuracies can disrupt the spinning illusion.
Organize your pieces by color and shape for easier assembly.
Press all fabric pieces before sewing to ensure smooth seams.
Take your time during this stage to achieve the best results.
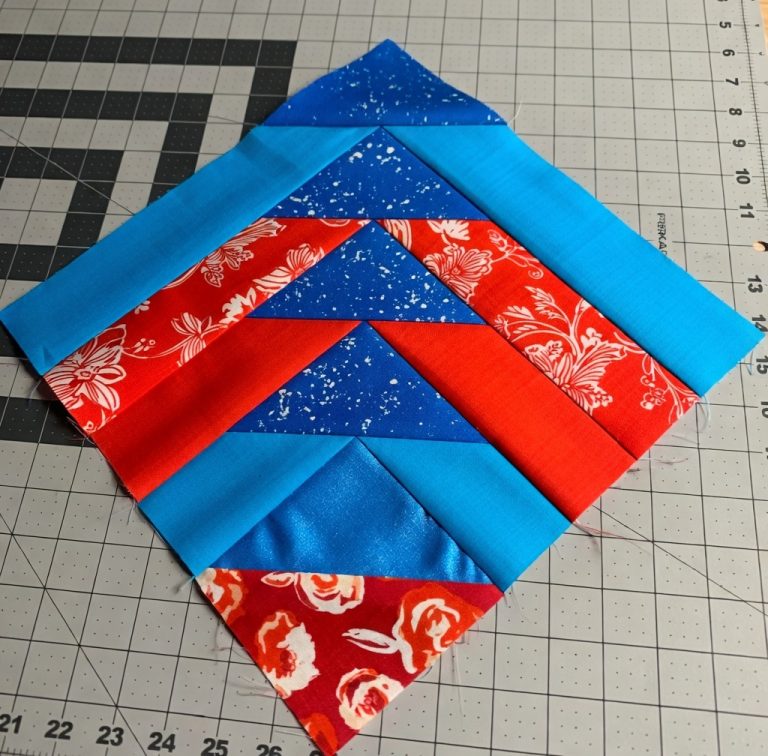
The next step in the Spinning Me Around – tutorial is assembling the quilt blocks where the spinning design comes to life.
Start by sewing smaller units together to form the basic block components.
Pay close attention to seam allowances to ensure all pieces align properly.
In the Spinning Me Around – tutorial, consistent stitching is essential for maintaining symmetry.
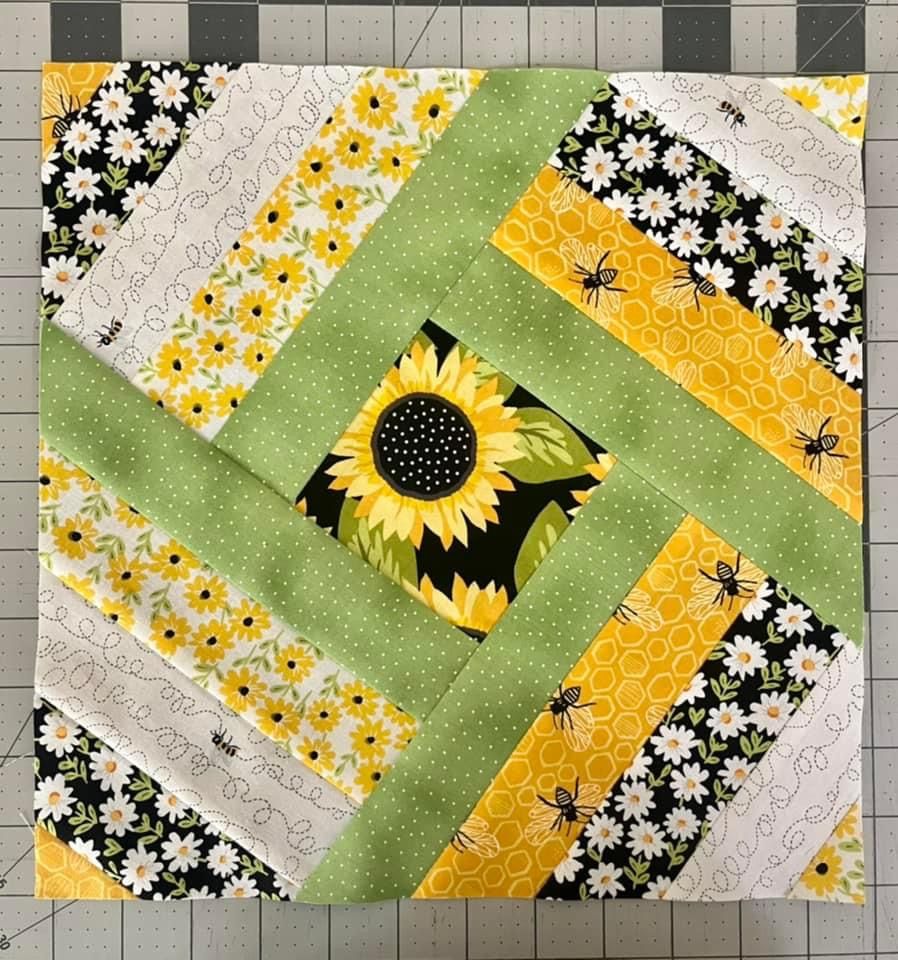
Arrange the pieces in a way that creates the illusion of rotation.
Press seams carefully to keep the blocks flat and well-defined.
Once all blocks are complete, lay them out to finalize the overall design.
The final stage of the Spinning Me Around – tutorial involves assembling the quilt and adding finishing touches.
Join all blocks together to form the quilt top.
Layer the quilt top with batting and backing fabric.
Secure the layers using pins or basting spray.
In the Spinning Me Around – tutorial, quilting stitches can enhance the sense of movement.
Trim any excess fabric and square up the edges.
Add binding around the quilt to complete the project.
Is this pattern suitable for beginners?
The Spinning Me Around – tutorial is suitable for confident beginners and intermediate quilters.
What fabrics work best?
Cotton fabrics with strong contrast are ideal.
How do I create the spinning effect?
Careful placement of colors and shapes creates the illusion of motion.
How long does it take to complete?
It can take several days depending on the size and complexity.
Do I need special tools?
Basic quilting tools are sufficient for this project.
Can I customize the design?
Yes, you can experiment with colors and layouts to create different effects.
The Spinning Me Around – tutorial is an exciting quilting project that combines creativity, precision, and visual impact. It allows you to create a quilt that feels alive with motion and energy.
In this tutorial, you learned how to select materials, prepare fabric pieces, assemble spinning blocks, and finish your quilt with professional techniques. Each step contributes to a stunning final result.
Projects like the Spinning Me Around – tutorial demonstrate how quilting can go beyond traditional designs and become a form of artistic expression. This quilt is perfect for showcasing your skills and creativity.
If you enjoyed this tutorial, feel free to leave your honest opinion and share your suggestions. Your feedback helps inspire more innovative quilting ideas and tutorials.