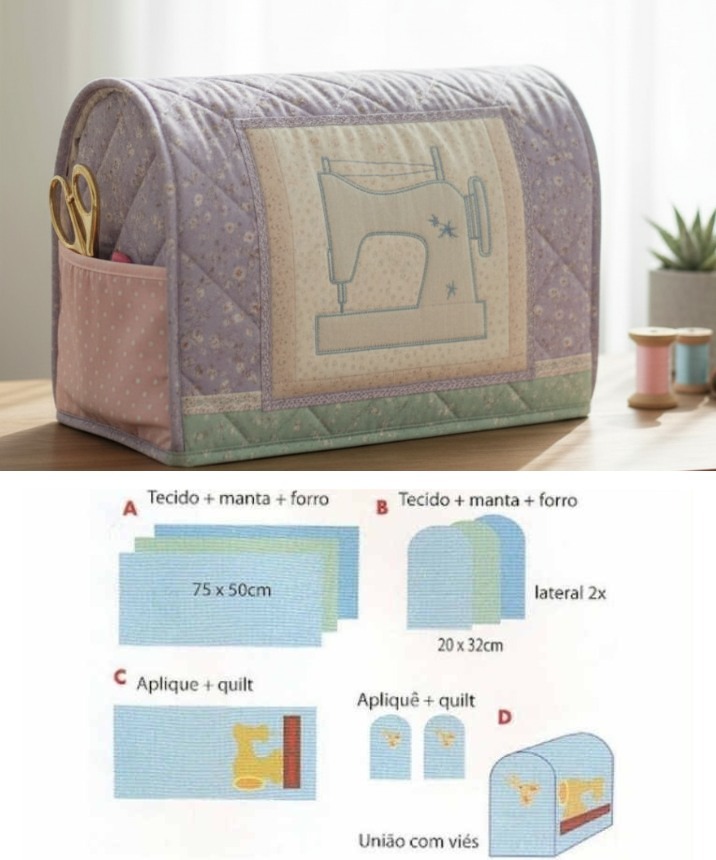
Lake Cabin Quilt Pattern – Tutorial

The Radiant Starfire Block – TUTORIAL is more than just another quilting guide—it’s a creative journey that allows quilters of all levels to explore striking geometric design, rich fabric combinations, and time-honored techniques with a fresh, modern twist. Whether you’re new to quilting or a seasoned stitcher, this radiant design is sure to become a favorite in your quilting repertoire.
In this article, we’ll walk through the complete process of crafting the Radiant Starfire Block, highlighting tips, techniques, and inspiration along the way. The design’s bold lines and dynamic symmetry give it a stellar, eye-catching quality that’s as rewarding to make as it is to admire. With its versatile aesthetic, it fits beautifully in traditional quilts, modern displays, or standalone mini quilt projects.
This tutorial is crafted with accessibility in mind—meaning both beginners and experienced quilters will find value and inspiration. By the end, you’ll have everything you need to confidently create your own Radiant Starfire Block from scratch and perhaps even expand it into a full quilted masterpiece.
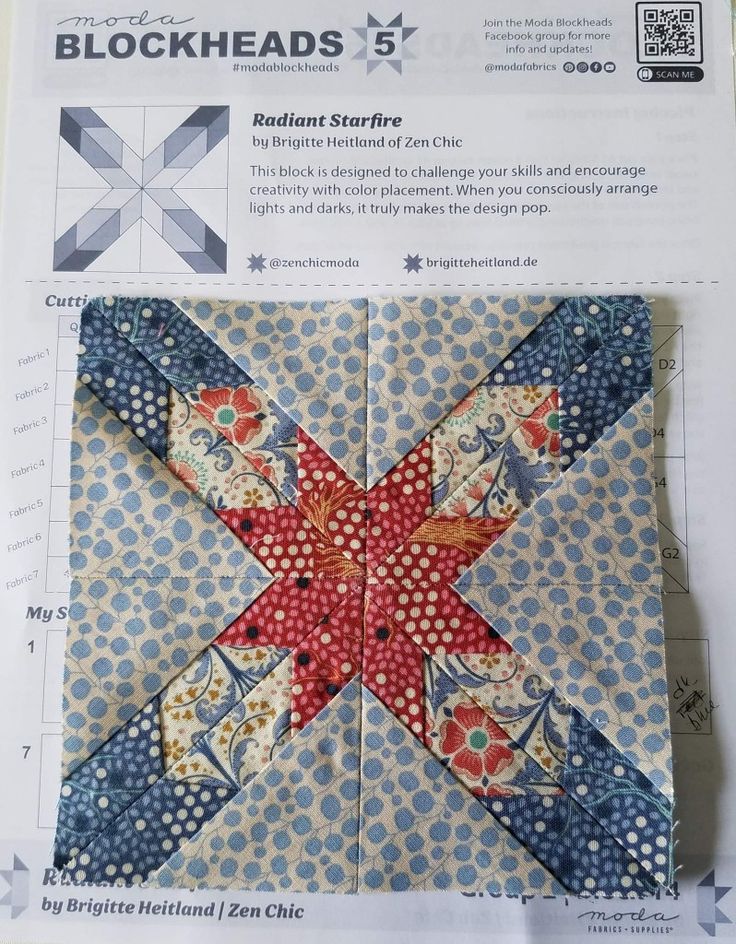
The Radiant Starfire Block – TUTORIAL starts with appreciating the fundamentals of its unique construction. Unlike simpler blocks, this pattern relies on layered symmetry and contrast between light and dark fabrics to create the illusion of motion and depth.
This star-like design radiates from a central point, with points that stretch outward, giving it an explosive yet controlled energy. It’s perfect for playing with bold prints or experimenting with gradients of a single color.
One of the most captivating aspects of the Radiant Starfire Block is its adaptability. You can use a traditional color palette or go wild with neons and pastels—the results are equally mesmerizing.
The block itself is typically square, often constructed with 12” or 16” dimensions, but can be resized depending on your quilt layout. Even a single block framed with borders can make a stunning wall hanging.
In terms of techniques, the pattern usually incorporates half-square triangles (HSTs), flying geese units, and careful piecing. Precision matters, but don’t worry—we’ll guide you through.
Don’t let the dazzling appearance fool you. With the right guidance, even newer quilters can achieve clean, sharp lines and a balanced final result.
Before diving into the Radiant Starfire Block – TUTORIAL, it’s important to gather the right materials. While fabric is the star of the show, having the proper tools will make your quilting journey smoother and more enjoyable.
You’ll need a selection of 3–5 fabrics. Choose one dark, one light, and 1–3 accent or medium-toned prints. This contrast is crucial to achieving the glowing, radiant look the block is known for.
Basic tools include a rotary cutter, quilting ruler, self-healing mat, and an iron. A sewing machine with a ¼-inch foot will help you maintain consistent seam allowances.
If you’re working from a digital pattern, print it out and use it to cut your pieces precisely. Labeling your fabric cuts will help you stay organized during assembly.
It’s also wise to starch your fabric before cutting. This helps stabilize it, especially when working with triangles or bias edges that can stretch during sewing.
A design wall or temporary layout surface will allow you to preview your color placement and make changes before sewing.
Lastly, take time to read through the entire tutorial before starting. Understanding the sequence of steps will give you more confidence and better results.
Now let’s jump into the core of the Radiant Starfire Block – TUTORIAL: putting the block together. With thoughtful layout and steady stitching, you’ll create a polished and radiant finish.
Begin by assembling your half-square triangles (HSTs). Pair your light and dark fabrics, draw a diagonal line, sew ¼-inch on both sides, cut, and press. HSTs are the backbone of this block.
Next, build your flying geese units. These will form the star points. Use the no-waste flying geese method if you want efficiency and minimal fabric loss.
Start assembling the block in quadrants. This makes construction manageable and helps ensure symmetry. Use pins at intersections to align points and seams for a sharp finish.
Sew the quadrants into rows, and then join the rows to form the full block. Press seams open or to the side, depending on bulk and nesting.
Measure your block once assembled. It should square up to the desired size (e.g., 12.5” if you’re making a 12” finished block). Trim edges if needed for accuracy.
If you’re working on a larger quilt, make multiple blocks and rotate them for added visual interest. The radiance effect intensifies when several blocks are joined together.
The Radiant Starfire Block – TUTORIAL doesn’t just end with one block. Once you’ve mastered the technique, explore creative applications across your quilting projects.
Turn your single block into a pillow cover. Add borders and quilt as desired—it becomes a bold home decor piece in no time.
Use four Radiant Starfire Blocks in a 2×2 grid for a beautiful baby quilt. With cohesive color placement, the center stars appear interconnected.
Incorporate the block into a sampler quilt. Its dynamic nature provides excellent contrast next to simpler blocks.
Create a table runner using a linear row of three blocks. With holiday or seasonal fabrics, it’s a great way to celebrate your skills and the season.
Expand it into a full bed quilt by repeating the block and using sashing or alternate block designs for variation.
Quilt each block individually before assembling the top (QAYG method). This approach is especially helpful if you’re working on a small machine.
What size should I cut my fabric for the Radiant Starfire Block?
Sizes can vary by pattern, but commonly HSTs are cut from 5” squares and trimmed to 4.5”, with final blocks finishing at 12”.
Is this block suitable for beginners?
Yes! The pattern looks complex, but with guided steps and basic techniques like HSTs and flying geese, beginners can succeed.
What fabrics work best for this pattern?
High-contrast fabrics (dark, light, and medium) highlight the starburst design. Solids, tone-on-tones, or batiks work beautifully.
Can I use pre-cuts like fat quarters or charm packs?
Absolutely. Fat quarters offer flexibility for cutting larger pieces, and charm packs are perfect for creating scrappy versions.
Do I need to pin every seam?
While not required, pinning ensures better alignment, especially at points. It’s highly recommended for precise results.
What’s the best way to press seams for this block?
Open seams reduce bulk in the center, but you can also nest seams if it helps with alignment. Use a hot iron with steam or starch.
We’ve explored the Radiant Starfire Block – TUTORIAL in full detail—from understanding the design, preparing materials, assembling the block, to thinking creatively about how to use it. Whether you’re making a single block for a mini project or planning a full quilt, this pattern offers endless possibilities for color play, symmetry, and beauty.
PATTERN VIDEO:
If you enjoyed this guide, we’d love to hear your thoughts! Leave a sincere comment below with your experience, questions, or any suggestions you have. Your feedback helps our creative community continue to grow and shine!