
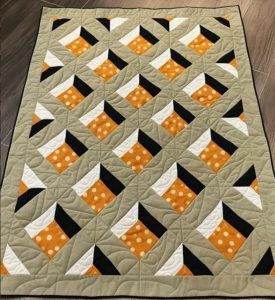
Autumn Lattice Quilt – PATTERN


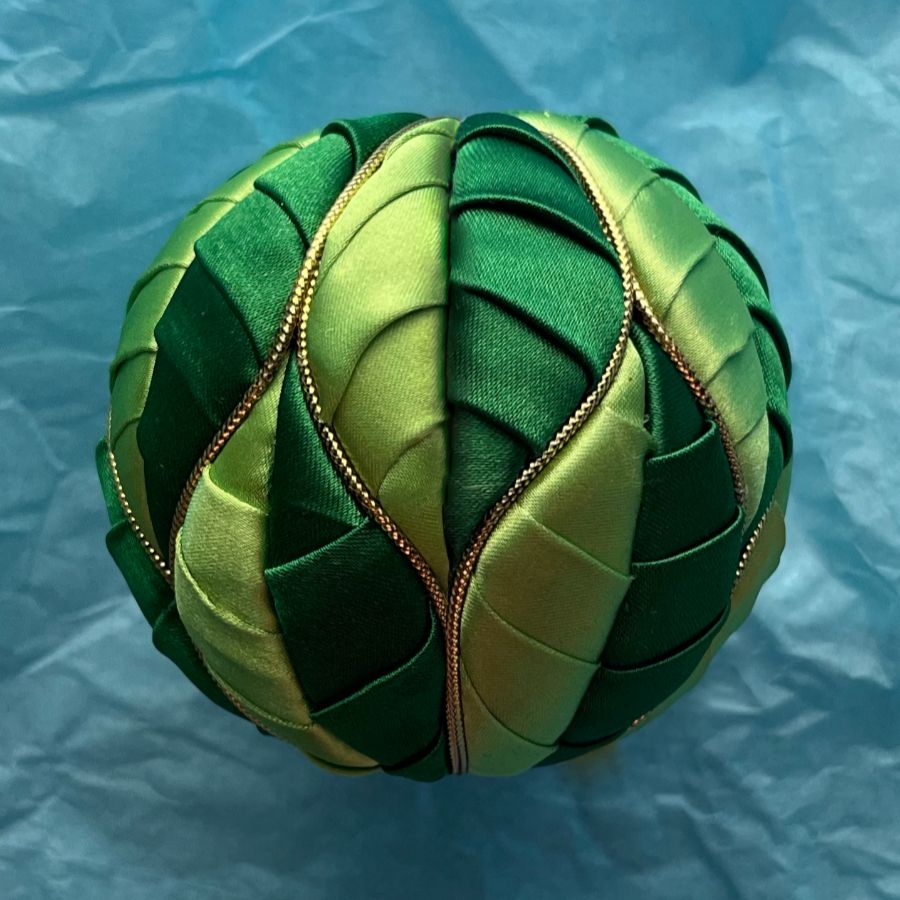
Creating beautiful and festive Pleated Ornaments is a wonderful way to bring warmth, creativity, and handmade charm to your home decor. In this Pleated Ornaments – TUTORIAL, you will learn how to craft stunning fabric ornaments that make perfect additions to your Christmas tree, holiday garlands, or even as thoughtful handmade gifts. The beauty of this pattern lies in its simplicity—yet it produces elegant, professional-looking results that look like they came straight from a boutique. With just a few materials and basic sewing skills, you can create unique ornaments that reflect your personal style and creativity.
These Pleated Ornaments are not only a joy to make but also serve as a sustainable and meaningful craft. Instead of buying mass-produced decorations, you can repurpose fabric scraps, ribbons, or old clothing to create something new and beautiful. Whether you prefer classic red and green tones or modern metallic fabrics, this Pleated Ornaments – TUTORIAL gives you the flexibility to design ornaments that perfectly match your holiday theme. The process is beginner-friendly and ideal for a cozy afternoon crafting session with family or friends.
Beyond their aesthetic appeal, handmade Pleated Ornaments carry emotional value. Each piece tells a story—perhaps made from a loved one’s old shirt, leftover quilting fabric, or festive ribbon. As you follow this Pleated Ornaments – TUTORIAL, you’ll not only create lovely decorations but also lasting memories. This step-by-step guide will teach you the methods, tips, and creative ideas needed to make these pleated wonders with ease.
To begin your Pleated Ornaments – TUTORIAL, gather all necessary materials before starting. You’ll need fabric (cotton, satin, or linen work well), a needle and thread or sewing machine, an iron, scissors, stuffing or a lightweight filling, and decorative embellishments such as beads or ribbons. Having everything prepared makes the crafting process smoother and more enjoyable.
Start by cutting your chosen fabric into strips. The width and length will determine the size of your ornaments. For a traditional round look, try strips around 3 inches wide and 12 inches long. Next, fold the fabric evenly into pleats—these folds will create the textured effect that makes Pleated Ornaments so distinctive. Use an iron to press the pleats in place for a neat, crisp appearance.
Sew the pleated strip along one edge to hold the folds together. This step is crucial for maintaining the pleated structure once the ornament is shaped. You can hand-stitch or use a sewing machine depending on your comfort level. The goal is to have a flexible strip that can be wrapped into a circular or folded shape without losing its pleats.
Once your pleated strip is ready, bring the two ends together and stitch them to form a closed circle. Adjust the pleats as needed to ensure the ornament has an even and symmetrical shape. At this stage, you can stuff the inside lightly if you want a fuller appearance. For a more delicate look, skip the stuffing and keep it flat.
Add decorative touches like small beads, sequins, or ribbons at the top. You can also attach a loop of thread or twine for hanging. Remember that the finishing touches are what truly bring your Pleated Ornaments to life, transforming them from simple fabric crafts into elegant holiday treasures.
Lastly, give your ornaments a final press with a warm iron to set the shape and pleats. Once cooled, they’re ready to display or gift. The preparation process may seem simple, but the results are stunningly professional, making this Pleated Ornaments – TUTORIAL perfect for any skill level.
The crafting stage of this Pleated Ornaments – TUTORIAL is where your creativity truly shines. Begin by taking your pleated strip and folding it in half lengthwise if you want a thicker, layered effect. Secure the open edges with small stitches to hold the fabric in place.
Next, form the pleated fabric into a spiral or circular shape. Depending on the type of ornament you want, you can roll it tightly for a compact design or more loosely for a softer look. Stitch the ends securely to maintain the shape. For best results, hide your knots and stitches within the folds so they remain invisible.
If you’re adding embellishments, now is the perfect time. Sew small beads along the pleats or glue sequins to give your Pleated Ornaments a sparkling finish. You can also attach a decorative button at the center or a bow on top for added charm.
To create hanging loops, use thin satin ribbons or gold thread. Fold them into a small loop and sew or glue them to the top of the ornament. Make sure the loop is strong enough to support the ornament’s weight when hanging on a tree or garland.
Experiment with fabric textures and colors. Using metallic fabrics, silk, or velvet can completely change the ornament’s look. Mixing materials also creates depth and visual interest. This Pleated Ornaments – TUTORIAL encourages experimentation—there’s no single right way to make these ornaments.
After completing one, try making a set of matching or contrasting designs. Creating multiple ornaments can be a great way to practice and perfect your pleating technique while preparing a full collection for your seasonal decor.
This Pleated Ornaments – TUTORIAL allows endless design variations. You can make traditional round ornaments, cone-shaped pieces, or even layered stars by combining multiple pleated strips. The design possibilities depend entirely on your imagination.
For a rustic theme, use burlap or linen fabrics and add wooden beads. If you prefer a glamorous style, metallic fabrics and crystal accents will give your Pleated Ornaments a luxurious shine. You can even dye fabrics naturally using tea or coffee for a vintage touch.
Try adding scent to your ornaments by tucking in small lavender sachets or a drop of essential oil. This transforms them into beautiful aromatic decorations perfect for closets, drawers, or as gifts.
Combine different sizes and hang them together as a set. The variety in shapes and colors adds depth to your holiday decor. Mixing plain and patterned fabrics can make the ornaments more dynamic and visually appealing.
These ornaments are not limited to Christmas. You can create themed sets for Easter, weddings, or birthdays using the same pleating technique. Simply change the colors and embellishments to suit the occasion.
Finally, consider personalizing your ornaments. Embroider initials or small motifs on the pleats before assembly to make your Pleated Ornaments uniquely yours. Personalized pieces make thoughtful keepsakes or memorable gifts for loved ones.
To achieve the best results with your Pleated Ornaments, precision and patience are key. Make sure your pleats are evenly spaced and pressed well before sewing. Uneven folds can distort the final shape of the ornament.
Always test your stitches on a small fabric piece before working on your actual ornament. This helps you adjust your tension and stitch length to prevent puckering or loose threads.
Use quality materials. While it may be tempting to use inexpensive fabric, higher-quality textiles hold pleats better and result in a more polished finish.
When using glue for decorations, apply it sparingly to avoid stiff spots. Allow each layer to dry completely before adding more embellishments.
Work in a clean, well-lit space. It’s easier to see the details and maintain even folds when you’re not rushing or distracted. Crafting Pleated Ornaments should be a relaxing, enjoyable process.
Finally, store your completed ornaments in a cool, dry place wrapped in tissue paper. Proper storage ensures that the pleats and decorations remain intact for years of future use.
FAQ
1. What type of fabric works best for Pleated Ornaments?
Cotton, satin, silk, and linen are great choices because they hold pleats well and are easy to sew.
2. Can I make Pleated Ornaments without sewing?
Yes, you can use fabric glue instead of stitching, though sewing provides a sturdier finish.
3. How long does it take to make one ornament?
On average, it takes 30–45 minutes depending on the design and embellishments.
4. Are Pleated Ornaments suitable for beginners?
Absolutely! This Pleated Ornaments – TUTORIAL is beginner-friendly and requires only basic skills.
5. Can I wash the ornaments?
It’s best to spot clean them with a damp cloth instead of machine washing to preserve the shape.
Conclusion
Through this Pleated Ornaments – TUTORIAL, you’ve learned how to create beautiful, personalized decorations that bring handmade charm to your festive season. From fabric selection to final embellishments, each step adds creativity and meaning to your craft.
Whether you’re making them for your own home or as thoughtful gifts, these ornaments will surely impress. Try this tutorial today and share your honest opinion and suggestions—we’d love to hear how your ornaments turned out!
