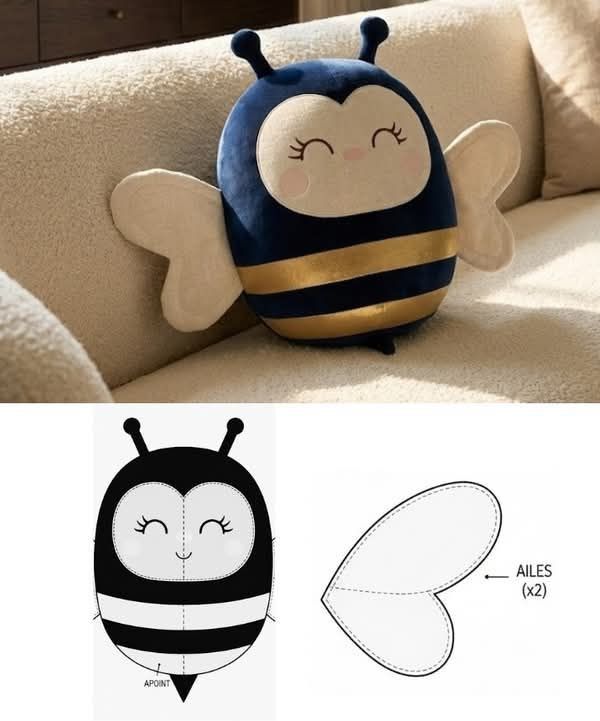
Bee Cushion - Tutorial

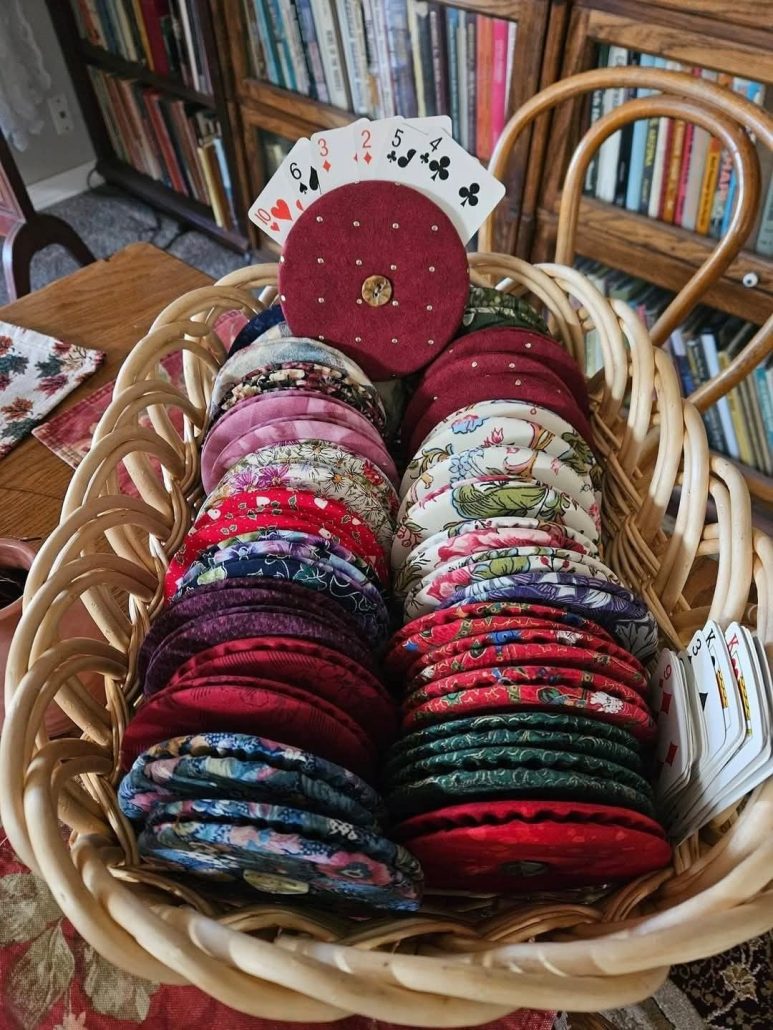
If you’ve ever found yourself struggling to hold a full hand of cards during family game night, this Playing Card Holder – Tutorial is the perfect project for you. Creating a playing card holder is not only fun and practical but also a great opportunity to explore your crafting skills. Whether you play poker, rummy, or Uno, this easy DIY craft makes organizing your cards effortless while adding a personal, handmade touch to your game nights. The Playing Card Holder – Tutorial will guide you step-by-step to craft your very own holder using simple materials and techniques, suitable for beginners and experienced makers alike.
This project is especially useful for children or seniors who find it difficult to fan out and hold multiple cards at once. A homemade playing card holder ensures comfort, improves gameplay, and can even become a charming personalized gift. You can design it in different shapes, sizes, and colors, depending on your preferences. With just a few tools and creativity, you can create a holder that’s both beautiful and functional.
By following this Playing Card Holder – Tutorial, you’ll learn how to make an accessory that can last for years and enhance every card game. From fabric-covered holders to wooden designs, there are endless ways to customize your piece. Let’s dive into how to make it, step-by-step, while keeping your crafting process simple and enjoyable.
Before starting this Playing Card Holder – Tutorial, gather your materials to ensure a smooth crafting experience. You will need basic supplies that are easy to find at home or in any craft store. Start by deciding what kind of base you want for your holder — wood, plastic, or even thick cardboard. Each option provides a different texture and durability level.
For a simple version, you can use recycled materials such as old boxes or fabric scraps. This makes the playing card holder both eco-friendly and budget-friendly. You’ll also need some basic crafting tools: scissors, glue, ruler, and markers for decoration. If you plan to make a fabric version, a sewing machine or needle and thread will be useful.
Once your materials are ready, make sure you have a clean and flat workspace to assemble your holder. A cutting mat can help you achieve precise cuts, especially for a wooden version. Depending on your choice of materials, you might also need a hot glue gun or wood adhesive.
Remember that the Playing Card Holder – Tutorial encourages creativity — feel free to mix materials like combining wood with felt or cardboard with fabric. You can even paint or decorate your holder to match your game night theme. The goal is to create something practical yet visually appealing.
Lastly, consider adding personal touches. For example, paint your initials, glue some colorful beads, or wrap the edges with decorative washi tape. These small details make your playing card holder unique and enjoyable to use.
When all your materials are prepared, you’re ready to move on to the next step: designing your holder’s structure.
The design process is where creativity truly shines in this Playing Card Holder – Tutorial. Start by sketching your idea on paper — decide how large you want your holder to be and how many cards it should hold. If you often play games that require multiple cards, consider making a multi-slot design.
For a beginner-friendly version, try a simple curved holder that fits comfortably on a table. This type of holder can easily display all cards without revealing them to your opponents. You can make the curve by cutting a half-moon shape in your chosen material.
If you prefer a standing design, a small wooden base with a groove cut across it works perfectly. This option is great for a more professional look and offers stability. Cardboard versions can also mimic this design using layers of glued cardboard for thickness.
Customization is key to this project. The playing card holder can be tailored to your personal taste, from minimalist neutral tones to colorful, playful designs. You might want to paint small symbols, such as hearts or spades, to match the card theme.
For kids, consider adding fun elements like stickers or cartoon motifs. A playful design encourages them to use the holder more often, especially when learning new games.
Once the design is ready, double-check measurements to ensure the holder comfortably fits your cards. Precision at this stage ensures your finished piece will be both functional and attractive.
Now it’s time to bring your idea to life with this Playing Card Holder – Tutorial. Start by cutting your base material according to the design you chose earlier. Make sure the edges are smooth to avoid rough spots that could damage your cards.
Next, if you’re making a fabric version, cut your chosen fabric slightly larger than the base so it can wrap around smoothly. Use fabric glue or a sewing machine to secure the edges. This gives your playing card holder a soft and stylish finish.
For a wooden or cardboard version, use a ruler to draw a straight groove in the center. This groove is where the cards will sit. Carefully cut it using a craft knife or saw, depending on your material.
Once the groove is made, smooth it with sandpaper to prevent any sharp edges. This ensures your cards won’t tear or bend while playing.
Add decorative elements next. Paint, stickers, or washi tape can make your holder stand out. If you’re creating multiple holders for family members, consider labeling them with names.
Finally, let the holder dry completely before using it. Once ready, test it with your favorite deck of cards to see how it performs.
This Playing Card Holder – Tutorial is designed to inspire creativity. Once you’ve mastered the basic design, experiment with different variations. For instance, try making a folding version that’s easy to store and carry.
If you enjoy woodworking, carve decorative grooves or shapes into the wood. These details add a handcrafted charm. You could even make themed holders — such as holiday designs, floral patterns, or minimalist modern looks.
A multi-tiered holder is another option, especially for games that require organizing multiple card sets. This design involves stacking two or three grooves at different heights.
If you love sewing, create a soft pouch or roll-up version that can double as storage for your cards. Using leftover fabric scraps makes it sustainable and adds personality.
Gift-giving is another fun use for this playing card holder. Handmade versions make thoughtful gifts for game enthusiasts, family members, or friends. Add a deck of cards and wrap it beautifully for a personal touch.
Lastly, don’t be afraid to mix materials — leather accents, fabric linings, or metallic details can transform a simple holder into a unique art piece.
1. What materials can I use for a playing card holder?
You can use wood, cardboard, plastic, or fabric depending on your crafting preference and available tools.
2. Is this project suitable for beginners?
Yes! The Playing Card Holder – Tutorial is perfect for beginners and can be adjusted for any skill level.
3. How long does it take to make a playing card holder?
Most simple versions can be completed in less than an hour, though drying or decorating may take additional time.
4. Can I make the holder larger for bigger cards?
Absolutely. Just adjust your measurements based on the card size before cutting your materials.
5. How can I make my holder more durable?
Use strong glue, thicker materials, and seal the surface with varnish or fabric sealant for longer-lasting results.
Creating your own Playing Card Holder is a rewarding and practical craft that enhances your game nights and showcases your creativity. Through this Playing Card Holder – Tutorial, you’ve learned how to choose materials, design your holder, and customize it for a personal touch.
Whether you’re crafting for fun, gifting, or everyday use, this simple project brings joy and functionality together. Share your experience in the comments — we’d love to hear your thoughts and see your creations. Your feedback helps inspire more creative projects like this one!