
Autumn Lattice Quilt – PATTERN


Patchwork Highland Cow Quilt – Pattern is a delightful project that combines creativity, tradition, and the charm of farm-inspired design. Quilting enthusiasts love this type of patchwork because it is both visually striking and rewarding to make. Whether you are new to quilting or already an experienced quilter, this project gives you the chance to work with fun shapes, color choices, and textures that bring the adorable Highland cow to life.
Many people think that creating animal-themed quilts requires advanced skills, but with clear instructions and the right fabric selections, you will see how manageable it can be. This Patchwork Highland Cow Quilt is perfect for practicing piecing techniques, exploring fabric contrasts, and learning how to add personality to your work. Once finished, it becomes a unique piece that can decorate a home or be offered as a thoughtful handmade gift.
By following this Patchwork Highland Cow Quilt – Pattern, you will discover the joy of transforming fabric into a work of art. From selecting earthy tones to assembling the cow’s features, every step is enjoyable and full of creativity. This quilt is not just functional—it is also a statement piece that captures the beauty of patchwork and the beloved Highland cow.
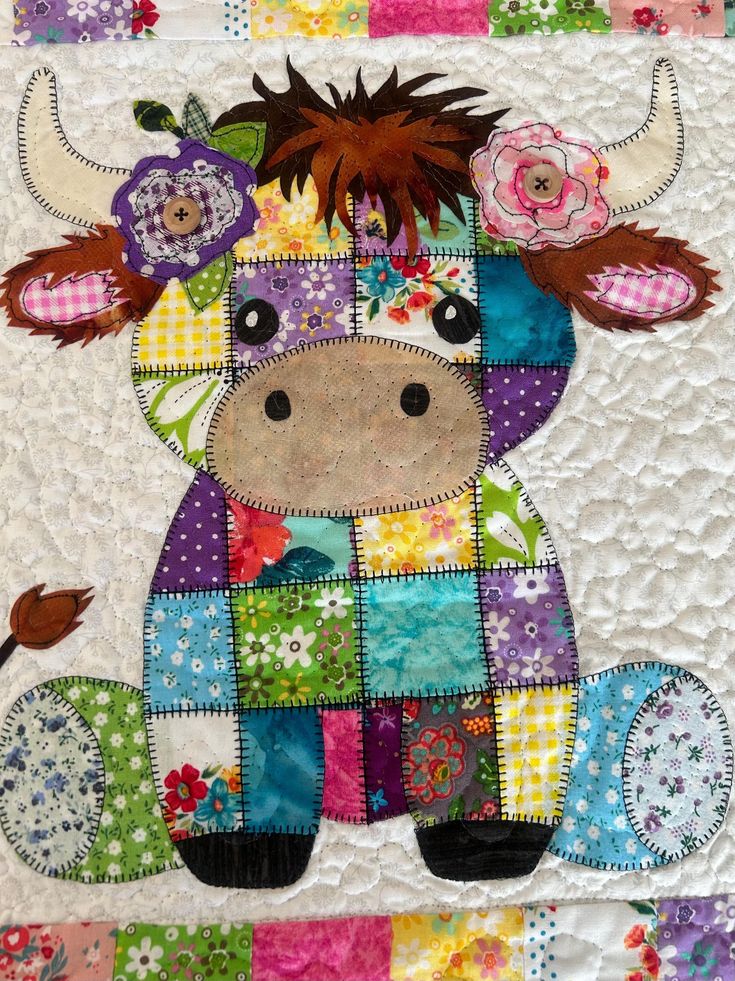
The first step in this Patchwork Highland Cow Quilt – Pattern is selecting fabrics. To capture the rustic and charming look of a Highland cow, you can choose earthy shades such as browns, tans, and creams. Using different textures, like mixing solids with prints, adds dimension and personality.
For the background fabric, lighter tones like cream, white, or soft gray are excellent choices. They allow the cow design to stand out while giving the quilt balance and harmony. Choosing a neutral background is a timeless way to highlight the central motif.
Batting is another important material. A medium-weight cotton or polyester batting gives the quilt warmth and body without making it too bulky. This ensures that your quilt will be cozy yet easy to handle during the sewing process.
Thread selection also matters. Neutral thread blends well with most fabrics, but using contrast thread for quilting lines can create a more decorative finish. It all depends on whether you want the stitches to blend in or stand out.
In addition to the fabrics and batting, you will need quilting tools such as a rotary cutter, cutting mat, quilting ruler, pins, clips, and of course, a sewing machine. Having the right tools makes cutting and piecing precise, which is essential for a neat and polished quilt.
Lastly, consider using interfacing or stabilizers for certain parts of the cow design if you want extra structure. This helps the patchwork details, such as the cow’s horns or shaggy fur sections, look sharp and well-defined.
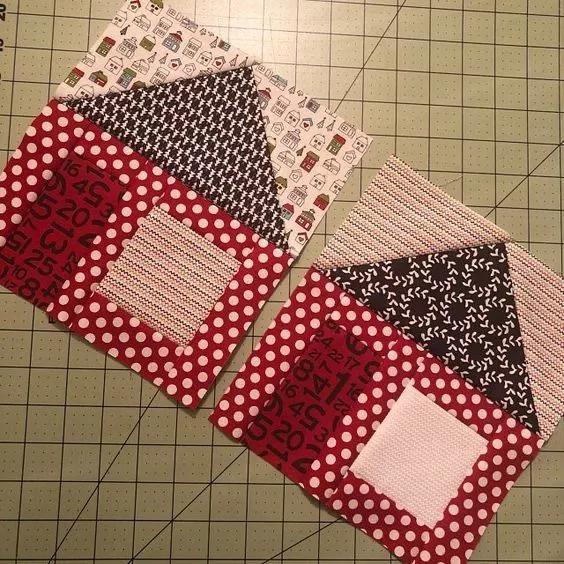
Begin by preparing your fabric pieces. Accurate cutting is essential in this Patchwork Highland Cow Quilt – Pattern because the cow’s design depends on precise shapes and sizes. Use a quilting ruler and rotary cutter to achieve clean edges.
Next, start assembling the background squares. This gives you a solid base and helps you visualize where the Highland cow will be placed. Piecing the background first ensures that your quilt stays balanced.
After that, focus on constructing the Highland cow blocks. Break the design into sections—such as the head, ears, horns, and shaggy fur. By piecing each section separately, the process feels more approachable and less overwhelming.
Once the sections are complete, sew them together carefully, checking alignment as you go. This is a crucial step to ensure the Highland cow design looks accurate and proportional. Patience pays off here.
When the central motif is assembled, add borders or sashing to frame the cow. This not only highlights the design but also helps adjust the final quilt size. Borders are an opportunity to play with colors or patterns that complement the main design.
Finally, layer the quilt top with batting and backing fabric. Quilt through all layers using straight-line quilting, free-motion, or even hand quilting. Binding the edges completes your quilt, giving it a finished, professional look.
One of the best aspects of this Patchwork Highland Cow Quilt – Pattern is the endless room for creativity. You can choose traditional earthy cow colors or go bold with whimsical shades like blues, pinks, or pastels for a modern, playful twist.
Experiment with backgrounds to change the overall mood of the quilt. A dark background creates drama, while a pastel or light background gives the quilt a cozy farmhouse feel.
Adding embellishments is another way to make your quilt stand out. Appliqué, embroidery, or decorative stitching can add texture to the cow’s fur or details to the horns. These small touches bring personality and charm.
Consider creating a mini quilt version of the Highland cow as wall art. This is a great way to practice the pattern before committing to a larger project. It also makes a lovely decoration for any room.
If you are making the quilt as a gift, you can personalize it by adding initials, names, or even a date embroidered on the border. Handmade quilts are cherished keepsakes, and personalization makes them even more special.
For a bolder design, try combining the Highland cow with other farm-inspired blocks, such as barns, tractors, or fields. This turns the quilt into a storytelling piece that reflects country living.
One common challenge in this Patchwork Highland Cow Quilt – Pattern is keeping all the small pieces aligned. To solve this, always double-check your cutting measurements and use plenty of pins or clips when piecing.
If your quilt top starts to look uneven, press each seam carefully as you go. Proper pressing prevents fabric from shifting and ensures a smoother finish.
Sometimes beginners find the cow’s face difficult to assemble. Breaking it into smaller blocks and tackling one section at a time makes it less intimidating. Don’t rush—precision is more important than speed.
If your quilt layers shift during quilting, use safety pins or basting spray to secure them before stitching. This prevents puckering and helps the quilt look polished.
Mistakes are part of the process. Keep a seam ripper handy and don’t be discouraged if you need to redo a section. Every quilter has been there, and it’s a natural step in learning.
Lastly, remember that quilting is meant to be enjoyable. Even if the cow isn’t perfect, your quilt will still have charm and reflect your effort and creativity. Celebrate progress rather than perfection.
What fabric works best for the Highland cow quilt?
Cotton fabrics in earthy tones work best, but you can experiment with prints, solids, or even flannels for a cozy effect.
Can a beginner make this quilt?
Yes, beginners can make it with patience. Breaking the design into smaller blocks makes the process much easier.
How big is the finished Patchwork Highland Cow Quilt?
The size depends on the pattern you follow. It can range from a small wall hanging to a full-sized bed quilt.
Do I need special tools for this quilt?
A rotary cutter, quilting ruler, and sewing machine are recommended for accuracy, but basic sewing tools are enough to start.
Can I customize the cow’s colors?
Absolutely! You can stick to realistic shades or choose bright and playful colors for a unique design.
What quilting style works best for this pattern?
Straight-line quilting keeps the design simple, while free-motion quilting adds artistic flair. It depends on your preference.
In this Patchwork Highland Cow Quilt – Pattern, we explored how to choose fabrics, assemble the design, add creative variations, and handle common challenges. This project is not only rewarding but also a great opportunity to improve quilting skills while creating a charming and meaningful piece.
We encourage you to try this pattern and share your results. Leave your honest opinion and suggestions—we’d love to hear about your quilting journey and see how your Highland cow quilt turned out.

