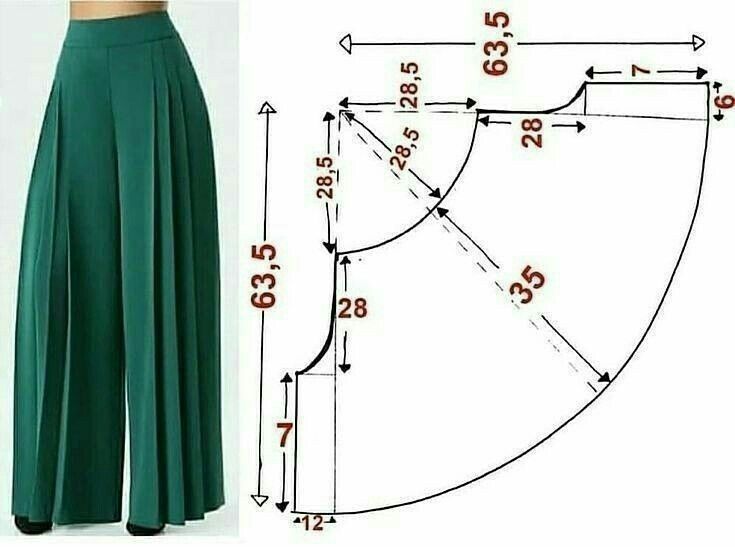
How to Sew a Pants-Skirt - TUTORIAL

Out the Door Organizer Sewing – Tutorial is a practical and creative sewing project designed to bring order, beauty, and efficiency to everyday life. This versatile organizer is perfect for busy households, helping you keep essential items neatly stored and easy to grab before heading out the door. Whether you are new to sewing or an experienced quilter, this project offers both functionality and creative satisfaction.
One of the reasons the Out the Door Organizer Sewing – Tutorial has become so popular among sewing and quilt enthusiasts is its adaptability. It can be customized in size, fabric choice, pocket layout, and hanging style, making it suitable for entryways, bedrooms, craft rooms, or even classrooms. It is a project that blends organization with handmade charm.
In this article, you will learn everything you need to know about creating your own Out the Door Organizer Sewing – Tutorial, from planning and materials to assembly, customization, and long-term use. This guide is designed to be clear, inspiring, and helpful, allowing you to confidently complete a beautiful and durable organizer while improving your sewing skills.
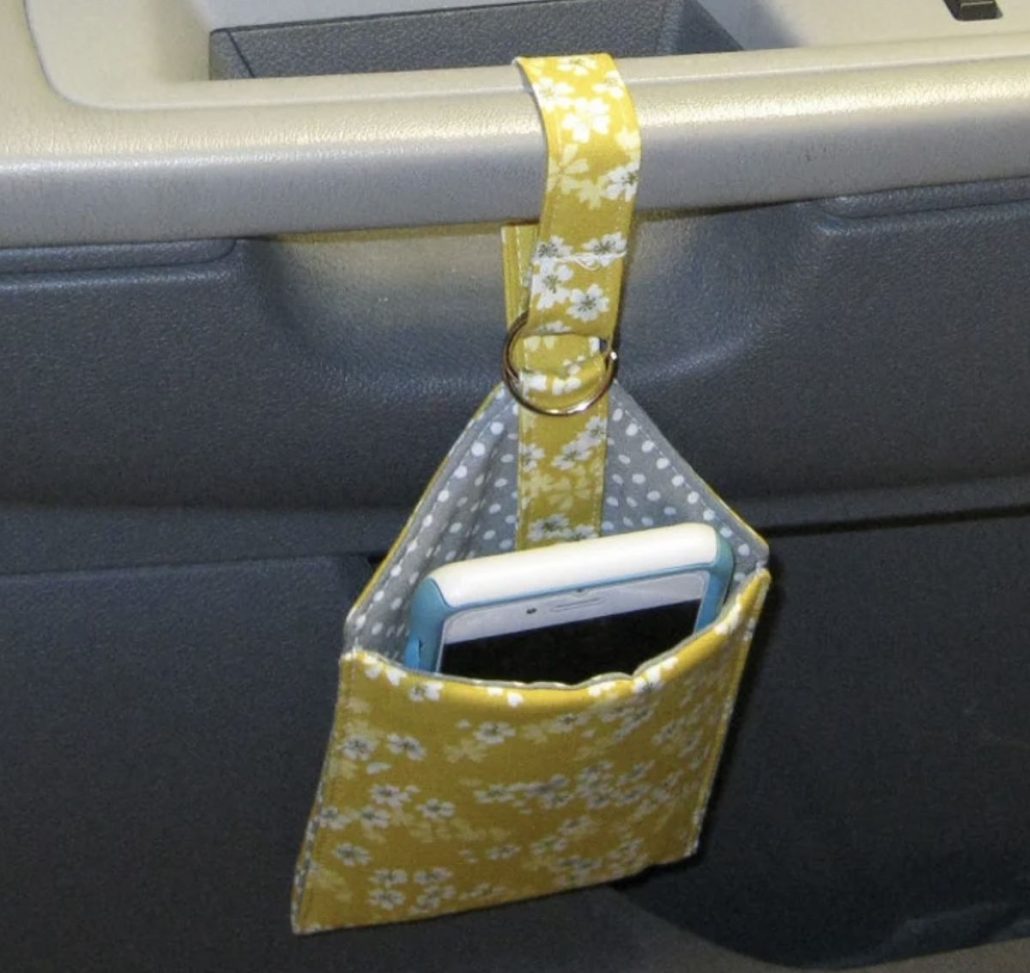
The Out the Door Organizer Sewing – Tutorial focuses on creating a fabric organizer that hangs near a door, providing multiple pockets or compartments for everyday essentials. These may include keys, wallets, mail, sunglasses, masks, chargers, notebooks, or children’s items. Its purpose is to reduce clutter and save time by keeping frequently used items in one accessible place.
One of the greatest advantages of this organizer is how it supports daily routines. Instead of searching for misplaced items, everything you need is ready and visible. This makes the Out the Door Organizer Sewing – Tutorial especially valuable for families, students, and anyone with a busy schedule.
From a sewing perspective, this tutorial is approachable and rewarding. It introduces useful techniques such as straight stitching, pocket construction, layering fabrics, and topstitching. For beginners, it builds confidence, while for advanced sewists, it offers opportunities for creativity and refinement.
The Out the Door Organizer Sewing – Tutorial is also an excellent stash-busting project. You can use leftover fabrics, quilting cottons, denim, or even recycled materials. This makes it budget-friendly and environmentally conscious, aligning with sustainable crafting practices.
Another reason this project stands out is its gift potential. Handmade organizers are thoughtful and practical presents for housewarmings, birthdays, back-to-school seasons, or holidays. The Out the Door Organizer Sewing – Tutorial allows you to personalize each piece, making every gift unique.
Ultimately, this tutorial combines usefulness, creativity, and craftsmanship. It transforms simple fabric into a long-lasting solution that enhances daily life while celebrating the joy of sewing.
Before starting the Out the Door Organizer Sewing – Tutorial, gathering the right materials is essential for a successful outcome. The main fabric should be sturdy enough to support weight while still being easy to sew. Quilting cotton is a popular choice, especially when paired with interfacing or batting for added structure.
You will typically need a main fabric, a lining fabric, and coordinating fabric for pockets. Interfacing or fusible fleece helps the organizer maintain its shape and prevents sagging over time. Choosing quality materials ensures your Out the Door Organizer Sewing – Tutorial remains durable with daily use.
Color and pattern selection play an important role in the final look. Neutral tones blend seamlessly into modern interiors, while bold prints add personality and charm. Seasonal themes can also be incorporated, allowing you to switch organizers throughout the year.
Accurate measuring and cutting are critical steps in the preparation phase. Taking time to square your fabric and align patterns properly will result in a more polished finish. The Out the Door Organizer Sewing – Tutorial benefits greatly from careful planning before sewing begins.
Hardware choices are another key consideration. Wooden dowels, curtain rods, or sturdy hangers can be used for hanging. Grommets, loops, or fabric ties should be securely stitched to support the organizer’s weight. These small details greatly impact functionality.
Preparation also includes organizing your workspace. Having your tools ready, such as scissors, rotary cutters, pins, and an iron, will make the process smoother. Pressing seams as you go is especially important in the Out the Door Organizer Sewing – Tutorial, as it creates crisp lines and professional results.
The construction phase of the Out the Door Organizer Sewing – Tutorial begins with assembling the main body. This usually involves layering the main fabric, interfacing, and lining, then stitching them together to create a strong base. Straight stitching and consistent seam allowances are key to achieving a neat structure.
Next comes pocket construction, which is often the most creative part of the project. Pockets can be uniform or varied in size depending on what you plan to store. The Out the Door Organizer Sewing – Tutorial allows flexibility, making it easy to customize layouts for different needs.
Topstitching pockets not only enhances durability but also adds a decorative element. This step reinforces seams and ensures pockets can handle frequent use. Taking your time during this stage will significantly improve the overall quality of your organizer.
Attaching the hanging mechanism is a crucial step. Whether you choose loops, grommets, or sleeves for a rod, these components must be securely stitched. The Out the Door Organizer Sewing – Tutorial emphasizes strength and balance to prevent tilting or tearing.
Edge finishing adds a polished look and increases longevity. Binding, hemming, or turning edges inward are common techniques used in this tutorial. Clean edges prevent fraying and give your organizer a professional appearance.
Throughout the sewing process, frequent pressing helps maintain accuracy. Each seam should be pressed flat before moving on. This attention to detail ensures your Out the Door Organizer Sewing – Tutorial looks tidy, functional, and well-crafted.
One of the most exciting aspects of the Out the Door Organizer Sewing – Tutorial is how easily it can be customized. You can add labels, embroidery, appliqué, or quilting details to personalize your organizer. These creative touches make the project uniquely yours.
Different environments benefit from different designs. A family entryway organizer may include large pockets for children’s items, while a home office version might feature slimmer compartments for documents and supplies. The Out the Door Organizer Sewing – Tutorial adapts effortlessly to these needs.
Seasonal customization is another popular option. By changing fabrics and colors, you can create organizers for holidays, school seasons, or specific themes. This keeps your space feeling fresh while using the same practical design.
Maintenance is simple and manageable. Most organizers made following the Out the Door Organizer Sewing – Tutorial can be spot-cleaned or gently hand-washed. Using durable fabrics and reinforced seams helps maintain structure over time.
Storage flexibility is another benefit. If you move or redecorate, the organizer can be relocated easily. This portability makes the Out the Door Organizer Sewing – Tutorial a long-term solution rather than a fixed installation.
By investing time in thoughtful design and quality construction, your organizer will remain functional and attractive for years. It is a project that truly balances form and function.
Is the Out the Door Organizer Sewing – Tutorial suitable for beginners?
Yes, this tutorial is beginner-friendly and focuses on basic sewing techniques while offering room for skill development.
What fabrics work best for this organizer?
Quilting cotton combined with interfacing or fusible fleece is ideal for structure and durability.
Can I resize the organizer?
Absolutely. The Out the Door Organizer Sewing – Tutorial is highly adaptable to different sizes and layouts.
How do I hang the organizer securely?
Using a sturdy rod, dowel, or reinforced fabric loops ensures stable hanging and long-term use.
Is this organizer washable?
Most versions are washable, especially if made with cotton fabrics. Gentle cleaning is recommended.
Can I sell organizers made from this tutorial?
If the tutorial allows commercial use, you may sell finished items. Always check pattern permissions.
The Out the Door Organizer Sewing – Tutorial is a practical, creative, and rewarding sewing project that brings organization and beauty into everyday spaces. Throughout this article, you learned how to plan, construct, customize, and maintain a fabric organizer that supports daily routines and showcases handmade craftsmanship.
By combining thoughtful design with accessible sewing techniques, this tutorial empowers sewists of all levels to create something both functional and personal. Whether for your own home or as a handmade gift, this organizer offers lasting value and satisfaction.
If you enjoyed this guide, please leave an honest opinion and share your suggestions. Your feedback helps improve future tutorials and inspires others in the sewing and quilting community. Happy sewing!