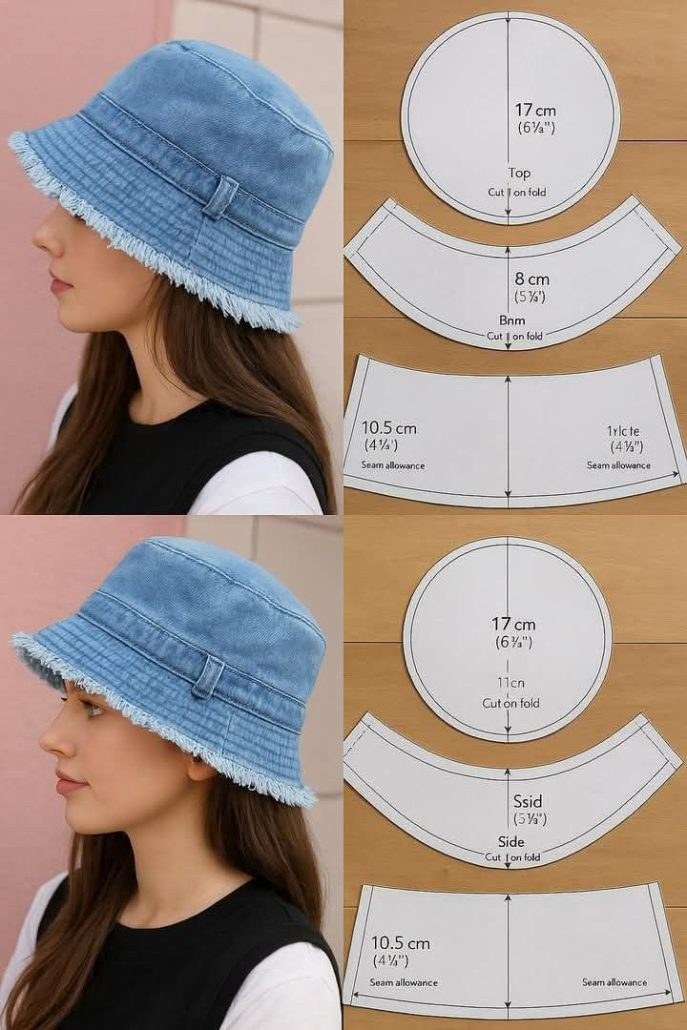
How to Cut and Sew a Bucket Hat

How to cut and sew a bucket hat is a practical and stylish quilting-inspired sewing project that allows you to create a trendy and functional accessory using your favorite fabrics. By following How to cut and sew a bucket hat, you can design a custom hat that reflects your personality while also improving your sewing skills.
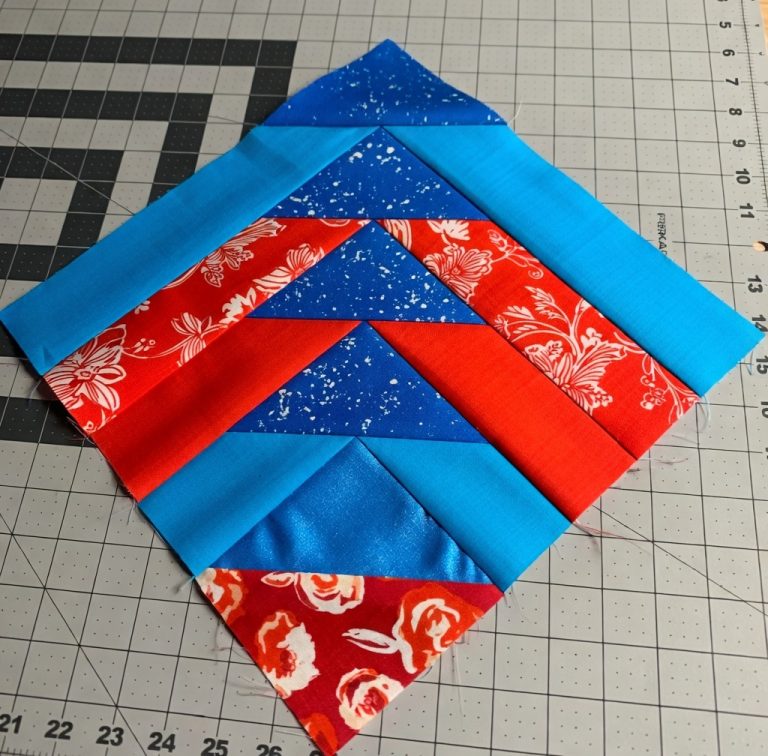
One of the most exciting aspects of How to cut and sew a bucket hat is the opportunity to experiment with colors, prints, and textures. Whether you prefer a minimalist look or a bold patchwork design, this project offers endless creative freedom. It is also a great way to use fabric scraps and create something both fashionable and sustainable.
In this complete How to cut and sew a bucket hat, you will learn how to choose materials, cut precise fabric pieces, assemble the hat structure, and finish it with professional details. This guide is perfect for beginners and experienced sewists who want to create a wearable and stylish piece.
The first step in How to cut and sew a bucket hat is gathering all the necessary materials to ensure a smooth sewing process.
Cotton fabric is highly recommended because it is breathable and easy to work with.
You can also use denim or canvas for a more structured and durable hat.
Thread that matches or contrasts your fabric can enhance the design.
Basic tools such as scissors, pins, a sewing machine, and a measuring tape are essential.
Interfacing can be used to give the hat more structure.
An iron is important for pressing seams and achieving a clean finish.
Preparation is a key part of How to cut and sew a bucket hat, ensuring that all pieces are accurate and ready for assembly.
Start by choosing a bucket hat pattern in your desired size.
Cut fabric pieces for the crown, side band, and brim.
In How to cut and sew a bucket hat, precise cutting ensures a better fit and professional result.
Mark seam allowances and alignment points on the fabric.
Press all pieces to remove wrinkles and prepare them for sewing.
Organize your pieces to make the assembly process easier.
The next stage in How to cut and sew a bucket hat is assembling the hat structure.
Begin by sewing the side band into a circular shape.
Attach the crown piece to the top of the band.
In How to cut and sew a bucket hat, consistent seam allowances ensure a smooth finish.
Sew the brim pieces together and attach them to the main body.
Pin all pieces carefully before sewing to maintain alignment.
Reinforce seams where necessary for durability.
The final stage of How to cut and sew a bucket hat focuses on finishing touches and personalization.
Trim excess threads and press all seams neatly.
Topstitch around the brim to add structure and style.
You can decorate your hat with embroidery, patches, or fabric combinations.
In How to cut and sew a bucket hat, customization allows you to create a truly unique accessory.
Adjust the fit if necessary for comfort.
Once completed, your bucket hat is ready to wear.
Is this project suitable for beginners?
Yes, How to cut and sew a bucket hat is beginner-friendly with basic sewing knowledge.
What fabric works best?
Cotton is ideal, but denim and canvas also work well.
Do I need a pattern?
Yes, using a pattern helps ensure proper fit and shape.
How long does it take to complete?
Most bucket hats can be made in a few hours.
Can I customize the design?
Absolutely, you can experiment with colors and details.
Do I need interfacing?
It is optional but recommended for structure.
How to cut and sew a bucket hat is a fun and rewarding project that combines creativity with practicality. It allows you to create a stylish accessory that can be worn in different seasons and occasions.
In this tutorial, you learned how to select materials, cut and prepare fabric pieces, assemble the hat, and finish it with professional details. Each step contributes to a comfortable and well-crafted final product.
Projects like How to cut and sew a bucket hat show how sewing and quilting techniques can be used to create fashionable and functional items.
If you enjoyed this tutorial, feel free to leave your honest opinion and share your suggestions. Your feedback helps inspire more creative sewing and quilting ideas.