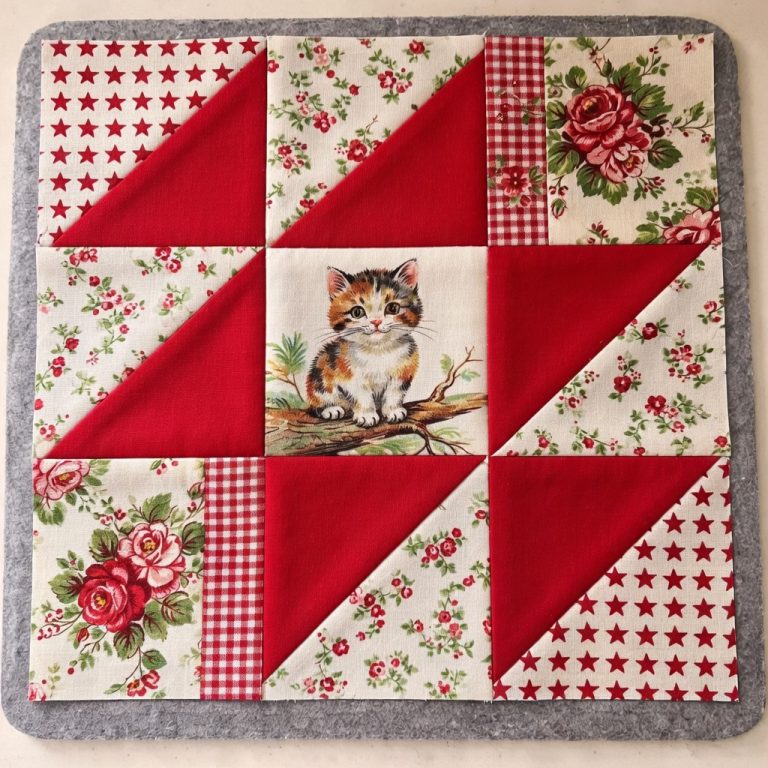
9-Patch Cat Block - TUTORIAL

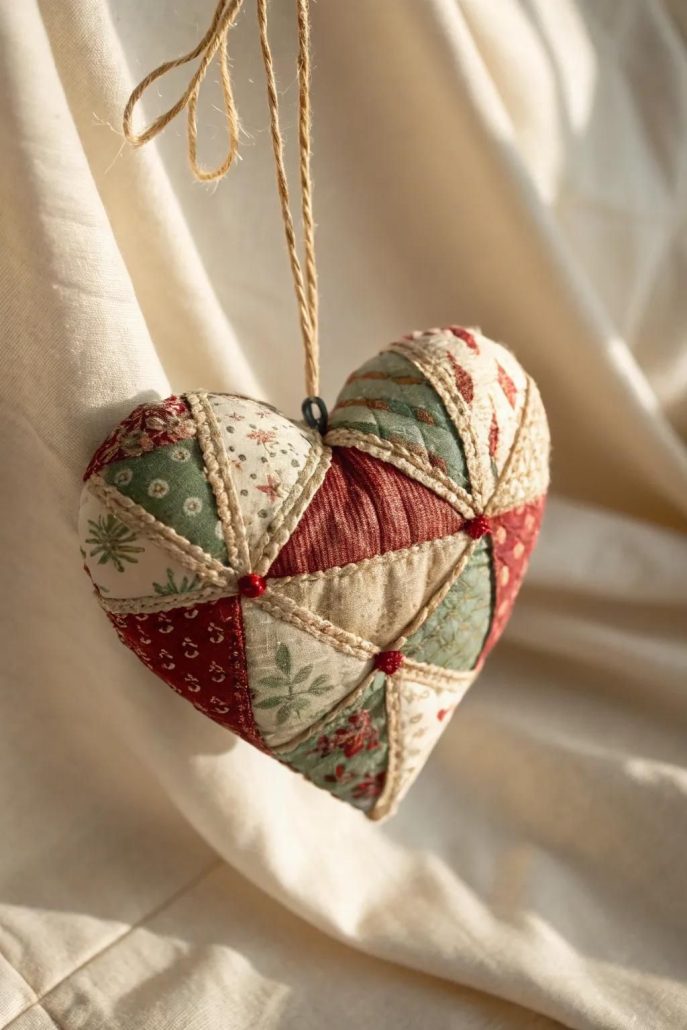
The Heart made with scraps – TUTORIAL is a delightful way to combine creativity, sustainability, and the timeless beauty of quilting. This project transforms leftover fabric pieces into a charming heart design that can be used as a wall hanging, pillow front, or part of a larger quilt. For quilters who love giving new life to small fabric scraps, this tutorial provides both a practical and sentimental approach to sewing. The heart shape adds a touch of warmth and love to any project, making it an ideal choice for gifts or seasonal décor.
Working with scraps allows quilters to express themselves without the pressure of purchasing large amounts of new fabric. Instead, the Heart made with scraps – TUTORIAL encourages resourcefulness and creativity. Each heart block becomes unique depending on the mix of colors, prints, and textures chosen. This makes the pattern endlessly versatile, offering a personal and emotional connection to the fabrics being used.
Whether you are a beginner looking for a manageable project or an experienced quilter seeking a fun and meaningful scrap-busting design, this pattern is perfect. In this article, we will explore how to approach this tutorial, provide sewing tips, highlight creative variations, and answer common questions. By the end, you’ll be inspired to start stitching your very own scrappy heart quilt block.
The Heart made with scraps – TUTORIAL focuses on turning fabric leftovers into a quilt block shaped like a heart. This design symbolizes warmth and affection, making it an ideal centerpiece for homemade creations. Each block can be used on its own or combined with others to form a larger quilt.
What makes this tutorial stand out is its accessibility. Unlike complex quilt blocks that require precise measurements and specialty fabrics, the heart block works beautifully with irregular scraps. Even small pieces can be trimmed and stitched together to form the larger heart shape. This means that nothing goes to waste, and every block feels special.
Quilters often enjoy this type of project because it allows them to relive memories through fabrics. A small floral print from an old dress, a stripe from a child’s shirt, or pieces left over from past quilts can all come together in a new design. The emotional value stitched into the heart makes it more than just a quilt block—it becomes a piece of storytelling.
Additionally, the Heart made with scraps – TUTORIAL is beginner-friendly. The simple layout provides a great introduction to patchwork for new quilters. At the same time, seasoned quilters find joy in experimenting with colors and arranging fabric combinations. This makes the tutorial suitable for all levels of quilting experience.
Another advantage of this project is its versatility. The finished heart block can be turned into a cushion cover, tote bag panel, table runner accent, or part of a larger quilt. Each choice gives the quilter freedom to adapt the design according to their needs.
Lastly, the heart block teaches valuable sewing skills like fabric selection, color balance, seam alignment, and block finishing. These lessons can be carried into future quilting projects, making the tutorial both practical and rewarding.
For the Heart made with scraps – TUTORIAL, the materials list is refreshingly simple. The main ingredient is your collection of fabric scraps. Cotton is the most common choice, but feel free to use any leftover fabrics as long as they are similar in weight and texture.
You will also need basic quilting tools such as a rotary cutter, quilting ruler, cutting mat, and sewing machine. A pair of sharp fabric scissors is useful for trimming irregular scraps into workable pieces. Thread in a neutral color usually works best when sewing together fabrics of different shades and patterns.
Preparation begins with sorting your scraps. Group fabrics by color family, theme, or contrast level depending on the effect you want for your heart block. Some quilters prefer a coordinated look with reds and pinks for a classic heart, while others enjoy a rainbow-style block with vibrant mismatched scraps.
Once sorted, trim the fabric pieces into manageable squares or rectangles. They don’t need to be identical in size, but keeping them relatively consistent helps with alignment. The process of cutting and preparing scraps can be enjoyable and meditative, as it lets you rediscover forgotten fabrics.
Another key step in preparation is ironing. Pressing your scraps before sewing ensures that the seams will be smooth and precise. Quilting is much easier when fabrics lie flat and are free from wrinkles.
Finally, gather any optional embellishments such as embroidery thread, buttons, or lace if you want to personalize your block further. While not necessary, small details can add charm and uniqueness to your finished heart.
The Heart made with scraps – TUTORIAL typically starts with piecing your scraps together into larger fabric panels. From these panels, you can cut out the heart shape or sections of the heart block. This method ensures that your heart has a patchwork appearance made from different prints and textures.
Begin sewing scraps edge to edge, using a ¼-inch seam allowance. Press the seams open or to one side depending on your preference. Continue adding scraps until you have a panel large enough for the heart block. This process is often called “made fabric” in quilting, and it’s a great way to use tiny leftover pieces.
Next, use a heart-shaped template or pattern guidelines to cut out your block. Templates are useful for achieving consistent shapes, especially if you plan to make multiple hearts for a quilt. Precision is not as critical as in complex blocks, but neatness will help your final piece look polished.
Once you have the heart shape, sew it together with background fabric to form the complete block. White, cream, or black backgrounds often make the heart pop, but you can also use coordinating fabrics for a softer effect.
Take care with alignment when attaching the heart to its background. Pin the pieces securely and sew slowly to ensure that curves and edges line up correctly. This step is where beginners may need extra patience, but it is also highly rewarding when the heart comes together seamlessly.
Finally, press your finished block flat. This not only makes the block easier to join with others but also gives it a clean, professional appearance. At this point, you can either continue making more blocks for a larger quilt or use the single block for a small project like a pillow cover.
One of the most exciting aspects of the Heart made with scraps – TUTORIAL is the endless creative possibilities. Since each block is made from unique scraps, no two hearts will ever be the same. This allows quilters to experiment freely without fear of mistakes.
A popular approach is to create a quilt entirely from heart blocks, each using different color schemes. The result is a lively patchwork quilt filled with variety and charm. This makes an excellent gift for weddings, anniversaries, or Valentine’s Day.
Another creative option is to use the heart block as an accent piece. Incorporate it into tote bags, table runners, or baby blankets for a special handmade touch. The heart motif works well in both functional and decorative projects.
Some quilters enjoy arranging the hearts in gradient or rainbow order. For example, one block could feature red scraps, the next orange, then yellow, and so on, creating a stunning rainbow quilt of hearts. This adds both structure and beauty to the design.
You can also experiment with embellishments. Adding hand-stitched embroidery around the heart or quilting detailed patterns within the block elevates the overall look. Small touches like buttons or appliqué can also give your block extra personality.
Lastly, the scrappy heart block can be an excellent teaching project for children or beginners. It provides an approachable way to learn sewing basics while creating something fun and meaningful.
What is the Heart made with scraps – TUTORIAL best used for?
It is versatile and can be used for quilts, pillows, bags, table runners, or wall hangings. The heart design works for both practical and decorative projects.
Can I use fabrics other than cotton?
Yes, but it’s best to stick to fabrics of similar weight and texture. Mixing heavy and lightweight fabrics can cause uneven seams.
Do I need a sewing machine for this tutorial?
While a sewing machine makes the process faster and easier, the block can also be sewn by hand. Hand sewing gives a more traditional look and adds extra charm.
How big should my fabric scraps be?
There is no strict rule, but pieces should be large enough to sew without fraying. Trimming them into small squares or rectangles usually works best.
Is this project suitable for beginners?
Yes, the heart block is beginner-friendly. It’s a simple way to practice piecing, pressing, and block assembly without needing advanced skills.
Can I make multiple heart blocks for a larger quilt?
Absolutely. Many quilters enjoy making several blocks to create a full quilt. Each heart can be unique depending on the scraps used.
The Heart made with scraps – TUTORIAL is a beautiful way to combine quilting skills with sustainability and creativity. By transforming leftover fabric pieces into meaningful heart blocks, quilters can create projects filled with love and personal history. This tutorial is versatile, beginner-friendly, and endlessly customizable.
Whether you use your heart block in a pillow, bag, or a full quilt, the result will always be unique and heartfelt. Try out the tutorial with your own scraps, and don’t forget to share your results. We’d love to hear your honest opinions and suggestions about your quilting journey with this project.