Rose Twirl Quilt - Pattern

The Diamond Garden Quilt – Pattern is a stunning blend of geometric precision and floral elegance, bringing together the timeless diamond block with garden-inspired color palettes. This quilt design is perfect for anyone who wants to combine symmetry with a sense of natural beauty, making it an ideal project for both seasoned quilters and confident beginners.
In this tutorial, you’ll learn how to create your own Diamond Garden Quilt, from selecting fabrics to piecing together your blocks and finishing your quilt with clean borders. This pattern is a favorite among quilting communities because of its versatility — it looks amazing in both bold, modern colors or soft, vintage tones.
Throughout this Diamond Garden Quilt – Pattern, we’ll guide you step-by-step with tips for fabric layout, cutting techniques, and assembly tricks to ensure your diamonds are sharp and your garden blooms beautifully through your quilt. Whether you’re making a bed quilt, a wall hanging, or a lap throw, this pattern delivers visual impact and heartfelt handmade charm.
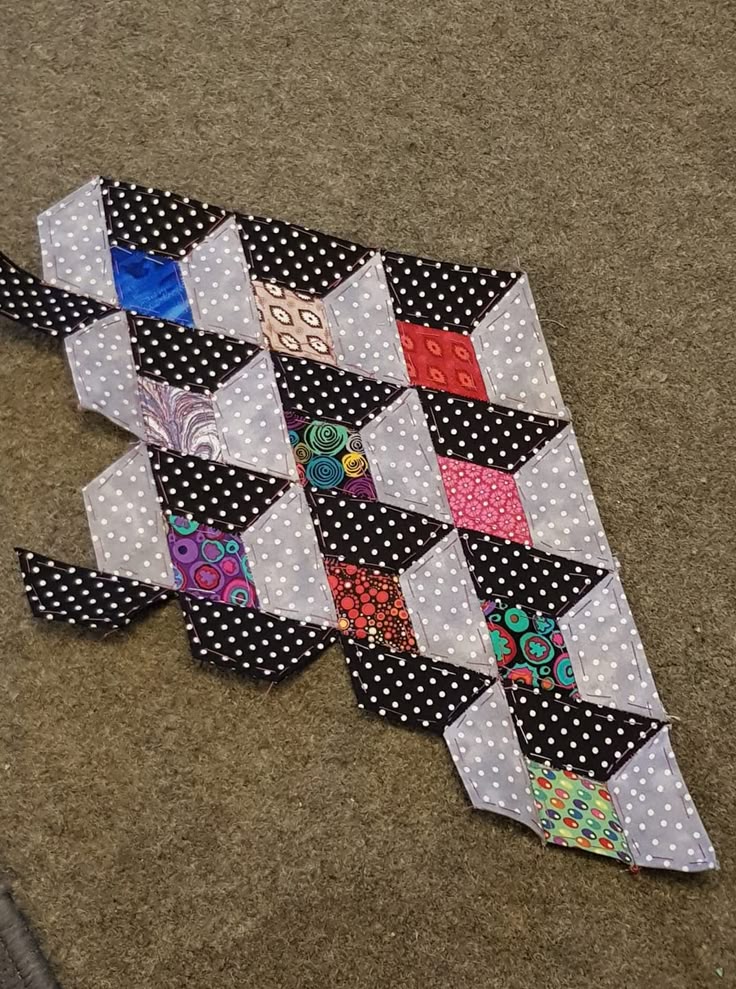
Image From Pinterest
Selecting the right fabrics is essential to bringing the Diamond Garden Quilt – Pattern to life. The “diamond” creates the structured shape, while the “garden” theme allows for color freedom and creativity.
Start by choosing a color palette inspired by nature — think spring florals, leafy greens, sky blues, and warm neutrals. You can also take a modern route with high contrast combinations like black, white, and pops of bold florals.
For the diamond shapes, solids or tone-on-tone prints work well. These fabrics will define the geometry of the quilt, so choose shades that contrast gently with the floral or garden prints you use in the background.
If you want to highlight a garden theme, incorporate floral fabrics, vine motifs, or leaf prints for the surrounding pieces. This contrast between organic patterns and clean diamond lines gives the quilt its signature look.
Use high-quality quilting cotton for durability and ease of sewing. Pre-wash your fabrics if they are likely to shrink, especially if mixing fabric types.
Fat quarters and jelly rolls are great for this pattern, especially if you enjoy scrappy quilting styles. They allow for a diverse mix of prints while keeping the palette cohesive.
Lay out your fabrics together before cutting to ensure harmony. A design wall or digital quilt planner can help visualize your final layout and avoid clashing tones.
Now let’s dive into the block construction — the heart of the Diamond Garden Quilt – Pattern. Precision is key when working with diamond shapes, so careful cutting and consistent seam allowances are important.
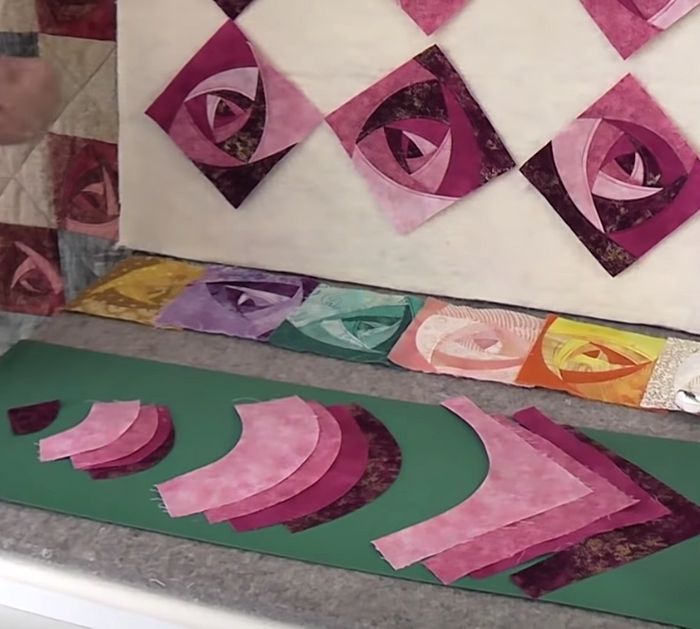
You’ll start by cutting diamonds from fabric strips using a 60-degree ruler or a diamond quilting template. Most diamonds are cut from 2.5″ or 3.5″ strips, depending on your desired block size.
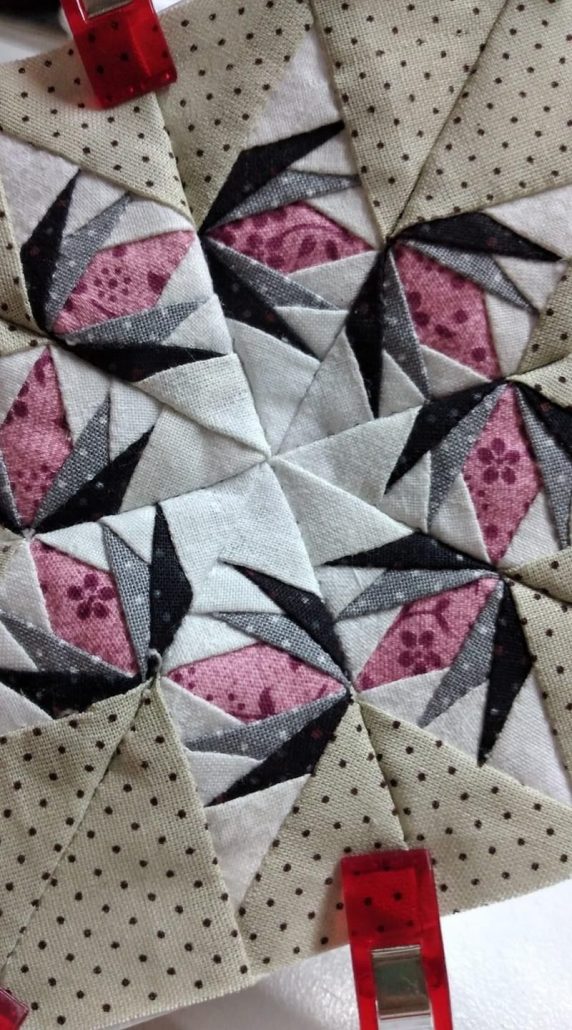
Each block typically contains a central diamond surrounded by triangular or hexagonal pieces that form a flower-like or star-shaped frame. This is where the “garden” effect comes to life.
To piece the blocks accurately, always match the points of the diamonds with the edges of adjacent triangles. Use pins or fabric clips to hold the pieces in place before stitching.
A quarter-inch seam allowance is essential. Press seams open or to one side as you go, depending on your nesting preferences. This helps reduce bulk and keeps your blocks flat.
Chain piecing can save time if you’re making multiple identical blocks. Prepare all pieces ahead of time and sew them assembly-line style.
Once you’ve completed the blocks, trim them to uniform size. This step ensures that they fit together perfectly in the final quilt layout, especially when alternating diamond orientation or color schemes.
With your blocks complete, the next step in the Diamond Garden Quilt – Pattern is assembling the quilt top. This stage is where your artistic choices in layout and spacing come together.
Decide whether to arrange the blocks in rows, diagonals, or an offset layout. Diamonds can point vertically, horizontally, or alternate directions to create movement and visual interest.
Use a design wall or floor space to experiment with block placement. Pay attention to how the colors flow — balance bright florals with softer tones to create a natural “garden” feeling.
If you prefer symmetry, consider adding sashing between the blocks. Sashing helps frame each diamond and gives the quilt a cleaner, more organized appearance.
Cornerstones or secondary blocks between sashing strips can add another design element. Use solid fabrics or tiny floral prints to echo your garden theme.
Once you’re happy with the arrangement, begin joining the blocks row by row. Press seams carefully and square up each section before joining the next.
At this stage, you can also decide whether to add borders. A wide border can frame your quilt like a picture, while a narrow border can help tidy the edges and protect seams during quilting.
The final step of the Diamond Garden Quilt – Pattern is quilting and binding. This is your opportunity to enhance the beauty of the design while giving it strength and function.
First, create your quilt sandwich: backing fabric on the bottom, batting in the middle, and your finished quilt top on top. Baste the layers with pins or spray adhesive.
Choose a quilting method that complements your design. Straight-line quilting works well with the diamond shapes, emphasizing their geometry. Free-motion quilting can add floral motifs or vines to support the garden theme.
Quilt along the seams (stitch in the ditch) for a subtle look, or use echo quilting around each diamond to add texture and highlight your piecing.
Once quilting is complete, trim the edges and attach your binding. Use double-fold binding for durability, and choose a fabric that frames the quilt without overpowering it.
Add a label to the back of your quilt with your name, date, and any special notes. This adds a personal touch and is great for gifting or documenting your quilting journey.
Give your finished Diamond Garden Quilt a gentle wash to soften it and remove any marking tools or basting spray. Let it dry flat or tumble on low heat, and your masterpiece is ready to shine.
Q: Is this quilt pattern beginner-friendly?
A: Yes! While cutting diamonds requires some precision, the pattern itself uses basic piecing techniques. Confident beginners can complete it with patience.
Q: Do I need a special ruler to cut the diamond shapes?
A: A 60-degree ruler or a diamond template makes cutting easier and more accurate, but you can also use printed paper templates with careful measuring.
Q: What size should I make my quilt blocks?
A: Blocks can range from 6″ to 12″ finished, depending on your layout. Adjust based on how large or small you want the final quilt to be.
Q: How do I prevent the diamonds from distorting?
A: Handle bias edges gently, press instead of ironing, and avoid stretching. Using starch spray can also help stabilize the fabric.
Q: Can I make this as a scrappy quilt?
A: Absolutely! This pattern looks fantastic with a mix of prints and colors. Just keep a consistent contrast between diamonds and background fabrics.
Q: What kind of quilting designs go best with this pattern?
A: Straight-line quilting, echo quilting, or free-motion floral patterns all work well. Choose a style that complements your fabric and theme.
The Diamond Garden Quilt – Pattern is a beautiful fusion of precision and creativity, offering quilters the chance to play with color, texture, and symmetry. From selecting garden-inspired fabrics to carefully piecing diamonds into stunning layouts, each step of the process brings joy and satisfaction.
We hope this tutorial inspired you to start your own Diamond Garden Quilt! If you try this pattern, please leave a sincere opinion and your suggestions in the comments below. Your feedback helps others and supports our quilting community in sharing and growing together. Happy quilting! 🧵💎🌸