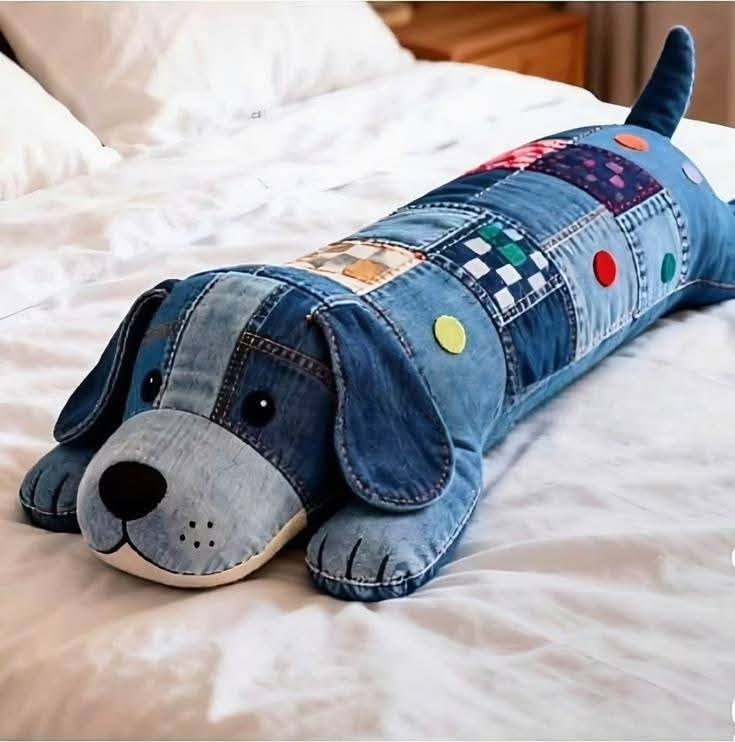
DIY - Quilted Denim Dog Pillow

If you’re passionate about quilting and love mixing beauty with practicality, the Diamond Cathedral Pincushion – Tutorial is exactly the kind of project that will bring you joy. Inspired by the elegant curves of cathedral window quilts, this pincushion merges timeless design with modern charm. It’s not just a pretty sewing accessory—it’s a mini quilted sculpture for your creative space.
The Diamond Cathedral Pincushion is perfect for quilters who enjoy small-scale projects that showcase precision and craftsmanship. It’s a wonderful way to experiment with fabric folds, contrast colors, and dimensional shapes without committing to a large quilt. Plus, who doesn’t love a stylish pincushion sitting pretty on their sewing table?
This tutorial walks you step by step through the process of making your own pincushion, whether for personal use, a thoughtful gift, or to sell at craft fairs. Grab your fabric scraps and let’s create something functional and beautiful!
The Diamond Cathedral Pincushion – Tutorial stands out for its elegant design and clever construction. Inspired by the traditional cathedral window quilt block, this pincushion mimics that layered, curved look in a compact, 3D form.
First, the aesthetic appeal is undeniable. The finished pincushion looks intricate and eye-catching, with its diamond-shaped windows and framed fabrics forming a beautiful geometric pattern. It adds a vintage yet modern flair to any sewing station.
Second, this is a great stash-busting project. It uses small squares of fabric, making it ideal for using up scraps or showcasing precious fabric bits you’ve been saving for something special.
Third, the pincushion is both functional and sturdy. Once filled and stitched shut, it maintains its shape and holds pins, needles, or even small scissors with ease. You can even weight it with rice or crushed walnut shells to keep it stable on your table.
Another reason to love this project is that it’s portable and quick to make. Unlike larger quilts, you can start and finish this pincushion in an afternoon. It’s a perfect weekend project for quilters on the go or those looking to unwind with something small and satisfying.
Lastly, it’s a fantastic handmade gift. Pair it with matching thread or a mini sewing kit, and it becomes a thoughtful present for any sewing enthusiast.
Before you begin the Diamond Cathedral Pincushion – Tutorial, gather your materials. The project is simple but relies on accuracy and careful folding, so be sure your tools are ready.
Materials:
Tools:
Fabric suggestions:
Use quilting cotton for crisp folds and ease of sewing. You can use solids for a clean modern look or prints for a more eclectic, vintage style. Fussy-cutting motifs for the diamond centers can add a unique touch.
Size options:
The standard pincushion measures about 4” x 4”, but you can easily scale it up or down depending on your preference.
Once your materials are set, it’s time to get started on crafting your very own cathedral-inspired pincushion.
This Diamond Cathedral Pincushion – Tutorial breaks the process down into clear steps. Take your time with folding and pressing, as precision makes all the difference in the final look.
Step 1: Cut your fabric
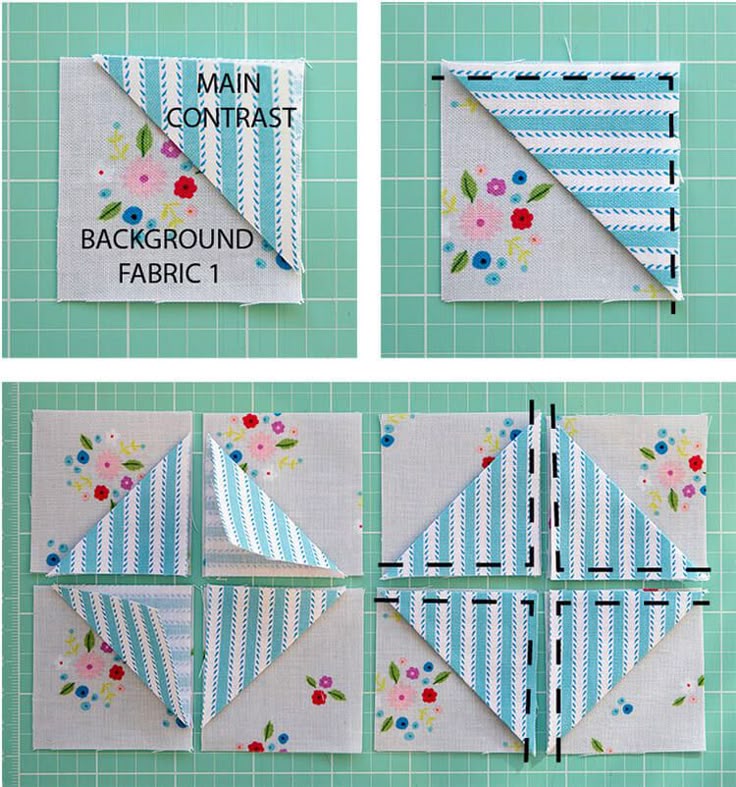
Step 2: Prepare the folded windows
Step 3: Arrange and sew the top panel
Step 4: Assemble the pincushion
Step 5: Fill and close
Step 6: Optional embellishment
Your elegant Diamond Cathedral Pincushion is now complete!
One of the joys of working through this Diamond Cathedral Pincushion – Tutorial is how easily it can be personalized. You can adapt it in countless ways to suit your taste or match your sewing space.
Play with color schemes:
Try contrasting dark frames with bright centers, or choose soft neutrals for a minimalist look. Seasonal fabrics make it easy to create holiday-themed pincushions.
Use decorative stitching:
Instead of a plain topstitch, use your sewing machine’s decorative stitches to outline the diamond centers. Metallic thread can add shimmer and elegance.
Add embroidery details:
Embroider small motifs inside the diamond panels for a more delicate, handmade appearance. Think tiny flowers, initials, or stars.
Change the shape:
Try making a hexagon or octagon variation for an even more complex cathedral design. This is a fun challenge for intermediate sewists.
Make a matching set:
Create multiple pincushions in different colorways and sizes. Stack them together or store them in a quilted basket for a coordinated sewing room accessory.
Turn it into an ornament:
With a loop attached, your pincushion can double as a quilted ornament or scented sachet if filled with lavender.
The only limit is your creativity—every version is a beautiful expression of your style and skill.
Is this pincushion difficult to make?
Not at all! While it looks intricate, the steps are quite beginner-friendly. The key is in the folding and pressing, not complex stitching.
Can I sew it entirely by hand?
Yes, you can! Hand stitching works well for small projects like this, especially if you want to add delicate details or work without a machine.
What’s the best filling to use?
Polyester fiberfill is soft and lightweight, while crushed walnut shells offer weight and hold pins more securely. Rice or sand can also work, but make sure to double-line the interior.
Can I wash the pincushion?
Spot cleaning is best, especially if using non-washable fillings. Choose washable fabrics if you expect it to get dirty over time.
How can I make it firmer?
Add interfacing to the fabric squares or stuff more firmly. Using a denser filler like walnut shells also increases firmness.
Can I sell pincushions made from this pattern?
Yes! This project is great for craft fairs or online shops. Just be sure to credit the source of your inspiration if the pattern is designer-made.
The Diamond Cathedral Pincushion – Tutorial offers a rewarding and creative project for quilters and sewists of all levels. With its eye-catching design, practical purpose, and endless customization options, this pincushion turns a simple sewing tool into a piece of quilted art.
Whether you’re using it yourself, giving it as a handmade gift, or adding it to your craft fair table, the results will be as beautiful as they are functional. You’ll gain quilting experience, enjoy a relaxing creative process, and end up with a pincushion that’s uniquely yours.
Have you tried this tutorial? Share your experience below! We’d love to hear your thoughts, see your creations, and read any suggestions you have for fellow makers. 🧵💎🪡