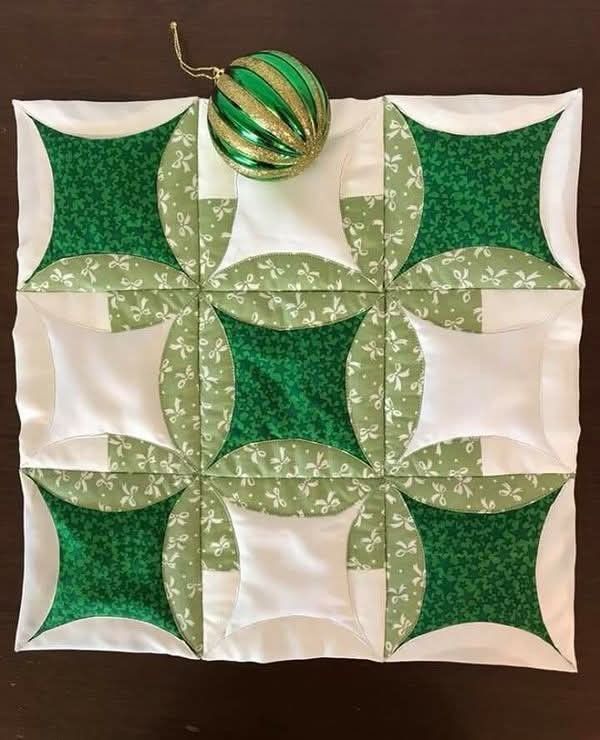
Cathedral Window Block – PATTERN


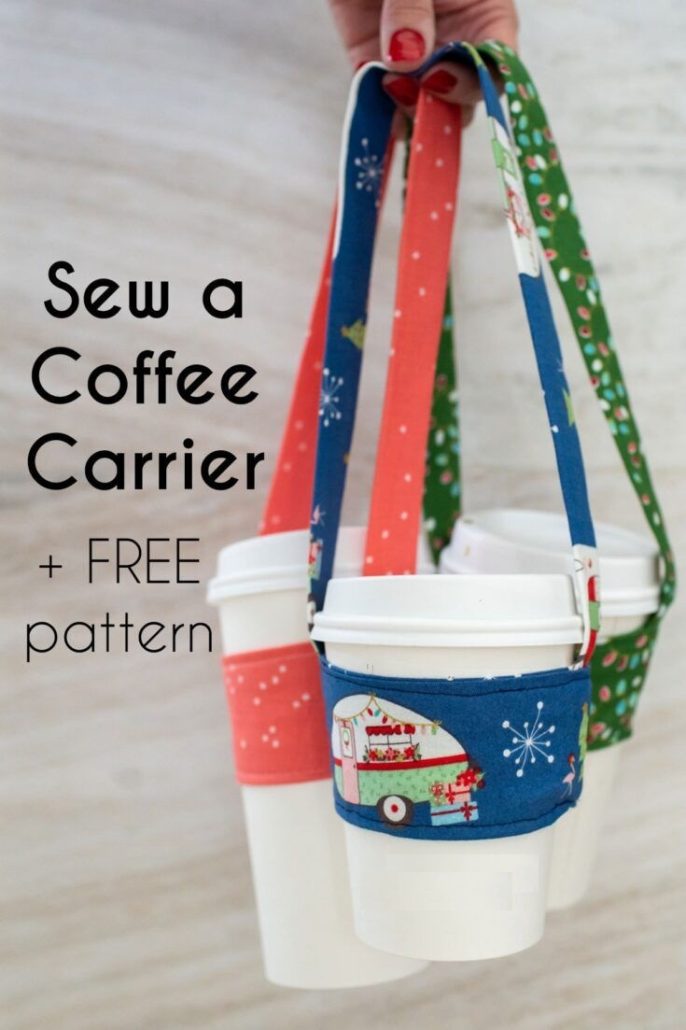
The Coffee Cup Carrier – TUTORIAL is the perfect solution for anyone looking to carry their hot or cold beverages in style, comfort, and convenience. Whether you’re a coffee lover on the go or simply want to protect your hands and cup while traveling, this free quilt pattern tutorial offers a fun and practical project for quilters of all levels. In this guide, we will explore everything you need to know to create your own beautiful and reusable coffee cup carrier at home.
The beauty of this DIY project lies in its functionality and design simplicity. The Coffee Cup Carrier – TUTORIAL uses basic quilting and sewing skills but results in a very professional-looking and useful item. You can customize the carrier with your favorite fabric prints, making it a thoughtful handmade gift for loved ones, or even a stylish accessory for your own morning routine.
In addition to being eco-friendly and stylish, this quilt pattern helps reduce waste from single-use cup sleeves. It’s also a fantastic way to use up fabric scraps from previous quilting projects. Let’s dive into this fun and easy project!
To complete the Coffee Cup Carrier – TUTORIAL, gather the necessary materials and tools before getting started. These are items commonly found in your sewing room or craft kit.
Start with your favorite fabric scraps or fat quarters. You’ll need two pieces of coordinating cotton fabric — one for the exterior and one for the lining. Using quilted fabric or batting between layers will provide extra insulation and structure.
You’ll also need fusible interfacing or a small piece of quilt batting. These materials give the carrier its shape and protect your hands from hot drinks. Lightweight interfacing works well if you want a more flexible finish, while batting adds thickness and stability.
Other essential tools include scissors or a rotary cutter, a quilting ruler, and straight pins or sewing clips. A sewing machine with a basic straight stitch setting will be sufficient to complete this project with ease.
Don’t forget matching thread to complement your fabric choices. Decorative topstitching can add a professional touch, especially if your thread contrasts subtly with the fabric.
Lastly, consider adding a small handle or loop to your carrier. You can use ribbon, fabric scraps, or bias tape for this, making the design more functional for carrying or hanging.
Once you have everything in place, preparing your fabric and cutting the correct sizes is the next important step before stitching.
Now that your materials are ready, let’s get into the steps of creating the Coffee Cup Carrier – TUTORIAL. Each step is designed to be easy to follow, even for beginners.
First, cut two rectangular pieces of fabric measuring about 11” x 4.5”. One will be the exterior, and the other will be the lining. Also, cut one piece of batting or interfacing the same size.
Layer the exterior fabric right-side down, then place the batting or interfacing on top. Finally, add the lining fabric right-side up, creating a sandwich. Pin the layers together to keep them aligned while sewing.
Using your sewing machine, quilt straight lines across the fabric sandwich. This not only holds the layers in place but also adds a beautiful quilted texture to the piece.
Next, fold the rectangle in half with the right sides facing each other, and stitch the short sides together to form a loop. This will become the body of your cup carrier.
To form the handle, use a 7” strip of ribbon or fabric, fold it in half, and insert it between the layers before sewing the final edge. This handle will be stitched in place when you close the carrier loop.
Finally, turn the carrier right-side out and press it with an iron. Topstitch around the top and bottom edges for a clean, finished look.
Personalizing your Coffee Cup Carrier – TUTORIAL is one of the most enjoyable parts of the process. There are countless ways to make this pattern your own.
Choose fabric that matches your style or mood. From bold prints and florals to minimalist solids or geometric patterns, anything goes. This is a great opportunity to use themed fabrics for holidays or seasons.
You can also add embellishments like embroidery, buttons, or appliqué to make your carrier unique. For coffee enthusiasts, try adding a coffee bean or cup design using fabric paint or stitching.
Monogramming your cup carrier with an initial or name adds a lovely touch, especially if you’re making it as a gift. Personalization makes the item more meaningful and useful.
If you have extra quilt blocks or orphan blocks left from previous projects, this pattern is a great way to repurpose them creatively.
Consider making a matching set — pair your coffee carrier with a mug rug or mini fabric coaster using the same fabrics for a cute gift bundle.
Lastly, you can even vary the shape and size slightly to accommodate different cup types, like travel mugs or tumblers, with a bit of experimentation.
One of the biggest advantages of making your own Coffee Cup Carrier – TUTORIAL is that it’s reusable and environmentally friendly. Caring for your handmade carrier is simple.
Wash your cup carrier gently by hand or in the washing machine using a mild detergent. Always lay flat to air dry, which helps maintain its shape and fabric quality.
If you use quilt batting inside, avoid high heat or harsh spinning cycles during washing. Spot cleaning also works well for small stains or spills.
Because it’s reusable, this quilted carrier reduces the need for disposable cardboard sleeves, helping you cut down on daily waste. It’s a small change that adds up over time.
You can keep one in your bag, desk drawer, or car so that it’s always available when you stop for your favorite coffee or tea.
These carriers are also excellent for use at home or in the office. They protect your hands and surfaces from hot drinks and spills, adding both safety and style.
By making your own coffee accessories, you’re supporting slow fashion, thoughtful living, and a greater appreciation for handmade crafts.
1. What size coffee cups does this carrier fit?
The pattern fits standard 12 to 16 oz takeaway cups, but you can adjust dimensions slightly to fit larger or smaller cups.
2. Can I use flannel or other fabric types?
Yes! Cotton is preferred, but flannel, denim, or linen can also work. Make sure the fabric is washable and heat-resistant.
3. Is the pattern beginner-friendly?
Absolutely. This is a great first quilting project and helps beginners practice cutting, layering, and basic machine stitching.
4. Do I need a sewing machine?
While a sewing machine makes the process faster, you can complete this project with hand stitching if you prefer.
5. Can I sell carriers made from this pattern?
Yes, as long as it’s a free public pattern and you’re making items by hand, many creators allow small-batch sales. Be sure to credit the original designer when possible.
6. What other items can I make to match?
Mug rugs, fabric coasters, tea cozies, and utensil holders are great complementary items to make with the same fabrics.
Creating your own Coffee Cup Carrier – TUTORIAL is more than just a sewing project — it’s an opportunity to reduce waste, express your creativity, and make daily life a little more beautiful. This free quilt pattern allows you to repurpose fabric, practice your skills, and enjoy the benefits of handmade functionality. We hope you’ve found this tutorial useful and inspiring.
We’d love to hear from you — leave your honest thoughts, share your experience, or suggest other project ideas in the comments. Let’s keep sewing and sipping sustainably!