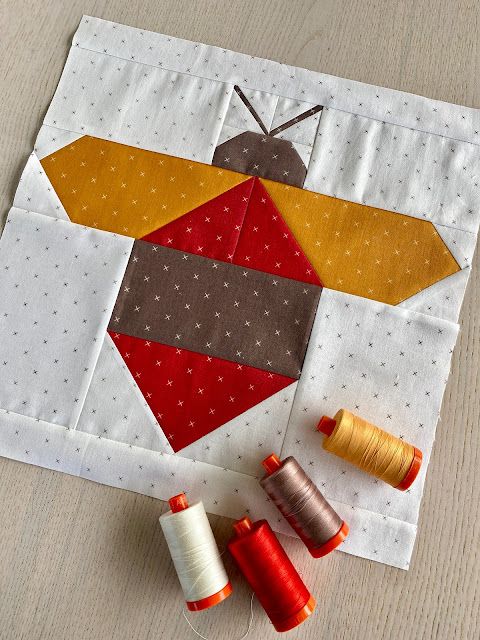
Buzzy Bee Block – TUTORIAL

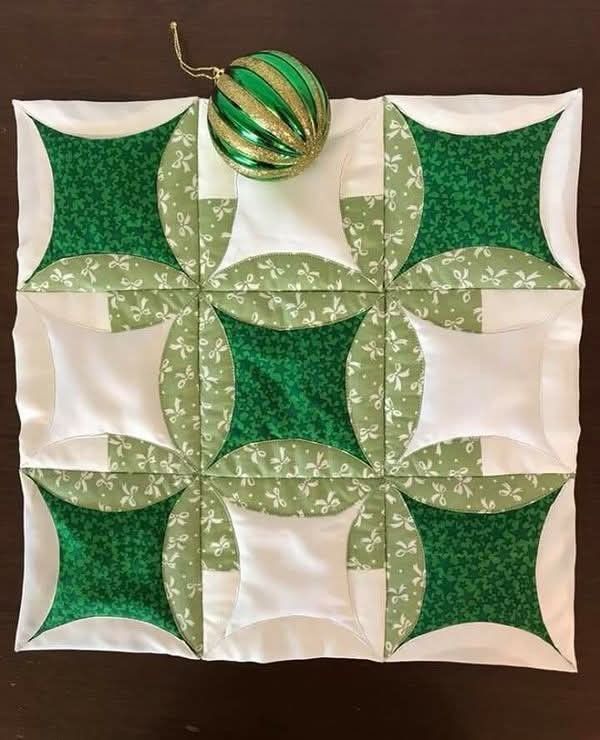
The Cathedral Window Block – PATTERN is one of the most timeless and elegant quilt designs ever created. Known for its intricate, three-dimensional appearance, this block beautifully mimics the look of stained-glass windows found in old cathedrals. With its overlapping fabric folds and carefully constructed layers, it’s a quilt pattern that combines artistry and craftsmanship in every stitch. Unlike traditional patchwork blocks, the Cathedral Window is sewn in a way that encloses raw edges, creating a polished, dimensional design that stands out both visually and texturally.
The Cathedral Window Block – PATTERN is perfect for quilters who enjoy slow, mindful stitching. While it may seem complicated at first glance, it’s actually built from simple folded squares and hand or machine stitching techniques. The result is an intricate-looking quilt that can be used for pillows, wall hangings, table runners, or even full-size quilts. Each “window” allows you to showcase beautiful fabric scraps, making it an excellent project for using your favorite prints in a creative and meaningful way.
In this tutorial, we’ll explore how to make your own Cathedral Window Block – PATTERN, step-by-step. From choosing the right fabrics to assembling and pressing each section, this guide will help you master the technique while keeping your project clean and beautiful. Whether you are a beginner eager to learn a classic design or an experienced quilter looking for your next masterpiece, this pattern will elevate your quilting skills and ignite your creativity.
The secret to a stunning Cathedral Window Block – PATTERN lies in your fabric selection. The design relies on contrast, so you’ll want to choose a solid or light-colored background fabric paired with bold, patterned prints for the windows. White, cream, or light gray cotton works perfectly as the base, creating a clean frame for your “stained-glass” windows.
Cotton fabric is the ideal choice for this pattern because it holds folds and creases well, ensuring crisp, even shapes throughout your block. Avoid stretchy or slippery fabrics like jersey or silk, as they make it harder to maintain the structure of the window design.
In addition to your fabric, you’ll need a rotary cutter, self-healing cutting mat, quilting ruler, iron, and thread that matches your background color. Having these tools ready will help you maintain accuracy and precision during each step.
If you plan to make multiple blocks, it’s a good idea to pre-cut all your fabric squares in advance. Consistent sizing will ensure your windows line up evenly once assembled.
A helpful tip is to starch your background fabric lightly before folding—it will make the fabric stiffer and easier to handle as you create your window frames.
With the right materials, your Cathedral Window Block – PATTERN will not only look beautiful but will also last for years as a cherished piece of handmade art.
The Cathedral Window Block – PATTERN begins with a foundation square that is folded and stitched to form a base for the window effect. Start with a large square of background fabric—typically around 9 to 10 inches—since the folding process will reduce its size.
Fold the square in half lengthwise and then crosswise to form creases that divide it into quarters. Bring each corner toward the center, pressing firmly to create a smaller square with four folded edges. This will become the base structure of your window.
Once folded, stitch around the edges to secure the shape. You can do this by hand or with your sewing machine, depending on your comfort level. The goal is to create a neat, firm square that can support the window openings.
Next, fold back the edges of your inner squares to create curved openings resembling cathedral arches. This step gives the block its signature 3D look and forms the framework for your colorful window fabrics.
Take your time aligning the folds and pressing them flat. Consistency in this stage ensures a professional finish and smooth symmetry across your block.
When you finish your first folded unit, you’ll see the beautiful foundation of the Cathedral Window Block – PATTERN come to life. It’s intricate yet calming—a design that rewards precision and patience.
Once your window frames are prepared, it’s time to insert the colorful fabric squares that represent stained-glass panes. Cut small squares slightly larger than the window openings so they can be tucked neatly under the curved edges.
Place a piece of patterned fabric behind each opening, making sure the print is centered and facing outward. Pin it in place or use a dab of fabric glue to hold it temporarily. Then, fold the curved edges of the frame over the printed fabric and hand-stitch or topstitch along the curve.
This technique is what gives the Cathedral Window Block – PATTERN its magical effect. The contrast between the light background and the vibrant window fabrics creates a striking interplay of color and texture.
You can use coordinating or random prints depending on your style. For a cohesive look, choose fabrics from the same color family. For a more eclectic design, mix florals, solids, and geometrics.
When multiple blocks are completed, join them together by stitching along the edges. Align the seams carefully to ensure that the window lines flow smoothly between blocks.
Iron your block gently after each step to keep it flat and well-shaped. The result is a soft, sculptural quilt piece that’s both durable and visually captivating.
The versatility of the Cathedral Window Block – PATTERN makes it a wonderful addition to any quilting project. You can use a single block as a decorative element for small projects or combine several blocks for a larger quilt.
This pattern is perfect for creating pillow covers, tote bags, wall hangings, or table runners. Because it’s thick and double-layered, it doesn’t require batting or backing, making it ideal for lightweight home décor.
If you want to add dimension, consider using textured fabrics or metallic threads to enhance the reflective look of the windows. These small details can elevate your quilt from simple to spectacular.
Personalize your project by adding embroidery stitches or beads inside the windows for extra charm. A few sparkling accents can mimic the look of light streaming through glass.
To preserve your quilt, wash it gently by hand or on a delicate cycle, and always lay it flat to dry. The folds and seams should be treated carefully to maintain their structure.
Whether gifted or displayed in your home, your Cathedral Window Block – PATTERN creation will be admired for its timeless beauty and skilled craftsmanship.
1. Is the Cathedral Window Block difficult for beginners?
While it requires patience, it’s suitable for confident beginners. The folding and stitching techniques are simple once you understand the structure.
2. What fabric size should I start with?
Start with 9–10 inch squares for the background fabric. After folding, your finished block will measure around 4–5 inches.
3. Do I need a sewing machine?
You can complete this pattern by hand or with a machine. Many quilters prefer hand stitching for a more traditional look.
4. How can I make my blocks perfectly even?
Consistent cutting, pressing, and measuring are key. Use a quilting ruler and iron each fold carefully.
5. Can I use scraps for the window fabrics?
Yes! This pattern is excellent for using small fabric scraps, making it both economical and eco-friendly.
6. What projects can I make with Cathedral Window blocks?
You can make quilts, pillows, runners, wall hangings, or even framed art. The pattern adapts beautifully to many creative uses.
The Cathedral Window Block – PATTERN is a masterpiece of quilting tradition and artistry. With its graceful folds, glowing window effects, and endless color possibilities, it remains one of the most beloved designs in quilting history.
PATTERN VIDEO:
Through this tutorial, you’ve learned how to fold, stitch, and assemble your own version of this classic block, creating a piece that blends precision with beauty. Whether you craft one block or an entire quilt, each stitch carries the legacy of handmade excellence. Share your honest thoughts and suggestions below—your feedback inspires more creativity and keeps the art of quilting alive!