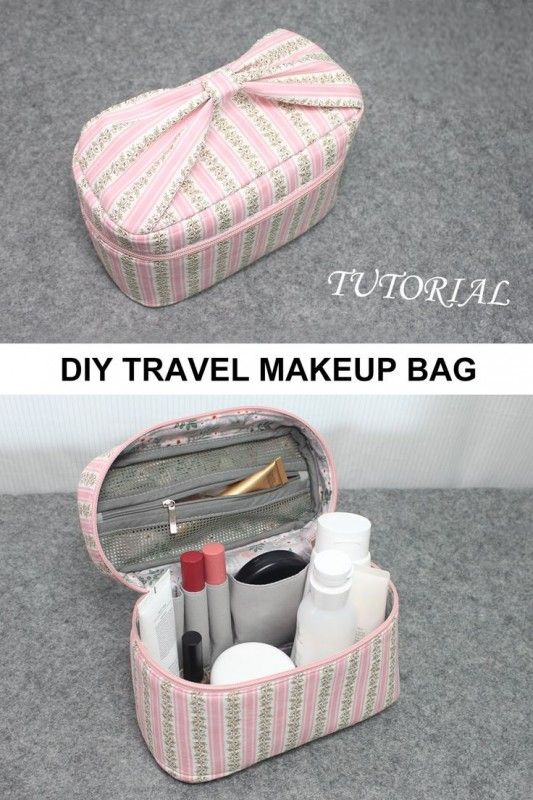
DIY Travel Makeup Bag

The Bannard Hills Block – Tutorial is a wonderful opportunity for quilters to explore both tradition and creativity while improving their sewing skills. This block is admired for its balanced design, structured layout, and versatility in quilt-making projects. By following this tutorial, you will not only learn how to construct the Bannard Hills Block but also discover how to use color, contrast, and precision to bring out the full beauty of this classic quilt block.
When diving into a project like this, many quilters find that the Bannard Hills Block provides the perfect mix of challenge and enjoyment. It uses simple shapes and sewing techniques that can be mastered by beginners while offering enough detail to keep experienced quilters engaged. Because of its structured nature, this block is excellent for experimenting with scrap fabrics, coordinated bundles, or themed designs.
Throughout this Bannard Hills Block – Tutorial, we will walk step by step through the process of cutting, piecing, pressing, and assembling the block. You will also gain helpful tips for achieving accuracy, ways to adapt the block to different quilt patterns, and creative suggestions for finishing touches. By the end of this guide, you will feel confident in making your own Bannard Hills Block and incorporating it into larger quilt projects.
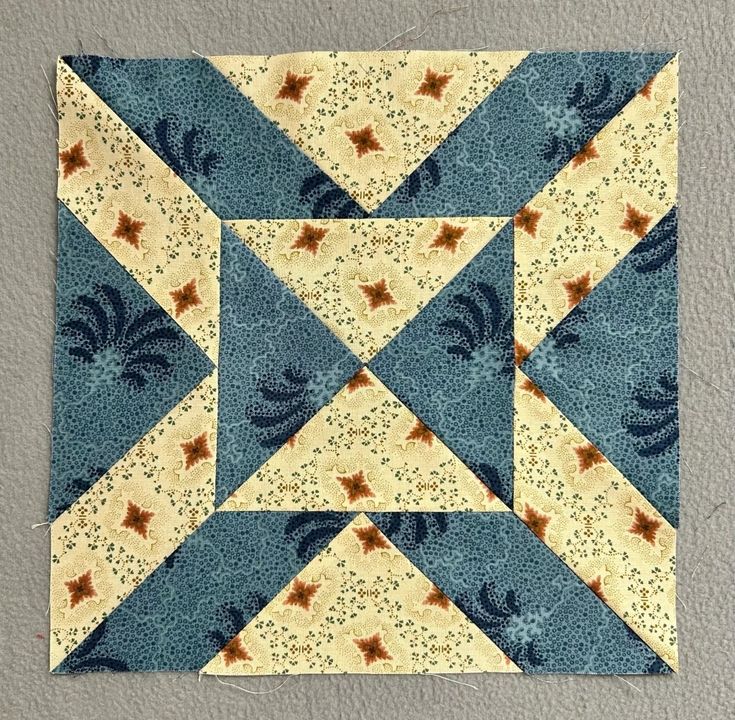
The Bannard Hills Block is a traditional quilt block known for its geometric symmetry and timeless appeal. Quilters have long appreciated its ability to create visual harmony, and when repeated across a quilt top, it produces a captivating effect. Its origins are often traced back to classic American quilt traditions, where blocks like these served as both practical and artistic expressions.
When working on this block, you will quickly notice how the arrangement of shapes creates a balance between strong lines and soft movement. This makes it a versatile option for those who enjoy mixing fabrics or working with contrast. Choosing fabrics with complementary colors can emphasize its geometric beauty, while bolder prints can make each block stand out on its own.
Another appealing feature of the Bannard Hills Block is its adaptability to various quilt sizes. Whether you are making a small wall hanging, a cozy lap quilt, or even a full-sized bedspread, this block can be scaled up or down depending on your needs. Its structure remains visually appealing no matter the dimensions.
Precision is a key part of achieving success with this block. Careful measuring and cutting ensure that all the shapes fit together neatly, while proper pressing techniques make seams align perfectly. Beginners will benefit from practicing these skills, and seasoned quilters will find the repetition both soothing and rewarding.
The Bannard Hills Block also provides an excellent opportunity to learn more about fabric placement. Subtle changes in light, dark, or patterned fabric choices can dramatically shift the block’s appearance. This flexibility means every quilter can bring their own personality into the design.
Finally, as you learn to make this block, remember that quilting is as much about enjoyment as it is about skill. The Bannard Hills Block is forgiving enough to accommodate small mistakes, yet structured enough to encourage precision. This balance makes it a favorite choice for tutorials and workshops.
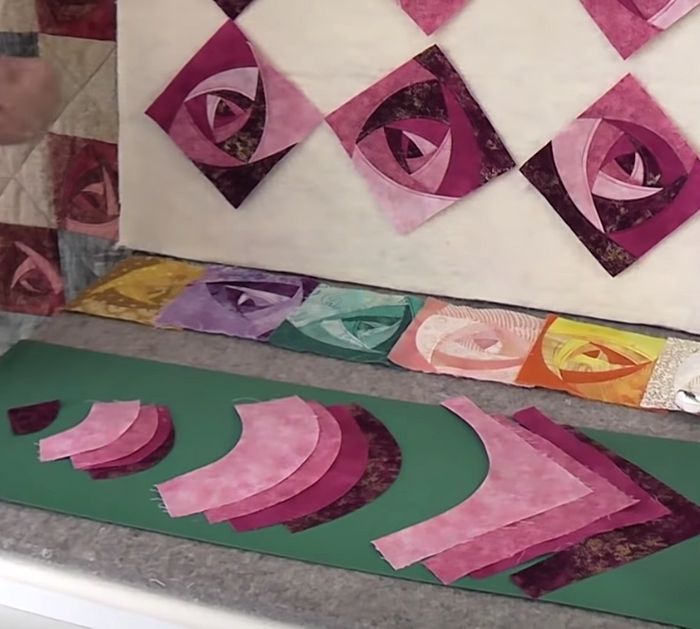
To begin your Bannard Hills Block – Tutorial, gather your materials: cotton fabrics, rotary cutter, ruler, cutting mat, and sewing machine. Having your supplies ready will make the process smooth and enjoyable. Select fabrics with good contrast, so the design stands out clearly once pieced together.
Start by carefully cutting your fabric pieces according to the block’s layout. Accurate cutting is crucial, as it sets the foundation for clean lines and seamless assembly. Take your time with this step, using a sharp rotary blade and ensuring your ruler does not slip. Even small adjustments at this stage can make a big difference later.
Once your pieces are cut, begin piecing them together in sections. The Bannard Hills Block is generally built from smaller units, such as squares, half-square triangles, or strips, which are then joined into larger sections. This step-by-step method ensures accuracy while preventing overwhelm.
Press each seam as you go. Pressing, rather than ironing, is important because it helps set the stitches without distorting the fabric. Consistent pressing creates crisp seams that will align properly when you assemble the block. This is one of the secrets to achieving a polished look.
Assemble the smaller sections into the full block. Work slowly and check alignment as you go. If points or seams do not match perfectly, do not be discouraged. Small adjustments can often be made, and with practice, your accuracy will naturally improve.
The final step is to give your block one last press. This not only flattens the block but also helps set the seams permanently. At this stage, you will see the complete design come to life, giving you a sense of accomplishment and excitement to continue creating more blocks.
The beauty of the Bannard Hills Block lies in its flexibility. By making small adjustments in fabric selection or layout, you can create endless variations that suit different themes or styles. Consider using seasonal colors for holiday quilts, pastel tones for baby quilts, or bold modern prints for a contemporary look.
One creative idea is to mix traditional and modern fabrics in a single quilt. Combining vintage florals with bold geometric prints adds visual interest and makes the quilt truly unique. This fusion of old and new reflects how quilting continues to evolve while honoring its roots.
Experimenting with size can also produce striking effects. Enlarging the Bannard Hills Block creates a bold statement piece suitable for quilt centers, while smaller versions can be used in borders or accents. This scalability makes the block an excellent choice for both small and large projects.
If you enjoy scrap quilting, the Bannard Hills Block is perfect for using up leftover fabrics. By blending a variety of colors and prints, you can achieve a charming patchwork look that feels both resourceful and creative. This is a sustainable way to quilt while celebrating diversity in design.
Another fun variation is to rotate the blocks or alternate their orientation in a quilt layout. This creates secondary patterns and adds depth to the overall design. Playing with symmetry and asymmetry can make your quilt more dynamic and visually engaging.
Finally, don’t hesitate to personalize the block. Adding appliqué, embroidery, or embellishments can make each Bannard Hills Block special. This personal touch transforms the block from a traditional design into a canvas for your creativity.
Accuracy is the foundation of a successful Bannard Hills Block. Always double-check your measurements before cutting and ensure your seams are consistent. A quarter-inch seam allowance is the standard for quilting, and sticking to it will help keep your blocks uniform.
If you notice your seams not aligning properly, consider using pins or clips more frequently. They help hold pieces in place and prevent shifting as you sew. Taking the time to pin carefully often saves time later when assembling larger sections.
Pressing remains one of the most important steps. Many quilting issues, such as bulky seams or distorted shapes, can be avoided with careful pressing. Use steam if needed, but always test your fabric first to ensure it can handle the heat.
Don’t be discouraged by small imperfections. Quilting is a learning process, and each block you make contributes to your overall skill. Focus on progress rather than perfection, and remember that handmade quilts are valued for their unique charm.
If you find yourself struggling with color choices, try laying out your fabrics before cutting. Seeing how the colors interact in a mock arrangement can give you confidence in your selections and prevent disappointment later.
Finally, practice makes a noticeable difference. The more Bannard Hills Blocks you create, the more comfortable you will become with the process. Over time, you will naturally achieve greater precision, speed, and creativity in your quilting.
What is the Bannard Hills Block?
The Bannard Hills Block is a traditional quilt block design known for its symmetry, balance, and adaptability. It is widely used in various quilt projects.
Is the Bannard Hills Block suitable for beginners?
Yes, this block is beginner-friendly because it uses simple shapes and piecing techniques, though it also offers depth for advanced quilters.
What size can I make the Bannard Hills Block?
You can scale the block to different sizes depending on your quilt. Common sizes range from 6 inches to 12 inches, but it can be enlarged or reduced as needed.
What fabrics work best for this block?
Cotton quilting fabrics are ideal. Choose fabrics with good contrast to highlight the geometric design of the Bannard Hills Block.
How do I ensure accuracy when sewing this block?
Use a consistent quarter-inch seam allowance, press seams carefully, and measure your fabric pieces precisely before assembly.
Can I use scraps to make this block?
Absolutely. The Bannard Hills Block is a great way to use fabric scraps, creating a charming patchwork look full of character.
The Bannard Hills Block – Tutorial shows how this timeless quilt block can be both approachable and rewarding. With clear steps, creative possibilities, and helpful tips, quilters of all levels can enjoy making this block and incorporating it into their projects.
Whether you prefer traditional patterns or modern variations, the Bannard Hills Block offers endless potential for creativity. We hope this guide inspires you to try the block and explore its many possibilities. Please share your honest opinion about this tutorial and let us know your suggestions for future quilting projects—we’d love to hear from you.