Summer Solstice Quilt – PATTERN


Nothing captures the beauty of the season quite like Autumn Details for your Table – TUTORIAL. As the air grows crisp and the leaves turn vibrant shades of red, orange, and gold, bringing that cozy autumn charm into your home becomes a delightful creative project. This tutorial will teach you how to design elegant and warm table decorations inspired by fall’s natural beauty. Whether you’re hosting a family dinner, a Thanksgiving feast, or simply want to add a touch of autumn magic to your dining area, this guide will show you exactly how to do it with style and ease.
Creating a beautiful autumn-themed table doesn’t require expensive materials or professional skills — all it takes is a bit of imagination, the right fabrics, and a love for seasonal colors. By following this Autumn Details for your Table – TUTORIAL, you’ll learn to craft charming accents that bring warmth and texture to your dining space. From fabric placemats and quilted coasters to napkin rings and table runners, every element you make will add a personalized, handmade touch to your fall décor.
As you work through this tutorial, you’ll also discover how to combine textures and patterns in ways that highlight the spirit of autumn. Using simple quilting techniques, cozy materials, and natural tones, you’ll transform your table into a welcoming space where guests feel embraced by the season itself. So, let’s get started creating your Autumn Details for your Table – TUTORIAL and bring your fall vision to life!
The first step in creating your Autumn Details for your Table – TUTORIAL is choosing a color palette that embodies fall. Think rich earthy tones like burnt orange, mustard yellow, forest green, and deep brown. These colors blend beautifully together and set the tone for a warm, inviting atmosphere.
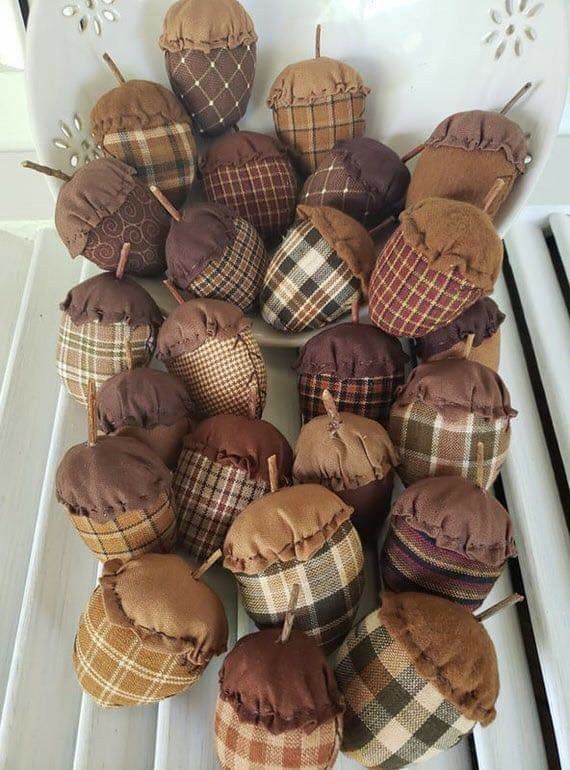
Select fabrics that add texture and depth. Cotton, linen, and flannel are ideal for this project since they hold up well and feel natural. Consider using patterned fabrics featuring leaves, pumpkins, acorns, or subtle plaid designs for a rustic touch.
Before cutting any material, gather your inspiration. You can use nature itself as your guide — take a walk and collect fallen leaves, pinecones, or berries to use as decoration or color references. This will help your handmade table details feel more authentic and grounded.
Once you’ve chosen your colors and fabrics, sketch a rough idea of what you want your table layout to look like. Planning ahead will make the creative process smoother and ensure that all the pieces you make complement each other.
Don’t be afraid to mix and match textures. Combining smooth cotton with soft flannel or rough burlap adds variety and enhances the cozy, autumn feel.
Finally, remember that this project is about expressing your personal style. Whether your fall décor is rustic farmhouse or modern minimalist, these Autumn Details for your Table can adapt beautifully to any home aesthetic.
A table runner is the centerpiece of any autumn table setup, and this Autumn Details for your Table – TUTORIAL wouldn’t be complete without one. Begin by cutting your chosen fabric into long strips — you can use one continuous fabric or piece together smaller scraps for a patchwork look.
Layer your fabric with batting and a backing piece, just like a small quilt. Pin the layers together and start sewing straight or diagonal quilting lines across the surface. This not only secures the layers but also adds texture and a handmade finish.
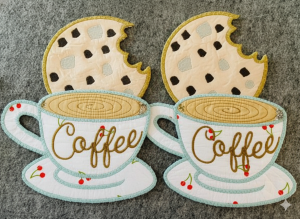
If you prefer a more intricate look, you can incorporate appliqué designs such as leaves or pumpkins along the edges. Use contrasting thread to make your stitches stand out and add more visual interest.
Once you’ve completed your quilting, trim the edges and bind them with a coordinating fabric strip. Bias tape is a great choice for clean and professional edges.
Before placing it on your table, press the table runner with a warm iron to smooth out any wrinkles. A well-pressed runner adds elegance and ensures your hard work shines.
This quilted table runner will instantly elevate your dining space, setting the tone for the rest of your Autumn Details for your Table – TUTORIAL décor pieces.
To continue your Autumn Details for your Table – TUTORIAL, let’s create matching placemats and coasters. These small but impactful pieces tie your table design together and add a polished look to your fall setup.
Start by cutting rectangles for the placemats and squares for the coasters. Use the same fabric combination from your table runner for a cohesive appearance. Layer each piece with batting and a backing fabric.
Sew the layers together using simple quilting lines or decorative stitching. This is where you can play with different thread colors to highlight your fall theme — gold, rust, or cream threads work beautifully.
Add binding around the edges to finish the pieces neatly. You can also add embroidered initials or small appliqué motifs like acorns or maple leaves for an extra personal touch.
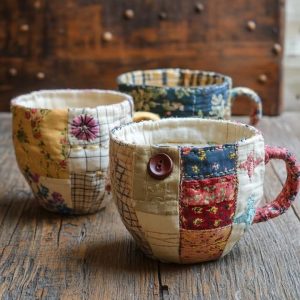
For coasters, keep them small enough to fit under mugs but large enough to showcase your fabric design. These are perfect for protecting your table and adding charm during hot cocoa or tea moments.
Once completed, your set of placemats and coasters will create harmony and balance across your table, perfectly complementing the Autumn Details for your Table – TUTORIAL aesthetic.
No Autumn Details for your Table – TUTORIAL is complete without the finishing details that make everything come together. Handmade napkin rings, candle holders, or natural centerpieces are simple ways to add personality and warmth.
For napkin rings, cut small strips of fabric or burlap and wrap them around your napkins, securing them with twine or a decorative button. You can even attach small fabric leaves or beads for a rustic, festive look.
To create a centerpiece, use a woven basket or wooden tray filled with pinecones, dried flowers, small pumpkins, and candles. Mixing natural textures enhances the seasonal charm and complements your handmade fabric décor.
If you enjoy quilting, try making small patchwork pumpkins or fabric leaves to scatter across the table. These can be reused year after year and will make your guests feel like they’re dining in a cozy autumn retreat.
Add candles or fairy lights to create a warm glow. The lighting will reflect beautifully off the different fabrics, highlighting the textures you’ve carefully crafted.
Finally, step back and admire your work — your table is now a perfect representation of the season, full of handmade details that celebrate the art of creativity and comfort.
Q: Can beginners follow this Autumn Details for your Table – TUTORIAL?
A: Yes! This tutorial is designed for all skill levels. The steps are simple, and you can customize the difficulty based on your sewing experience.
Q: What kind of fabrics are best for autumn table projects?
A: Natural materials like cotton, linen, and flannel are great choices. They’re easy to sew and match the cozy feel of fall.
Q: Do I need a sewing machine to make these projects?
A: A sewing machine will make the process faster, but you can also hand-stitch each item with patience and care.
Q: Can I wash the table runner and placemats?
A: Absolutely! Use gentle detergent and cold water to preserve the colors and textures. Air drying is best to prevent shrinkage.
Q: How can I make my autumn table decorations last longer?
A: Store them flat in a cool, dry place and avoid direct sunlight to prevent fading. These handmade pieces can last for years with proper care.
Through this Autumn Details for your Table – TUTORIAL, you’ve learned how to create beautiful handmade décor that reflects the heart of the season. From choosing your fabrics and colors to stitching placemats and designing a warm centerpiece, every detail adds to the magic of autumn gatherings.
Now it’s your turn to bring your creativity to life. We’d love to hear your thoughts — share your experience, ideas, or any suggestions for future tutorials. Your feedback helps inspire more seasonal designs and keeps the spirit of crafting alive all year long.


