DIY Travel Makeup Bag

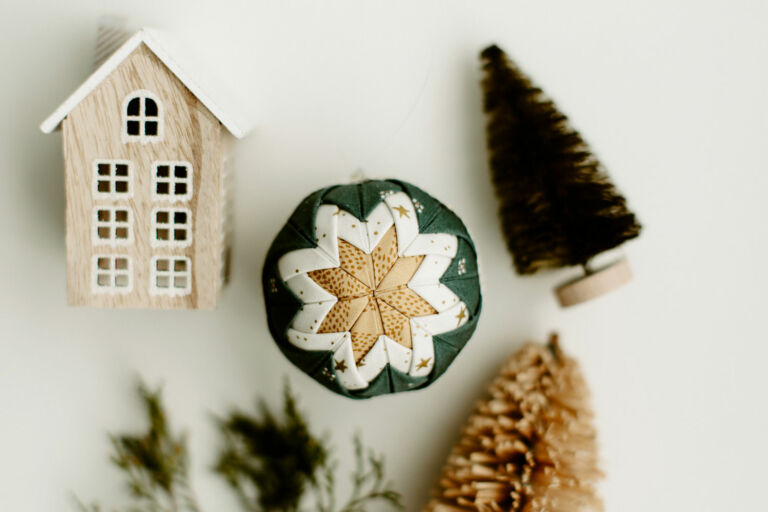
The Autumn Block – TUTORIAL is one of the most charming and heartwarming quilting designs you can create, capturing the warm tones and cozy textures that define the fall season. This pattern blends tradition, creativity, and seasonal inspiration, making it perfect for quilters who want a project that feels both meaningful and beautiful. Whether you’re creating a quilt for home décor, a seasonal wall hanging, or a thoughtful handmade gift, this tutorial will guide you step-by-step through this inspiring design. The Autumn Block – TUTORIAL is also beginner-friendly and offers endless customization options.
By using techniques recommended for modern quilt patterns, this design gives you an opportunity to practice precision, color arrangement, and block assembly. The block can be adapted into larger quilts, table toppers, runners, or used as stand-alone decorative pieces. The key to mastering the Autumn Block – TUTORIAL is combining the right fabrics and following the construction process with care. With warm tones such as gold, brown, rust, and deep green, your block will truly reflect the beauty of autumn.
This article will walk you through everything you need to know about creating your own Autumn Block – TUTORIAL, from material selection to tips for perfecting your seams and color combinations. Whether you are a beginner or an experienced quilter, you will find valuable insights to elevate your work and enjoy this seasonal pattern to the fullest.

The Autumn Block – TUTORIAL is inspired by the natural changes of fall, blending geometric elements with organic color choices. It brings together simple shapes that create harmony and visual movement. This makes the block ideal for projects that need structure but also want to convey softness and warmth.
One of the main advantages of this pattern is its versatility. You can scale the block up or down depending on your project, making it suitable for both large quilts and small décor pieces. The design works beautifully with textured fabrics such as batiks or tone-on-tone prints.
When working on this block, fabric selection plays a crucial role. Choose fabrics with enough contrast so your shapes don’t blend together. A mix of warm tones and earth-based neutrals helps highlight the seasonal theme.
The Autumn Block – TUTORIAL also allows quilters to experiment with secondary patterns. When joined together, the blocks can form subtle stars, leaves, or diamond shapes depending on your arrangement.
This block is also a great opportunity to practice accurate cutting and piecing. The cleaner your seams, the more defined your final block will look. Even small improvements in accuracy can make a big difference.
Overall, understanding the structure and intention behind this block will help you create a beautiful and cohesive quilt design inspired by autumn itself.
To begin your Autumn Block – TUTORIAL, the first step is gathering the right materials. High-quality quilting cotton is recommended to keep your block crisp and durable. The fabric should also press easily and hold its shape well.
You’ll need fabrics in warm fall colors. Shades such as pumpkin orange, deep red, olive green, mustard yellow, brown, and cream work particularly well. You can choose a monochromatic palette or mix several tones for a more vibrant effect.
A rotary cutter, cutting mat, and quilting ruler are essential for achieving clean, accurate cuts. Precision in cutting is especially important for this block, as the shapes need to fit together perfectly.
Good-quality thread in neutral tones is also recommended. Neutral thread blends well with autumn fabrics and helps maintain a clean overall appearance.
You will also need an iron and ironing board. Pressing each piece during construction is vital for achieving sharp seams and a smooth finish.
Finally, have sewing pins or clips on hand to keep your pieces aligned during stitching. This simple addition ensures better accuracy and cleaner results in your Autumn Block – TUTORIAL project.
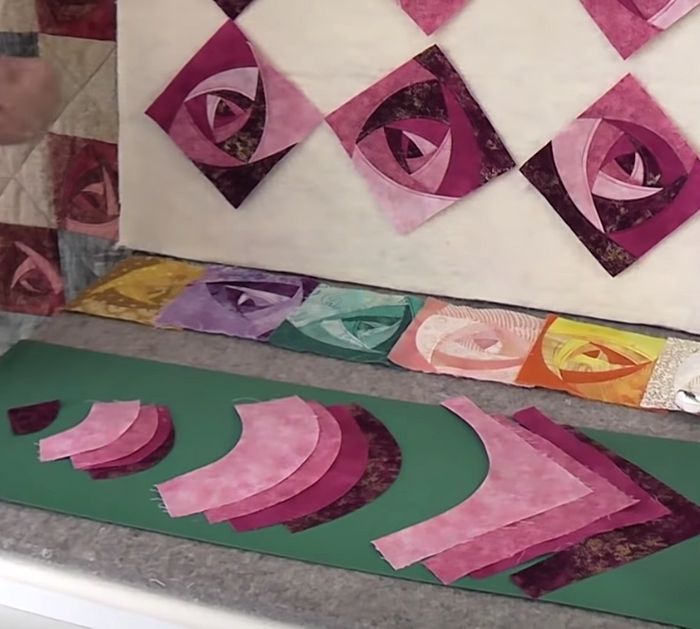
To start assembling the Autumn Block – TUTORIAL, begin by cutting all your fabric pieces according to your chosen size. Take your time during this step to ensure each piece matches the measurements exactly.
Next, arrange your fabrics before sewing. Laying out the block visually helps you check color balance and avoid mistakes before stitching begins. This step is especially important with autumn-colored fabrics.
Begin by sewing smaller units such as half-square triangles, squares, or rectangles, depending on your block variation. Press each unit carefully to maintain clean lines.
Once your smaller units are assembled, join them to create larger segments of the block. Work slowly and check alignment frequently to keep your seams straight and accurate.
When assembling the final block, sew each row one at a time and press toward the darker fabric to avoid shadowing or bulk. This method ensures a tidy structure and smooth finish.
Finally, square up your block to the desired size. A well-trimmed block helps everything fit together perfectly when creating your final quilt or seasonal décor.
There are countless ways to enjoy your completed Autumn Block – TUTORIAL. One of the most popular uses is incorporating it into a full-size quilt. The repeating pattern creates a stunning seasonal piece.
You can also use the block as the centerpiece of a fall-themed table runner. Its warm tones look beautiful in dining rooms during autumn celebrations.
Another common option is creating a wall hanging. The block’s seasonal charm brings warmth to any room and can be displayed year after year.
Smaller blocks can be turned into coasters, placemats, or mug rugs. These make thoughtful handmade gifts that reflect the beauty of fall.
You can combine several blocks using different color palettes for a more dynamic and artistic quilt. Mixing deep reds, golds, and browns adds visual interest and depth.
Lastly, the block works perfectly for scrap-busting projects. If you have leftover autumn-colored fabrics, this pattern gives them new life in a creative and meaningful way.
1. Can beginners make the Autumn Block?
Yes, this pattern is very beginner-friendly and uses basic quilting techniques.
2. What fabrics work best for this block?
Warm autumn tones such as orange, red, yellow, brown, and olive green work beautifully.
3. Can I use scraps for this quilt block?
Absolutely. Scrap fabrics in warm colors are perfect for this project.
4. What size should the block be?
Common sizes are 9”, 12”, or 15”, but you can adjust based on your project.
5. Do I need special tools?
A rotary cutter, ruler, and cutting mat help ensure accuracy and clean results.
6. Can I use this block for home décor?
Yes, it’s great for table runners, wall hangings, coasters, and seasonal decorations.
7. What quilting style complements this block?
Straight-line quilting or gentle curves both enhance the cozy autumn aesthetic.
8. Can I mix different autumn colors in one block?
Yes, combining multiple tones adds depth and makes the design more dynamic.
9. How do I keep my seams accurate?
Cut carefully, use pins or clips, and press each seam as you sew.
10. Can the block be enlarged?
Yes, simply scale up the fabric pieces to create a larger focal design.
Creating the Autumn Block – TUTORIAL is a rewarding and creative experience that captures the warmth and beauty of the fall season. With the right fabrics, accurate cutting, and a thoughtful approach to assembly, you can make stunning quilt blocks that enhance any project.
This article covered materials, construction, design ideas, and helpful tips so you can complete your block with confidence. I would love to hear your honest opinion and suggestions—feel free to share your thoughts about this tutorial!