The Strawberry Quilt Pattern is a delightful and whimsical design that brings the sweetness of summer and the charm of fresh fruit to your quilting projects. Inspired by the iconic shape and color of strawberries, this quilt pattern can add a playful and vibrant touch to your home décor, whether you’re creating a full quilt, a table runner, or a set of placemats.
The Strawberry Quilt Pattern is perfect for quilters of all levels, as it uses simple techniques that can be easily mastered with a little practice.
In this tutorial, we’ll guide you step-by-step through creating the Strawberry Quilt Pattern, from fabric selection to piecing and finishing your quilt. This tutorial will ensure that you can make your own charming strawberry-inspired quilt with ease.
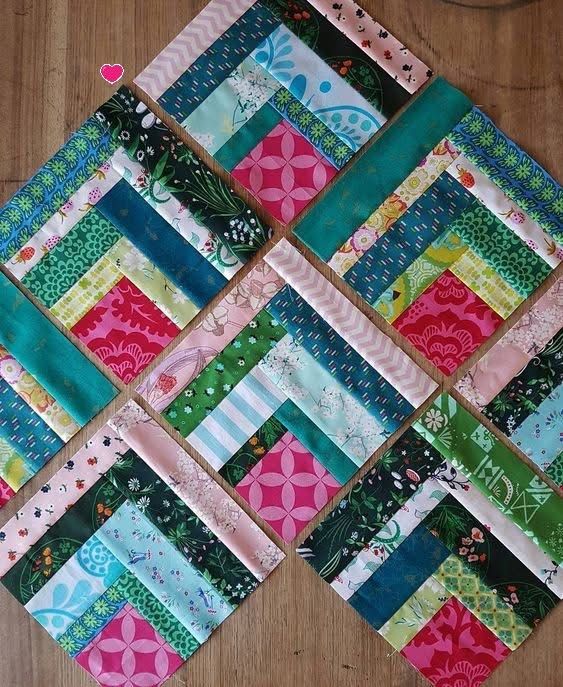
Image From Pinterest
1. Materials Needed for the Strawberry Quilt Pattern
Before starting your Strawberry Quilt Pattern, it’s important to gather all the necessary materials. With the right tools and fabrics, you’ll be ready to create this delightful quilt design. Here’s a list of the materials you’ll need:
SEE OTHER FACE PATTERNS HERE!
- Fabric:
- Red Fabric: For the strawberries, choose a rich red fabric that resembles the color of ripe strawberries. You may opt for a solid red fabric or a small red print for added texture.
- Green Fabric: Use green fabric for the leaves and stems of the strawberries. A solid green or a leafy print fabric would work well for this part of the design.
- Background Fabric: A neutral or light-colored fabric will work for the background, creating a nice contrast with the bright red strawberries. White, cream, or light pastel colors are commonly used.
- Accent Fabrics: For added dimension and detail, you can use other accent fabrics, such as yellow or cream, for the seeds of the strawberries or for the quilt border.
- Quilt Batting: Quilt batting adds structure and warmth to your quilt. Choose the appropriate weight of batting based on the size of your quilt and your desired finished thickness.
- Sewing Machine: A sewing machine will make the piecing process faster and more efficient. If you prefer hand-piecing, you can absolutely do so, but using a machine is the best way to achieve precise seams.
- Rotary Cutter and Quilting Ruler: A rotary cutter and quilting ruler will help you make clean, accurate cuts for the fabric pieces.
- Thread: Choose a neutral or matching thread to blend with your fabrics. You can also use contrasting thread for decorative stitching if desired.
- Quilting Pins: Quilting pins or fabric clips are essential for holding your fabric pieces in place while you sew.
- Iron and Ironing Board: Pressing the seams after each step will ensure that your quilt blocks lay flat and have crisp, clean edges.
- Strawberry Quilt Pattern Template: You can either purchase or create your own strawberry quilt block pattern. A simple strawberry shape consists of a heart-shaped base, with a green leafy top and stems.
2. Step-by-Step Guide to Creating the Strawberry Quilt Pattern
Now that you have your materials ready, let’s dive into the steps to create the Strawberry Quilt Pattern. This design is made up of strawberry blocks that will be pieced together to form your quilt.
2.1. Cutting the Fabric
Start by cutting the fabric pieces according to the dimensions provided in the pattern. If you’re designing your own template, cut fabric for the following components of the strawberry block:
- Strawberry Body: Cut red fabric into heart-shaped pieces for the strawberry body. You will need several of these pieces, depending on the number of blocks you want to make.
- Leaves and Stems: From the green fabric, cut pieces to create the leaves and stems. You can use a small square or rectangular piece for the stem and several triangular pieces for the leaves.
- Seeds: For the seeds, cut small yellow or cream-colored fabric pieces, either in a circular or oval shape. These will be sewn onto the strawberry body to give the block added detail.
- Background Fabric: Cut your background fabric into squares or rectangles, depending on your design. The size of the background pieces will depend on the finished size of the strawberry block and the overall quilt.
2.2. Piecing the Strawberry Block
Now that your fabric pieces are cut, it’s time to piece the blocks together. Follow these steps to assemble the strawberry blocks:
- Sew the Strawberry Body: Start by sewing the red heart-shaped pieces together to form the body of the strawberry. You can either use a simple patchwork technique to sew the pieces together or use appliqué to stitch the strawberry body onto the background fabric.
- Add the Leaves and Stem: Once the strawberry body is complete, add the green leaves and stem to the top of the strawberry. You can arrange the leaves in a cluster or in a more whimsical design, depending on the look you’re going for.
- Sew the Seeds: Add the small seed pieces to the body of the strawberry. Place them randomly on the strawberry block, sewing them onto the fabric. You can use a simple straight stitch or an appliqué technique to attach the seeds.
- Attach the Background Fabric: Finally, sew the strawberry block onto the background fabric. This background piece will form the base of your quilt block and provide contrast to the vibrant strawberry design.
2.3. Assembling the Quilt
Once you’ve completed several strawberry blocks, it’s time to assemble the quilt:
- Arrange the Blocks: Lay out your blocks in rows, alternating the placement of the strawberry blocks and any other design elements you want to include (such as solid color blocks or pieced blocks). Experiment with the arrangement until you find a layout that you love.
- Sew the Blocks Together: Once you’re happy with the layout, begin sewing the blocks together. Start with the rows and then join the rows together to form the quilt top.
- Add the Border: After the quilt top is assembled, you can add a border around the quilt. The border fabric can be a solid color, a floral print, or a coordinating pattern that complements the strawberries.
- Press the Seams: Press the quilt top to ensure all seams are crisp and clean. This will also help the quilt lay flat.
2.4. Quilting the Strawberry Quilt
With the quilt top complete, it’s time to quilt your strawberry creation. Follow these steps to finish your quilt:
- Layer the Quilt: Lay out your quilt top, quilt batting, and quilt backing fabric. Pin or baste the layers together to hold them in place.
- Quilt the Layers: Use a quilting machine or hand-quilt the layers together. You can choose a simple straight-line quilting pattern, or you can stitch around the strawberries to enhance their design.
- Trim the Edges: After quilting, trim any excess batting and backing fabric to ensure clean edges.
- Bind the Quilt: Finally, add quilt binding around the edges of the quilt. This step will finish off the quilt and give it a polished look.
3. Customizing the Strawberry Quilt Pattern
The Strawberry Quilt Pattern can be customized in many ways to suit your style:
- Use Different Fabrics: Experiment with different fabric combinations, such as using floral prints for the leaves or adding polka dots to the strawberry body for a whimsical touch.
- Change the Quilt Size: Adjust the number of blocks to make the quilt smaller or larger. You can create a mini quilt, a throw, or a full-size bed quilt.
- Add Embellishments: Consider adding embellishments like embroidery, buttons, or lace to the strawberry blocks for additional texture and visual interest.
- Mix with Other Fruit Designs: If you love fruit-themed quilts, you can mix the Strawberry Quilt Pattern with other fruit-inspired patterns like apples, cherries, or lemons for a fun and colorful fruit quilt.
4. Creative Uses for the Strawberry Quilt
Once your Strawberry Quilt is complete, there are many ways to use it:
- Full Quilt: A full strawberry-themed quilt will brighten up any room. Place it on your bed or drape it over a couch for a charming, seasonal look.
- Table Runner: A smaller version of the quilt can be turned into a table runner for a delightful spring or summer centerpiece.
- Pillows: Use a few of the strawberry blocks to create decorative pillows for your living room or bedroom.
- Wall Hanging: Turn your strawberry quilt into a whimsical wall hanging that brings color and charm to any space.
FAQ
1. Can I use any type of fabric for the strawberry quilt?
Yes, you can use various types of cotton fabric, but make sure the fabric is suitable for quilting. Quilting cotton is the best option because it’s durable and easy to work with.
Join Now!!
🌟Join our exclusive Quilt broadcast list on Messenger! Receive the best patterns, tips, and updates directly in your inbox. Our team is ready to send you delightful content that will inspire your projects. Don’t miss this opportunity to stay updated and create amazing pieces. Join now and be part of this passionate quilt community!✨📩
2. What is the best way to cut fabric for the strawberry quilt?
Using a rotary cutter and quilting ruler is the most efficient way to cut fabric accurately. This ensures that your pieces are uniform and precise.
3. How can I make my quilt more unique?
You can add unique touches by experimenting with different fabrics, embroidery, or embellishments like buttons or lace to make your strawberry quilt one-of-a-kind.
4. Can I make this quilt by hand?
Yes, you can hand-pieced the blocks and hand-quilt the layers. However, using a sewing machine will speed up the process and give more accuracy.
5. How do I care for my finished quilt?
Wash your quilt gently on a cold cycle and air dry or tumble dry on low heat. Be sure to use a gentle detergent to preserve the fabrics.
PATTERN HERE
Conclusion
The Strawberry Quilt Pattern is a delightful and vibrant design that adds a touch of sweetness to any quilting project. Whether you are making a full
quilt, a table runner, or a set of pillows, the Strawberry Quilt Pattern will surely brighten up your home with its playful charm.
We hope this tutorial has inspired you to create your own strawberry-inspired quilt. Share your creations with us, and feel free to leave your feedback or suggestions in the comments below. Happy quilting!