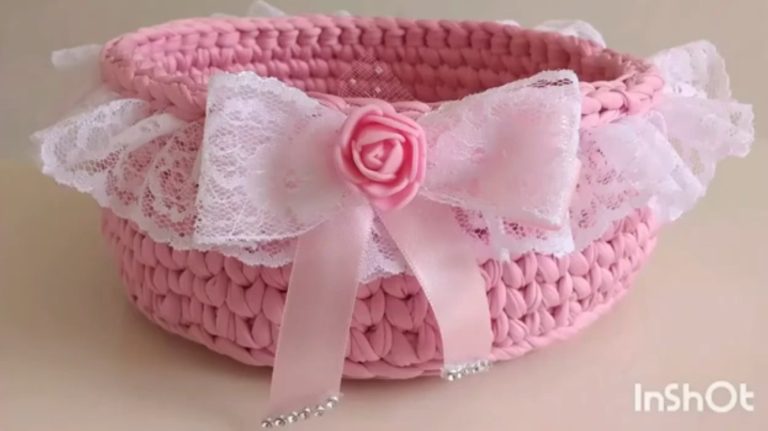
Crocheted Basket - Tutorial

The Two-Needle Poncho for Girls – TUTORIAL is the perfect knitting project for anyone who wants to create something cozy, stylish, and practical for the little ones. This poncho pattern combines simplicity and elegance, making it ideal for both beginners and experienced knitters. Whether you’re looking to make a thoughtful handmade gift or a warm accessory for winter days, this tutorial will guide you through every step of the process with ease and confidence.
Knitting a two-needle poncho for girls is an excellent way to learn new techniques while creating something functional. It’s an accessible project that doesn’t require advanced skills or complex materials. All you need are two knitting needles, your favorite yarn, and a little time to dedicate to this creative and rewarding craft. This tutorial will explain everything clearly, from the materials you’ll need to the final finishing touches that give your poncho a professional look.
By following this Two-Needle Poncho for Girls – TUTORIAL, you’ll not only learn how to knit a poncho but also gain a deeper understanding of how to shape, size, and customize your creation. Whether you want to use bright colors for a fun look or soft pastel tones for a delicate feel, this pattern allows for complete personalization. Let’s explore the materials, techniques, and steps to make this poncho a success.
To start your Two-Needle Poncho for Girls – TUTORIAL, you’ll need a few essential materials. Choosing high-quality yarn will make your project more durable and comfortable to wear. Acrylic or wool blends are perfect options for a soft texture that’s gentle on the skin. You can choose the thickness depending on whether you want a lightweight or chunky poncho.
Select two knitting needles that match your yarn’s recommended size. Typically, sizes between 4mm and 6mm work best for this type of poncho. You’ll also need a pair of scissors, a yarn needle for weaving in the ends, and a measuring tape to ensure your poncho fits perfectly. Having everything ready before you start will make the process smooth and enjoyable.
Next, choose the colors you’d like for your project. A two-needle poncho for girls looks lovely in multicolor yarns or with alternating stripes. The color choice can reflect the personality of the girl who will wear it — bright and cheerful for a playful style, or soft and elegant for a more classic look.
Before you begin, it’s a good idea to knit a small sample square to check your tension. This helps you achieve the correct size and ensures your stitches are even. Adjusting your needle size slightly can make a big difference in the final result.
Finally, keep a notebook or pattern guide nearby to jot down stitch counts or customizations. This small habit will make it easier to recreate or adjust the poncho later. With your materials ready, you’re all set to move on to the knitting process.
The base is the foundation of your Two-Needle Poncho for Girls – TUTORIAL. Start by casting on the required number of stitches depending on the size you’re making. For a small child, you might start with 70–80 stitches, while for an older girl, 100–120 stitches may be more suitable. Always measure shoulder width and desired length before you begin.
Work in a simple garter stitch (knit every row) or stockinette stitch (knit one row, purl one row) to form the main body. The garter stitch gives a thicker, more textured look, while the stockinette creates a smoother finish. Both are excellent choices depending on your desired style.
As you knit, remember to keep your tension even. Uneven tension can make the poncho look irregular, especially if you plan to add decorative borders or fringes later. Consistency is key for a clean, professional appearance.
Continue knitting until your piece reaches the desired length — usually from shoulder to just below the waist. You can check the fit by folding the piece over the shoulders and adjusting as needed. This ensures a comfortable, flexible fit for the wearer.
Once the base is complete, bind off your stitches loosely. Avoid tight edges, as they can restrict movement or distort the shape. After binding off, gently stretch your work and lay it flat to shape before joining the sides.
This step forms the core of the Two-Needle Poncho for Girls – TUTORIAL, setting the foundation for any additional details or decorations you’d like to add next.
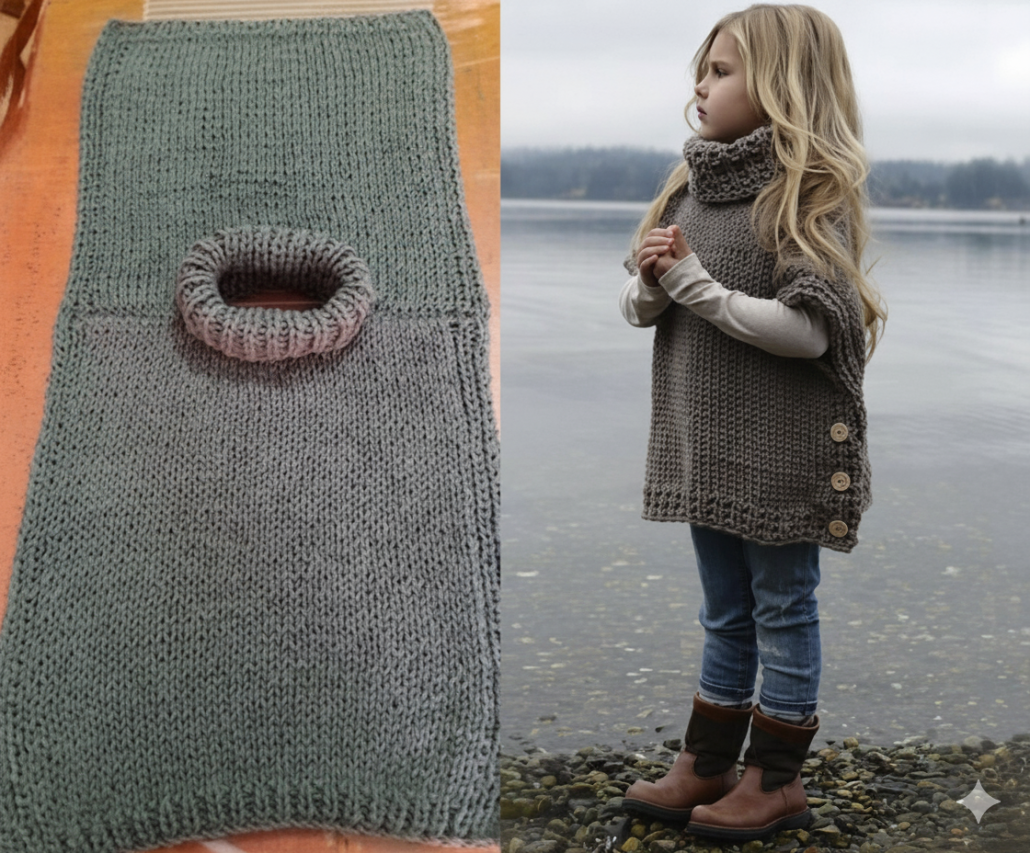
In this part of the Two-Needle Poncho for Girls – TUTORIAL, you’ll transform your flat knitted pieces into a wearable poncho. To assemble, fold your knitted rectangle diagonally or join two identical panels together. The method depends on your chosen style — one-piece diagonal ponchos are quick and stylish, while two-piece versions allow for more symmetry.
Use your yarn needle to sew the sides together, leaving a space at the top for the neckline. A simple mattress stitch works perfectly for invisible seams, giving the poncho a seamless finish. Take your time with this step; neat stitching makes a huge difference in the final result.
Next, shape the neckline according to your preference. You can create a straight opening or a rounded one. To make the neckline more comfortable, pick up stitches along the edge and knit a few rows in rib stitch. This adds elasticity and prevents the edges from curling.
You may also choose to add a decorative border or fringe along the bottom edge. A fringe gives a fun, youthful touch, while a ribbed or crocheted edge adds elegance and durability. Customize the look to suit the girl’s style.
If you’d like to add a hood or buttons, this is the perfect time. Both features are functional and aesthetic enhancements. A small pom-pom or tassel at the end of a tie string can also be a cute finishing touch.
When you’ve finished assembling and decorating, gently block your poncho to shape it perfectly. Blocking helps even out stitches and gives your handmade project a polished, professional look.
After completing your Two-Needle Poncho for Girls – TUTORIAL, you’ll want to ensure it stays beautiful and long-lasting. Proper care and styling are key to preserving the quality of your handmade creation. Always check the yarn label for washing instructions before cleaning.
For most yarns, hand washing in cold water with a mild detergent is best. Avoid wringing the poncho; instead, press gently to remove excess water and lay it flat to dry. This helps maintain its shape and texture. Never hang a wet poncho, as it can stretch the fibers and alter the fit.
When it comes to styling, a two-needle poncho pairs wonderfully with jeans, leggings, or dresses. It’s perfect for layering during cooler months, providing warmth without being bulky. You can add accessories like scarves, hats, or boots for a complete winter outfit.
If you’ve made the poncho as a gift, consider adding a personalized label or tag with the recipient’s name. It’s a thoughtful detail that makes your handmade piece even more special. Kids love wearing something made especially for them.
To keep your poncho fresh between wears, store it folded in a drawer rather than hanging it. This prevents stretching and keeps the stitches looking crisp. Using a lavender sachet can help keep it smelling fresh and deter moths.
Remember, your handmade two-needle poncho for girls is not just a garment — it’s a piece of art, care, and creativity. With proper care, it can be cherished and worn for years to come.
Q1: Is the two-needle poncho suitable for beginners?
Yes! The Two-Needle Poncho for Girls – TUTORIAL is perfect for beginners. It uses simple stitches and techniques, making it easy to follow even if you’re new to knitting.
Q2: How much yarn will I need for the poncho?
It depends on the size. For a small child, around 200–250 grams of medium-weight yarn is usually enough. Larger sizes may need up to 400 grams.
Q3: Can I use circular needles instead of straight needles?
Yes, circular needles can also be used if you prefer. They’re especially handy for larger projects and reduce strain on your hands.
Q4: What’s the best stitch pattern for a poncho?
Garter stitch and stockinette stitch are the most common choices. Both create a neat texture and are easy to knit on two needles.
Q5: How can I make the poncho look more decorative?
You can add fringes, pom-poms, buttons, or even a crocheted border for extra charm. Customizing details makes each poncho unique.
Q6: How do I resize the poncho for different ages?
Simply adjust the number of cast-on stitches and the total length of the piece. Measuring the child’s shoulders and height ensures a perfect fit.
The Two-Needle Poncho for Girls – TUTORIAL is a fun and rewarding knitting project that allows you to create a beautiful and functional garment for any young girl. With just two needles, some yarn, and creativity, you can produce a cozy poncho that’s perfect for any season. From choosing colors to adding decorative touches, every step offers room for personalization and joy.
We hope this tutorial has inspired you to pick up your needles and start creating. Share your experience in the comments and let us know your thoughts — your opinion and suggestions help us make our tutorials even better!