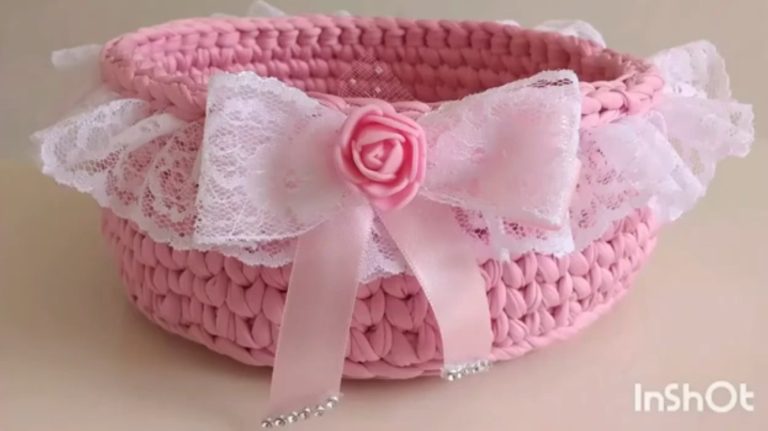
Crocheted Basket - Tutorial

The Tree of Life Mandala Crochet Pattern is a stunning and symbolic design that represents growth, connection, and the cycles of life. The intricate details of the tree combined with the circular structure of the mandala make it a beautiful and meaningful crochet project. Whether you’re looking to create a decorative piece for your home or a gift for a loved one, the Tree of Life Mandala Crochet Pattern is sure to add a touch of elegance and warmth to any space.
Crocheting a mandala is a fulfilling and enjoyable task, especially when the design carries such deep symbolism. The Tree of Life is an ancient symbol found in many cultures, often representing strength, wisdom, and interconnectedness. With its roots deep in the earth and branches reaching for the sky, the Tree of Life conveys balance, growth, and renewal. This crochet pattern allows you to bring these symbolic elements to life with yarn and a hook.
In this tutorial, we will break down the steps to help you crochet your own Tree of Life Mandala. Whether you’re a beginner or an experienced crocheter, this pattern can be adapted to suit your skills. Let’s dive into the details and start crafting this stunning crochet piece!
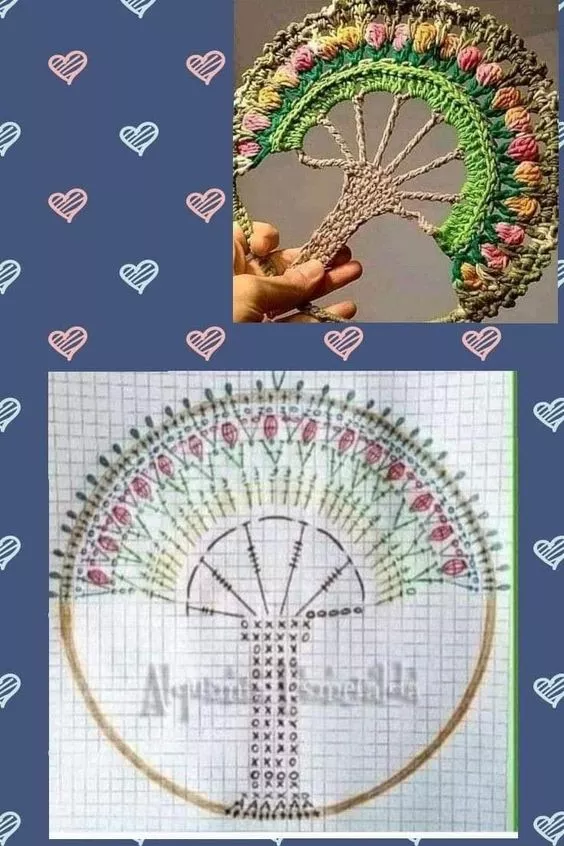
Image From Google
Before you begin your Tree of Life Mandala Crochet Pattern, it’s important to choose the right yarn and crochet tools for the job. The yarn you select will play a significant role in the overall look and texture of your mandala.
DISCOVER MORE FREE PATTERNS HERE!
For a mandala with vibrant, rich colors, consider using cotton yarn or acrylic yarn. Cotton yarn is durable and gives a nice texture to the work, while acrylic yarn is soft and comes in a wide range of colors. Choose a yarn weight that suits the pattern’s design. Typically, medium-weight yarn (like worsted weight) is a good option, but you can adjust the yarn thickness depending on the size of the mandala you want to create.
For the crochet hook, select one that corresponds to your yarn’s weight. A 4mm or 5mm hook is commonly used for worsted-weight yarn, but you can use a different size hook to change the tightness or looseness of your stitches. Having a stitch marker is also helpful to mark the beginning of rounds, as this can help keep track of your progress.
Lastly, choose colors that reflect the symbolism of the Tree of Life Mandala. Earth tones like green, brown, and beige are ideal for the tree itself, while vibrant colors for the mandala’s background can add a mystical touch. Feel free to experiment with colors that resonate with you or follow a specific color scheme for the design.
A mandala typically starts in the center and radiates outward in a circular fashion. To crochet the Tree of Life Mandala, you’ll first need to create a base circle. The center of the circle will represent the heart of the tree, and as you continue crocheting, you’ll build outward with the tree’s roots, trunk, and branches.
To create the center, start by making a magic ring or a chain loop, depending on your preference. The magic ring is often preferred for mandalas as it creates a tight and adjustable center. Begin with a few stitches in the ring and then work in a circular fashion, increasing stitches as needed to form a flat, round shape.
As you crochet the rounds, pay attention to the increases in each round, which will help your mandala maintain its circular shape. This is a crucial step to ensure your Tree of Life Mandala Crochet Pattern turns out symmetrical and balanced. It may take some practice, but with patience, you’ll create a beautiful base for your tree design.
Once you’ve mastered the basic circular shape, you can move on to the next step: creating the tree trunk and branches.
Now comes the most exciting part of the Tree of Life Mandala Crochet Pattern – the tree trunk and branches! This section will bring the design to life, and you’ll have the opportunity to use your crochet skills creatively.
Begin by crocheting the tree trunk at the bottom center of your mandala. Use a brown or dark-colored yarn to create a sturdy and grounded trunk. You can crochet the trunk with a simple single crochet (sc) stitch, making sure to work tightly to create a firm structure. If you prefer, you can also incorporate a few textured stitches such as front post or back post double crochet (fpdc or bpdc) to give the trunk more dimension and depth.
For the branches, use a lighter brown or green yarn to crochet extending branches that will radiate out from the trunk. The branches should be thinner than the trunk, but still sturdy enough to balance the design. You can crochet each branch separately or connect them as you go, depending on your preference.
When crocheting the branches, add extra detail by making small leaf motifs that hang from the branches. These can be crocheted separately and attached later, or you can crochet them directly onto the branches for a more seamless look. Using green yarn for the leaves will tie the design back to the tree’s natural element and complete the look.
Once your tree trunk and branches are finished, you can add any additional details you like, such as flowers or small embellishments, to personalize your Tree of Life Mandala.
After completing the tree trunk and branches, the next step is to finish the rest of the mandala and add any final touches. You’ll need to continue crocheting outward from the tree with additional rounds of stitches to fill in the outer portions of the mandala.
To highlight the tree design, consider crocheting in contrasting colors around the tree to make it stand out against the background. You could use a combination of vibrant colors for the surrounding mandala, like blues, purples, or yellows, depending on your color palette.
Once the final rounds of the mandala are completed, make sure to weave in any loose ends using a yarn needle to give the piece a clean, professional finish. You can also block the mandala to ensure its shape is perfect and even. Blocking helps to stretch the stitches, especially if you used natural fibers like wool, and it gives the mandala a crisp, polished look.
If you’re planning to hang the mandala on a wall, consider adding a small loop of yarn at the top for easy hanging. You could also turn the mandala into a decorative pillow, a wall hanging, or even use it as a table centerpiece.
1. What is the Tree of Life Mandala Crochet Pattern?
The Tree of Life Mandala Crochet Pattern is a circular crochet design that incorporates the iconic Tree of Life symbol, representing strength, growth, and interconnectedness. The pattern features a tree trunk, branches, and roots surrounded by a mandala-like structure.
2. How do I start a Tree of Life Mandala?
Start with a magic ring or chain loop to create the center of the mandala. From there, crochet outward in a circular shape, increasing stitches as needed. Once you have the base, you can begin crocheting the tree trunk and branches.
3. What kind of yarn should I use for a Tree of Life Mandala?
Use yarn that is durable and comfortable to work with, such as cotton or acrylic yarn. You can choose any color palette that resonates with you, but earth tones like brown, green, and beige are common for representing the Tree of Life.
4. Is the Tree of Life Mandala Crochet Pattern beginner-friendly?
Yes, this pattern can be made by beginners, although it may take some practice to get the circular shape and tree design right. The pattern can be adjusted to fit your skill level, and you can always add your own creative touches.
5. How can I make my Tree of Life Mandala unique?
You can customize your Tree of Life Mandala Crochet Pattern by using different colors, adding decorative elements like flowers or animals, or changing the stitches to add texture. The pattern is versatile and can be adapted to reflect your personal style.
The Tree of Life Mandala Crochet Pattern is a beautiful and meaningful project that can be enjoyed by crocheters of all levels. From choosing the perfect yarn to crocheting the tree trunk and branches, each step allows you to bring a piece of nature and symbolism into your crochet work. By following this tutorial, you can create a stunning mandala that represents growth, connection, and balance.
We hope this guide has helped you understand how to crochet your own Tree of Life mandala. Feel free to share your thoughts, experiences, and any suggestions you might have for future projects in the comments below. Happy crocheting!