Chicken Crochet - Pattern

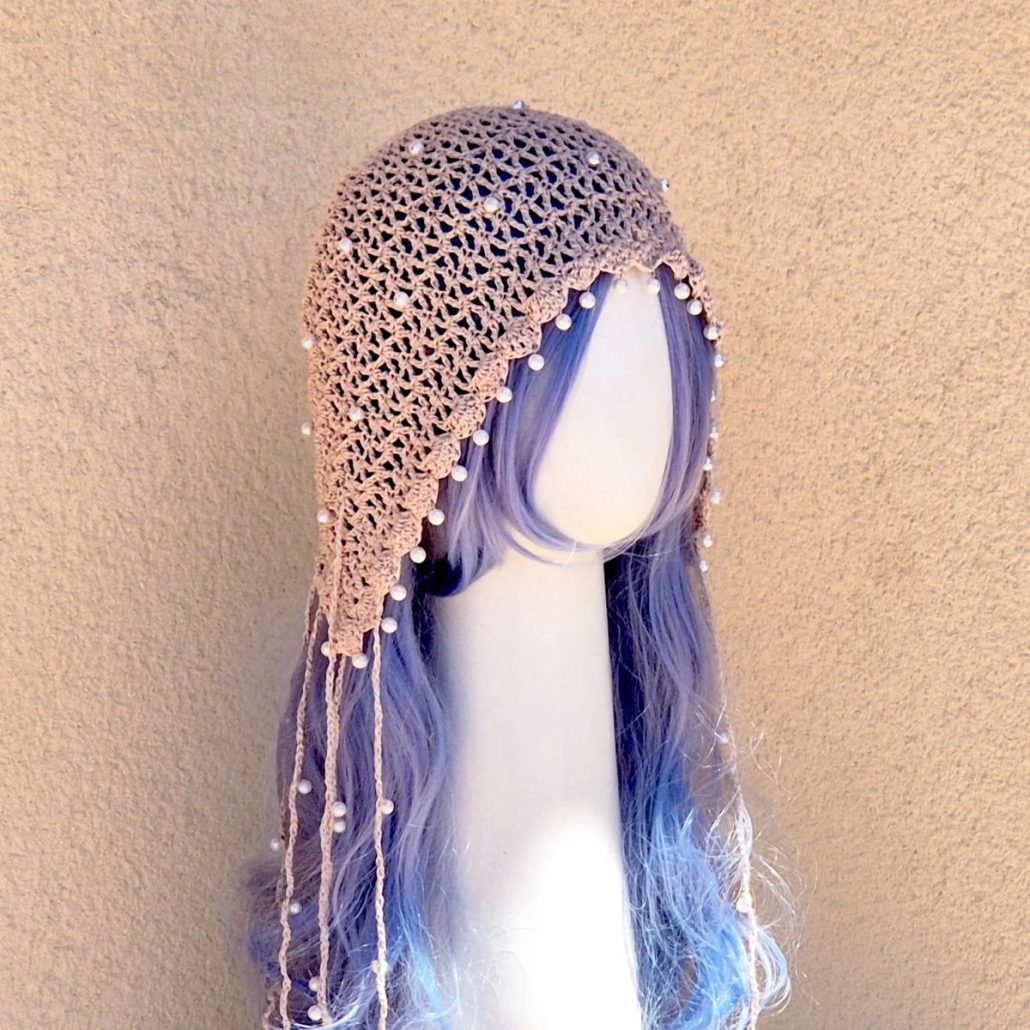
If you love creating beautiful, delicate accessories, this Lacy Crochet Hat – TUTORIAL is the perfect project for you. Designed for both beginners and experienced crocheters, this hat combines elegance and comfort in a single piece. The open lace design gives it a light, airy feel, making it ideal for spring and summer wear while adding a touch of handmade charm to your wardrobe.
Making a lacy crochet hat is not only relaxing but also rewarding. It’s a quick project that allows you to explore different stitch patterns, color combinations, and yarn textures. You can easily customize it to suit your personal style—whether you prefer soft pastels, neutral tones, or bold, vibrant shades.
In this Lacy Crochet Hat – TUTORIAL, you’ll learn how to make this stylish accessory from start to finish. With just a few materials and basic stitches, you can craft a hat that looks intricate but is actually easy to make. It’s perfect for gifting, selling, or adding to your handmade collection of crochet accessories.
Let’s get started and discover how you can create a lacy, elegant hat that you’ll be proud to wear or share with someone special.
Before starting this Lacy Crochet Hat – TUTORIAL, gather all the materials you’ll need. Preparing your supplies ahead of time ensures a smooth and enjoyable crocheting experience.
You will need lightweight yarn, preferably cotton, bamboo, or acrylic blend. These materials provide softness and breathability—perfect for a lace-patterned hat that’s comfortable in warmer weather. Choose a DK or sport-weight yarn for the best results.
Next, select the right crochet hook size according to your yarn label, typically between 3.5 mm and 4.5 mm. Using the right hook helps you achieve the perfect balance between stitch definition and drape.
You’ll also need scissors, a yarn needle for weaving in ends, and stitch markers to keep track of rounds or pattern repeats. A measuring tape is also helpful for ensuring your hat fits properly.
If you plan to add embellishments, such as a crochet flower or ribbon, gather those materials as well. These small details can elevate your design and give it a personal touch.
Once you’ve organized your materials, you’re ready to begin your project with confidence and creativity.
Now let’s begin the Lacy Crochet Hat – TUTORIAL. This design may look delicate, but it’s made with simple stitches that are easy to follow. Even beginners can achieve great results with a little patience and practice.
Start by making a magic ring or chain four and join with a slip stitch to form a loop. This will be the top of your hat. Work several rounds of double crochet stitches, increasing gradually to shape the crown.
As you progress, you’ll transition into the lace section. This is where the openwork pattern forms, giving the hat its beautiful and breezy appearance. The lace effect can be created using a combination of chains, single crochets, and double crochets spaced in repeating patterns.
Follow the stitch sequence carefully to maintain symmetry in your design. Stitch markers can be very helpful for tracking where each round begins and ends.
Once the body of the hat reaches your desired length, switch to a tighter stitch pattern for the brim. You can use single crochet or half double crochet to give it structure and prevent stretching.
Finally, fasten off, weave in all loose ends with your yarn needle, and try on your beautiful new lacy crochet hat!
One of the best things about this Lacy Crochet Hat – TUTORIAL is how easy it is to personalize. There are countless ways to style and customize your hat so it reflects your unique personality.
You can experiment with different yarn colors. Pastels like blush pink, mint green, or lavender create a soft and feminine look, while earthy tones or deep blues add a more classic feel.
For a playful twist, alternate two or more colors throughout the rounds or create an ombré effect with gradient yarn. The open lace design highlights color transitions beautifully.
Adding embellishments like crochet flowers, small bows, or decorative buttons can make your hat even more charming. You can attach a ribbon around the brim or a lightweight pompom on top for extra flair.
If you want a hat suitable for cooler weather, line the inside with soft fabric or crochet an inner layer using finer stitches to make it warmer without losing the lace aesthetic.
Lastly, consider making matching accessories such as a lacy scarf or gloves using the same pattern style. A coordinated set makes for a lovely handmade gift or fashion statement.
Now that you’ve completed the Lacy Crochet Hat – TUTORIAL, it’s time to learn how to keep your creation looking beautiful for years to come. Here are some helpful tips for success and maintenance.
Always check your gauge before starting. This ensures the hat fits perfectly and that your stitches aren’t too tight or too loose. Adjust hook size if needed.
When working lace patterns, maintaining consistent tension is key. Uneven tension can make the lace look messy or distort the hat’s shape. Take your time and enjoy the process—it’s meant to be relaxing.
If you’re new to reading crochet charts or patterns, consider writing down each round or marking your progress with a stitch counter. This will help prevent mistakes and make your work more organized.
For care, hand wash your hat in cool water with a gentle detergent. Lay it flat to dry to maintain its shape and texture. Avoid hanging it to prevent stretching.
If your hat becomes wrinkled after washing, use a light steam setting on your iron with a pressing cloth to gently smooth it out.
Store your crochet hat in a drawer or breathable fabric bag to protect it from dust and maintain its softness. Proper care ensures your handmade hat stays in perfect condition for a long time.
Q1: Is this pattern suitable for beginners?
A: Yes! This Lacy Crochet Hat – TUTORIAL is beginner-friendly. It uses simple stitches and includes clear step-by-step instructions.
Q2: What yarn type works best for this pattern?
A: Lightweight yarns such as cotton or bamboo are ideal for a breathable and comfortable lace design.
Q3: Can I make this hat for children or babies?
A: Absolutely! Simply adjust the number of rounds or use a thinner yarn and smaller hook to create smaller sizes.
Q4: How long does it take to make the lacy crochet hat?
A: Most crocheters can finish it in about 3 to 5 hours, depending on experience and stitch speed.
Q5: Can I sell the hats I make using this pattern?
A: Yes, you can sell your handmade hats. Just make sure to credit the pattern designer if applicable.
Q6: What if my hat is too loose or too tight?
A: Try adjusting your hook size or changing yarn weight to get the perfect fit.
This Lacy Crochet Hat – TUTORIAL shows that elegance and simplicity can go hand in hand. With only a few materials and basic stitches, you can create a stunning, lightweight hat that’s perfect for any occasion. Whether you make it for yourself or as a heartfelt gift, this project is a beautiful way to express creativity and skill through crochet.
We hope you enjoyed this guide and feel inspired to try making your own lacy crochet hat. Don’t forget to experiment with colors, yarns, and embellishments to make it uniquely yours.
PATTERN VIDEO:
Now it’s your turn! Share your finished creations, tell us how your hat turned out, and leave a comment below with your honest opinion and suggestions. Your feedback helps keep the crochet community growing and full of inspiration!