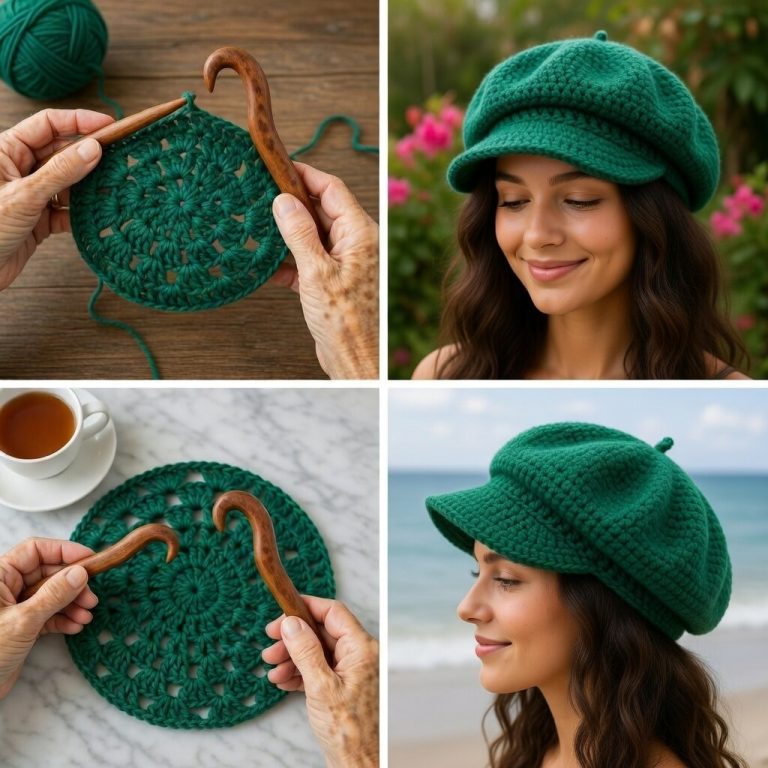
Crocheted Beret - TUTORIAL

Crocheted Beret – TUTORIAL is a classic and elegant crochet project that lets you craft a stylish accessory with your own hands. By following the Crocheted Beret – TUTORIAL, you can create a versatile piece that adds charm to any outfit while also improving your crochet skills. This project is perfect for anyone who enjoys handmade fashion and wants to explore new techniques.
What makes the Crocheted Beret – TUTORIAL so appealing is its flexibility in design. You can easily adapt the pattern to suit different tastes by changing yarn colors, textures, or stitch patterns. Whether you prefer a minimalist look or something more eye-catching, this beret can be customized to match your style.
In this detailed Crocheted Beret – TUTORIAL, you will discover how to choose the best materials, build the top section, shape the hat, and finish it neatly. This guide is designed to be accessible for beginners while still offering value for more experienced crocheters.

To begin the Crocheted Beret – TUTORIAL, it is important to select the right materials. Good preparation ensures a smoother and more enjoyable experience.
The type of yarn you choose will influence the final look and feel of your beret. Soft yarns are recommended for comfort.
Wool yarn is great for colder weather, while cotton yarn works well for lighter, breathable versions.
Selecting the correct hook size is essential in the Crocheted Beret – TUTORIAL, as it affects the stitch tension and overall shape.
You will also need a yarn needle for finishing and a pair of scissors for cutting the yarn.
Using stitch markers can help you keep track of your rounds more easily.
A measuring tape is useful to make sure your beret fits perfectly.
The top section is where the Crocheted Beret – TUTORIAL begins to take shape.
Start with a magic circle to create a neat and adjustable center.
Work in continuous rounds, increasing stitches evenly to form a flat circle.
In the Crocheted Beret – TUTORIAL, maintaining consistent tension is key to achieving a smooth result.
Continue increasing until the circle reaches the desired width.
The size of this section will determine how loose or structured your beret appears.
Once complete, you are ready to move on to forming the main body.
At this stage of the Crocheted Beret – TUTORIAL, the piece starts to develop its signature shape.
Stop increasing and work several rounds with the same number of stitches.
This creates the volume that gives the beret its soft, relaxed look.
You can experiment with different stitches to add texture and visual interest.
The Crocheted Beret – TUTORIAL allows you to be creative with patterns while maintaining structure.
Check the fit as you go to ensure the beret sits comfortably.
The body should drape naturally without losing its form.
The final part of the Crocheted Beret – TUTORIAL focuses on completing the hat and refining its details.
Begin decreasing stitches gradually to shape the band.
Use tighter stitches to create a secure and comfortable fit around the head.
In the Crocheted Beret – TUTORIAL, the band plays a crucial role in keeping the beret in place.
Once finished, fasten off and weave in all loose ends carefully.
You can personalize your beret with embellishments such as small appliqués or decorative stitching.
Blocking the finished piece can help enhance its overall shape and appearance.
Is this beret suitable for beginners?
Yes, the Crocheted Beret – TUTORIAL is beginner-friendly if you are familiar with basic crochet stitches.
What yarn should I use?
Soft yarns like wool or acrylic are ideal for warmth, while cotton is better for lighter versions.
How can I adjust the size?
You can modify the number of increases and the length of the band to fit different head sizes.
How long does it take to complete?
Most berets can be finished within a few hours depending on your skill level.
Is blocking necessary?
Blocking is optional but helps improve the final look of the beret.
Can I add decorations?
Yes, you can customize your beret with different colors, textures, and embellishments.
The Crocheted Beret – TUTORIAL is a creative and enjoyable project that results in a stylish and practical accessory. It is a great way to practice crochet techniques while making something you can wear or gift.
Throughout this tutorial, you learned how to select materials, create the top section, shape the body, and finish the beret with a comfortable band. Each step contributes to achieving a polished final result.
The beauty of the Crocheted Beret – TUTORIAL lies in its adaptability, allowing you to design a piece that reflects your personal style. Handmade items like this bring a special touch that cannot be replicated.
If you liked this tutorial, leave your honest opinion and share your suggestions. Your feedback is very important and helps inspire more creative crochet projects.