
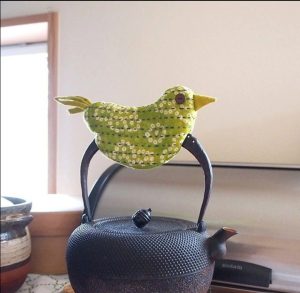
Turtle Baby Blanket – Tutorial


Starting your crafting journey with a Crochet Flower Tutorial is one of the most delightful ways to explore creativity through yarn. Because this pattern is simple, versatile, and perfect for beginners, it has become a favorite among crocheters of all skill levels. Whether you want to embellish hats, bags, blankets, or home décor, a Crochet Flower Tutorial teaches you the skills needed to create beautiful, delicate motifs that can be used in countless handmade projects. In this article, you will learn how this pattern works, why it’s popular, and how to follow the steps with confidence.
Working with a flower motif is also a wonderful introduction to shaping and stitch variation. Even if you are new to crochet, the Crochet Flower Tutorial breaks each section into easy-to-understand steps, helping you build skill while creating something adorable. Because flowers use only small amounts of yarn, they’re also perfect stash-buster projects, letting you experiment with different colors and textures without needing new supplies.
As you follow this guide, you will see how the Crochet Flower Tutorial can be adapted to suit your personal style. You can work with bright spring colors, soft pastels, festive shades, or even neutral tones for minimalist décor. No matter how you choose to use your flowers, this pattern is a charming and practical addition to your crochet knowledge.

The Crochet Flower Tutorial typically begins at the center, where you form a small circle using basic stitches. This structure allows the rest of the petals to be built outward in a clean, uniform shape. Most designs start with a magic ring or a simple chain loop.
Each petal is created using different stitch heights to give volume and dimension. Beginners love this approach because it helps them practice combinations such as single crochet, half double crochet, and double crochet. These stitches form the foundation of many future projects.
The petals can be worked individually or built continuously around the center. Continuous petals are easier for beginners, while individual petals give a more delicate look. The tutorial guides you through both options so you can choose your favorite.
Color choice is another important part of the structure. A Crochet Flower Tutorial often uses two or more colors to enhance depth, highlight the center, or add visual interest. You can change colors between rounds or keep the piece monochromatic for simplicity.
The flower’s final round usually includes a finishing border to stabilize the shape. This ensures your flower doesn’t curl and stays neat and flat when attached to accessories, garments, or decorative pieces.
Once finished, the flower can be sewn onto any project using a needle or attached with hot glue for quick crafting. This makes it one of the most versatile motifs available in crochet.
The beauty of the Crochet Flower Tutorial is that it requires only minimal materials. Most crocheters already have what they need at home. A medium-weight yarn is recommended for beginners because it is easier to hold and work with.
Your hook size should match your yarn, but you can go one size smaller if you prefer tighter, more defined petals. The tutorial explains how different hook sizes affect the final flower so you can customize your project.
A tapestry needle is used to weave in yarn ends and attach the flower to your chosen item. This small step gives your work a clean, professional look. Many beginners underestimate how important this finishing touch is.
You may also want to use scissors, stitch markers, or blocking tools. While not required, these extras can make your crafting experience smoother and more enjoyable.
If you want multi-colored flowers, keep a few contrasting yarn shades nearby. The Crochet Flower Tutorial often includes tips on color combinations that look harmonious and vibrant.
Optional embellishments such as beads, buttons, or pearls can be added to the center of the flower. These additions instantly elevate your flower from simple to decorative, especially for festive or elegant projects.
Most flowers begin with a magic circle, which allows you to close the center tightly. This prevents gaps and gives your flower a polished look. If you prefer, you can also start with a chain loop, which is easier for total beginners.
The first round typically includes simple stitches that form the flower’s core. As the Crochet Flower Tutorial explains, this foundation must be consistent to ensure symmetrical petals. Take your time with this step.
Next, you will build the petals by working multiple stitches into the same space. This creates the rounded, layered effect that flowers are known for. Using taller stitches helps the petals stand out.
Each petal is separated by slip stitches to keep the shape defined. These small stitches help maintain spacing and prevent the petals from merging together. It’s a small step, but very important visually.
After completing all the petals, a final round may be added to create a crisp outline. This round is optional but is often recommended because it gives structure and durability to your flower.
When the crocheting is complete, weave in the ends and shape the flower with your hands. You can lightly block it for extra precision, especially if you plan to use it on clothing or accessories.
One of the highlights of following a Crochet Flower Tutorial is discovering how versatile the finished piece can be. You can attach the flowers to hats, scarves, headbands, or even handmade bags. They instantly add charm and personality.
Many crafters also use crochet flowers to decorate blankets and baby items. Because the flowers are small and light, they are perfect for adding accents without weighing down your project.
You can turn your flowers into brooches or hair clips simply by gluing or sewing them onto accessories. This is a great option for creating last-minute handmade gifts.
Another fun idea is to make a full bouquet for home décor. Crochet flowers never wilt, making them a long-lasting and eco-friendly choice for decorating tables, shelves, or office spaces.
If you enjoy festive decorations, create holiday-themed flowers using greens, reds, golds, or sparkling yarn. The Crochet Flower Tutorial adapts beautifully to seasonal crafting.
Finally, you can combine multiple flowers into garlands or wall hangings. These projects are beautiful year-round and add a soft, artistic touch to any room.
1. Is a crochet flower suitable for beginners?
Yes. A Crochet Flower Tutorial is one of the easiest introductions to crochet. Most designs use basic stitches that beginners can learn quickly.
2. How long does it take to make a crochet flower?
Depending on size and complexity, it usually takes between 10 and 30 minutes to complete one flower.
3. What yarn is best for a crochet flower?
Medium-weight cotton or acrylic yarn works best, as it gives structure and definition to the petals.
4. Can I make a crochet flower with leftover yarn?
Absolutely. This project is perfect for using small scraps from previous projects.
5. How do I attach a crochet flower to a finished piece?
You can sew it on using a tapestry needle or glue it with hot glue for quick crafting.
6. Can I make larger flowers?
Yes. Increase hook size, use thicker yarn, or add extra rounds to create bigger petals.
7. Are crochet flowers washable?
Yes, as long as the yarn used is washable. Cotton yarn is especially durable.
In this article, you learned everything you need to create beautiful motifs using the Crochet Flower Tutorial. From understanding the structure to choosing materials, shaping petals, and finding creative uses, this pattern opens endless possibilities for decorative and practical crochet projects. Now that you know how to make your own flowers, feel free to experiment with colors, sizes, and embellishments.
PATTERN VIDEO:
I’d love to hear your thoughts—please share your honest opinion and suggestions to help improve future tutorials!
