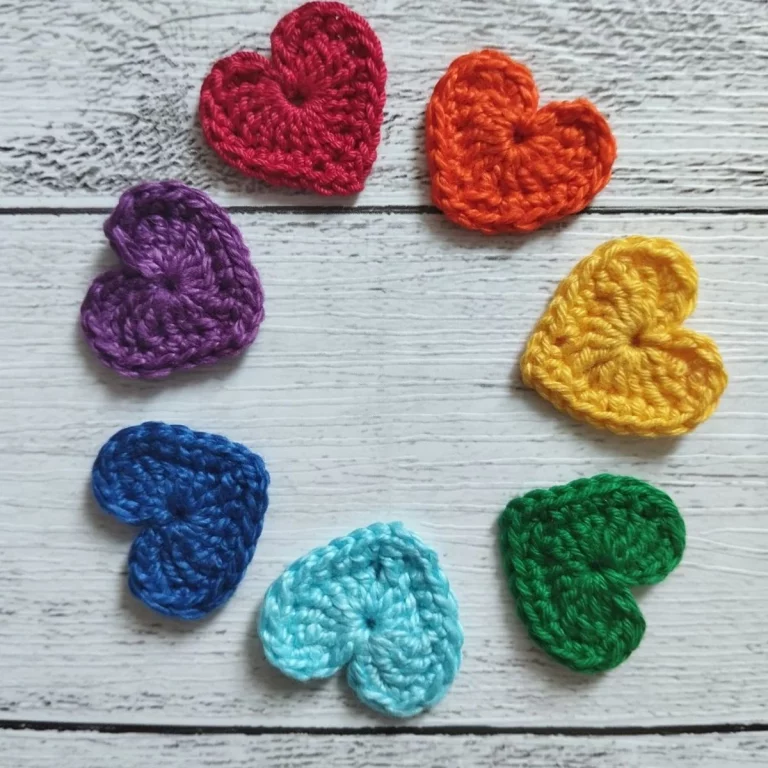
Crochet Heart Pattern – Tutorial

The Crochet Flower for Framing – TUTORIAL is a delightful way to blend the timeless art of crochet with modern home decor. Whether you’re a seasoned crocheter or just starting out, creating flowers designed specifically for display adds both charm and creativity to your living space.
Unlike wearable crochet pieces, these floral creations are made to last, decorate, and impress. They bring a handcrafted elegance to picture frames, shadow boxes, gallery walls, or even standalone art on shelves.
In this tutorial, we’ll walk you through how to crochet a flower perfect for framing—from choosing the right materials to adding professional finishing touches. The goal is a stunning, frame-worthy piece that showcases your crochet skills and artistic taste.
To begin your Crochet Flower for Framing – TUTORIAL, you’ll need to gather a few key materials that will influence your final result. These framed flowers are meant to be visually striking, so intentional material choices matter.
Start with lightweight cotton or mercerized yarn. These types offer crisp stitch definition and a polished look, which is ideal for framed pieces. Avoid fuzzy or textured yarns that can obscure your flower’s shape when viewed behind glass.
Select a crochet hook that pairs well with your yarn. For cotton yarns, a 2.5 mm to 4 mm hook usually works best. Tighter stitches help the flower maintain its form and add that professional, clean-lined finish you want in framed work.
Color is a big part of what makes framed crochet art visually appealing. Choose hues that contrast or complement your background. Think of soft blush pinks on dark linen or vibrant reds and yellows on white canvas.
You’ll also need a tapestry needle for sewing, scissors, and optionally, blocking pins if you want to shape your flower more precisely before framing. A backing material like linen or cardstock and a photo frame (with or without glass) complete the list.
Lastly, decide if you want to add leaves or extra layers. This is your artistic creation—don’t be afraid to experiment and create a unique layout before attaching everything.
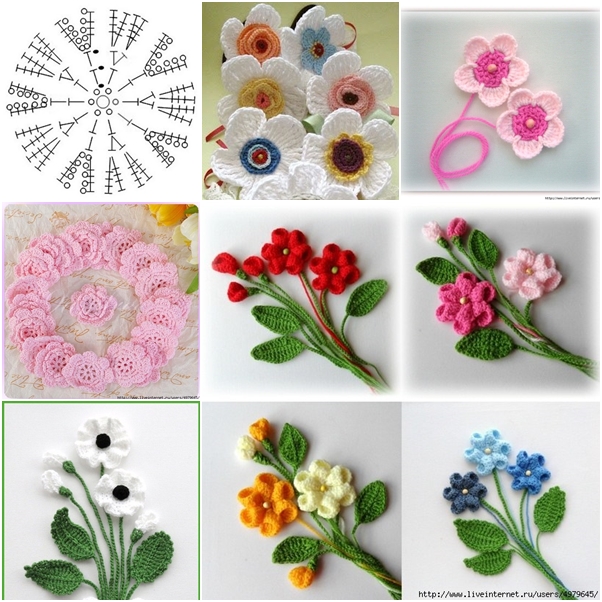
The heart of the Crochet Flower for Framing – TUTORIAL lies in building a layered, well-structured bloom. A good framed flower often starts with a foundation circle and then expands into detailed petals.
Begin with a magic ring or a chain loop to form the center. Work a round of single or half-double crochets to establish the flower base. Keep your stitches tight and even for a polished look.
Next, create your first layer of petals. Petals can be simple (like five single crochets in one stitch) or more ornate (a combination of single, half-double, and double crochets in one sequence). Repeat this pattern around the circle.
For a fuller flower, add a second or third round of petals behind the first. This is done by creating a base round behind the initial petals and working new ones in between or behind the originals.
As you add layers, the flower will gain dimension and texture. You can use color changes to create a gradient or highlight petal tips for extra flair.
Secure your last round with a tight slip stitch, fasten off, and weave in the ends neatly with a yarn needle. At this point, your flower is complete and ready for blocking.
Optional: Add a small button or bead in the center to give your flower a touch of sparkle or to create a focal point.
One of the most important steps in the Crochet Flower for Framing – TUTORIAL is preparing your piece for presentation. Even a beautifully crocheted flower can lose impact without proper finishing and display methods.
Start by lightly blocking your flower. Pin it onto a foam board or towel in the desired shape and spray lightly with water. Let it dry completely. This process helps flatten and define the petals.
Once dried, choose a background material. Linen, canvas, cotton fabric, or thick cardstock all make great options. Select a color that highlights the tones in your flower and offers good contrast.
Use hot glue or thread to attach your flower to the background. If gluing, apply a small amount in the center and press firmly. If stitching, secure the flower using invisible stitches around the base only—avoid flattening the petals.
Once mounted, place your work in a shadow box or glass frame. Make sure it’s centered and that the petals are not compressed. A little depth between the flower and the glass adds elegance and preserves the texture.
Consider labeling your piece with a handwritten tag, your name, or the date. This makes it more meaningful as an art object and perfect as a handmade gift or keepsake.
Framing your crochet adds an entirely new layer of appreciation—your work becomes decor, not just craft.
There are endless ways to enjoy the beauty of the Crochet Flower for Framing – TUTORIAL beyond just wall art. The versatility of this pattern allows for a range of decorative uses that are both personal and inspiring.
Create a series of framed flowers using different colors and sizes to build a gallery wall. These can represent seasons, moods, or even loved ones’ birth months using flower symbolism.
Use your framed crochet flower as a unique centerpiece for weddings, baby showers, or birthdays. Pair it with a name or message for a custom, one-of-a-kind display.
Give them as gifts! Handmade framed art is thoughtful, sustainable, and lasting. Crochet flowers in meaningful colors or patterns for friends, teachers, or new parents.
Add floral framed pieces to bookshelves, entryway tables, or desk spaces to bring a cozy handmade touch to any room.
You can also use mini crochet flowers framed in tiny embroidery hoops or small frames for craft fairs or home-based businesses. They’re affordable to make and sell well due to their visual charm.
If you’re feeling adventurous, combine multiple crochet motifs like butterflies or vines around your flower to make a full textile illustration within your frame.
Is the framed crochet flower pattern suitable for beginners?
Yes! This pattern is great for beginners. Basic stitches like single and double crochet are all you need to get started.
What yarn is best for framed crochet flowers?
Cotton yarn is ideal due to its stiffness and crisp stitch definition, which help the flower maintain its shape under glass.
Can I use glue instead of sewing to attach the flower to the background?
Yes, hot glue is a quick option, especially for static display pieces. Just be careful not to use too much, which can show through.
Do I need to block my flower before framing it?
Blocking is recommended to give your flower a more polished and professional look, especially if the petals curl too much.
Can I use a regular photo frame or do I need a shadow box?
You can use either. Shadow boxes are ideal because they provide space between the glass and the flower, preserving its dimension.
How do I clean or maintain framed crochet flowers?
Keep them out of direct sunlight to prevent fading. Occasionally dust the frame, and if needed, remove the glass to gently clean inside.
The Crochet Flower for Framing – TUTORIAL provides a creative and fulfilling way to transform yarn into beautiful wall art. From material selection to final framing, this project offers endless room for personalization and artistic expression.
We hope this guide helped you learn how to craft a crochet flower worthy of display in your home or to give as a meaningful gift. If you enjoyed this tutorial, please leave your honest feedback and let us know what you’d like to see next—we’d love to hear your suggestions!