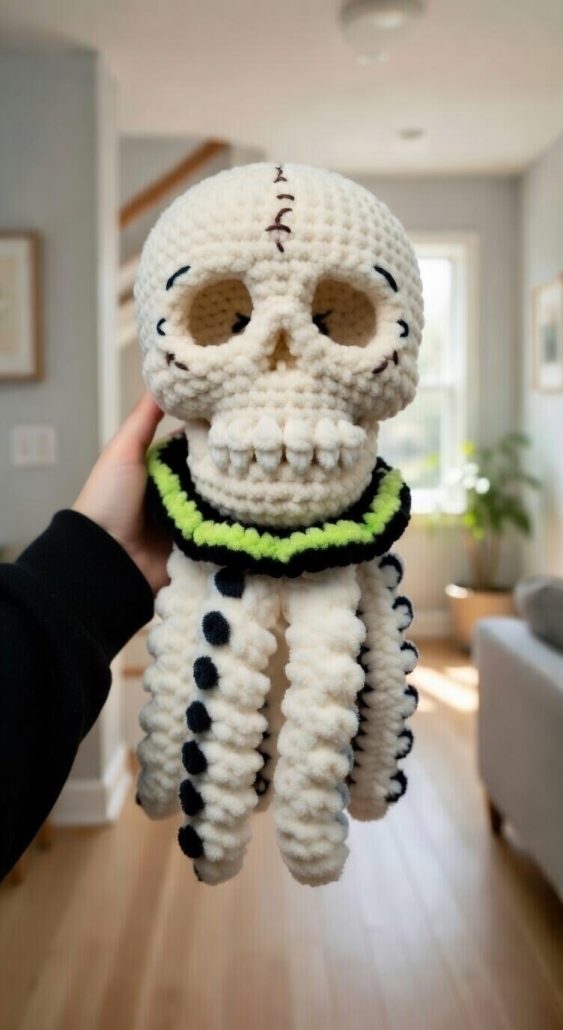
Chunky Skulltopus Crochet - Tutorial

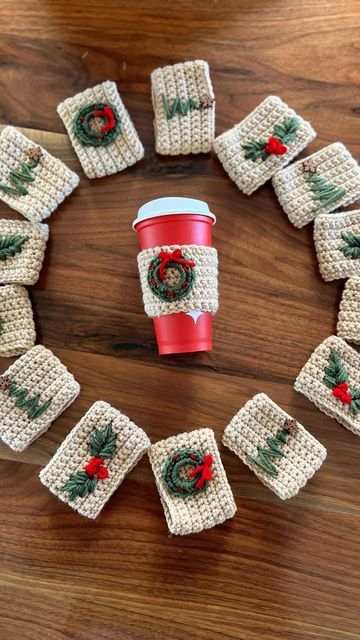
The Crochet Christmas Tree Cozy – TUTORIAL is the perfect festive craft to bring warmth, texture, and personality to your holiday decorations. Whether you are an experienced crocheter or just beginning your journey, this project is both simple and rewarding, creating a charming cozy that will give your Christmas tree or decorative plant a touch of handmade beauty. It’s a wonderful way to combine functionality with seasonal flair, all while indulging in a relaxing and creative activity.
By making a Crochet Christmas Tree Cozy, you can enhance the look of your home without spending a fortune on store-bought décor. The cozy helps hide unattractive tree bases or pots and adds a unique, personal element to your festive setup. You can customize it to match your color theme, style, and preferred stitch pattern, making it truly one-of-a-kind.
In this Crochet Christmas Tree Cozy – TUTORIAL, you will learn how to select materials, master the basic stitches, assemble your cozy, and add finishing touches. The process is beginner-friendly but also adaptable for advanced crafters who want to experiment with textures, patterns, and embellishments. By the end, you’ll have a beautiful, handmade piece that will be treasured for many holidays to come.
Selecting the right materials is an essential first step for creating your Crochet Christmas Tree Cozy – TUTORIAL. Your yarn choice will determine the look, feel, and durability of your cozy, so consider the final effect you want to achieve before you start.
Acrylic yarn is a popular choice for holiday projects because it’s affordable, widely available, and comes in a vast range of colors. It also holds up well over time, which is ideal for a decoration you plan to reuse each year. If you prefer a more luxurious feel, wool or cotton blends can add softness and texture, though they may require more delicate care.
When choosing colors, traditional festive shades like deep red, forest green, gold, and white work beautifully. You can also go for a modern aesthetic with silver, cream, or even pastel tones for a winter wonderland theme. Metallic thread accents or yarn with a subtle shimmer can make your cozy stand out.
Consider the weight of the yarn carefully. A medium-weight yarn (such as worsted) works well for most cozies, providing enough thickness for warmth without being too bulky. Thicker yarns can make the project faster to complete but may require adjustments to the pattern size.
In addition to yarn, you will need the appropriate crochet hook size recommended on your yarn label. Having scissors, a yarn needle for weaving in ends, and optional embellishments like ribbons, buttons, or pom-poms will help complete the look.
Choosing quality materials not only improves the appearance of your project but also ensures that your Crochet Christmas Tree Cozy will last for many seasons without losing its charm.
Once your materials are ready, it’s time to start working on the base of your Crochet Christmas Tree Cozy – TUTORIAL. The base will determine the fit and stability of the cozy, so measuring accurately is crucial.
Begin by measuring the circumference of your tree stand or plant pot to ensure your cozy will fit snugly. Add a small margin for ease so that it’s not overly tight. Write down your measurements to refer to as you work.
Start with a foundation chain long enough to match the circumference measurement. If you prefer a more flexible start, you can use a foundation single crochet to create a stretchier base. Join the chain into a loop with a slip stitch, making sure it’s not twisted.
Work the first few rounds in single crochet or half-double crochet for a sturdy, structured base. These stitches create a dense fabric that will help the cozy hold its shape. You can also experiment with textured stitches like the waistcoat stitch for added interest.
Continue crocheting in rounds, checking the fit periodically. If you want a flared base to drape slightly over the ground, add a few increases evenly spaced in one of the rounds. This creates a gentle, elegant flare.
Once the base height is complete, you’re ready to move on to the body section, where you can get more creative with stitches and patterns.
The body of the Crochet Christmas Tree Cozy – TUTORIAL is where you can truly let your creativity shine. This is your opportunity to play with stitches, colors, and textures to make your cozy unique and festive.
Striped patterns are a classic choice for Christmas cozies. You can alternate red and white for a candy-cane effect, or use three or more colors for a vibrant, patchwork-inspired look. To create stripes, simply change yarn colors at the start of a round and carry the unused color neatly inside the work.
Textured stitches, such as bobbles, puff stitches, or shells, add depth and interest. Bobble stitches, in particular, can resemble ornaments or berries, enhancing the holiday vibe. Use them sparingly as accents or fill entire sections with them for a bold statement.
Consider incorporating openwork or lace stitches for a delicate, airy appearance. This works especially well if you plan to place fairy lights inside the cozy for a soft, glowing effect. Just be sure the open areas are not too large, so the cozy still hides the tree base effectively.
You can also add appliqué elements like crocheted holly leaves, snowflakes, or small stars. These can be sewn onto the cozy once the main body is complete, providing charming 3D embellishments.
For an extra festive touch, weave a ribbon through one of the rounds near the top and tie it in a bow. This not only adds decoration but can also help adjust the fit.
The final stage of the Crochet Christmas Tree Cozy – TUTORIAL is finishing and assembling your piece so it’s ready to display. This step ensures your cozy looks polished and professional.
Once you’ve reached the desired height, finish with a round of slip stitches or reverse single crochet (also known as the crab stitch) for a neat, decorative edge. This will prevent the top from curling and give it a refined look.
Weave in all yarn ends with a yarn needle, taking care to hide them neatly inside the stitches. This will give your cozy a clean finish without visible loose threads.
If you’ve created separate decorative elements, now is the time to attach them. Use matching yarn or sewing thread to secure them firmly so they withstand handling and storage from year to year.
Give your cozy a light blocking if necessary, especially if you’ve used textured stitches that need to settle into shape. Lay it flat or wrap it around a cylindrical object similar in size to your tree base while it dries.
Once dry, place the cozy around your Christmas tree stand or pot, adjusting as needed to ensure a snug fit. Step back and admire your work — you’ve created a festive, handmade decoration that’s sure to impress.
Store your cozy carefully after the holidays by folding it gently and keeping it in a cool, dry place. This will help it maintain its shape and color for many future celebrations.
1. Is the Crochet Christmas Tree Cozy – TUTORIAL beginner-friendly?
Yes, this project is simple enough for beginners, especially if you stick to basic stitches and minimal color changes.
2. Can I use chunky yarn for a faster project?
Absolutely. Chunky yarn will work up more quickly, but you may need to adjust stitch counts for the correct fit.
3. How do I clean my Christmas Tree Cozy?
Most acrylic cozies can be machine-washed on a gentle cycle, but hand-washing is recommended for embellished or delicate versions.
4. Can this cozy fit any size tree base?
Yes, simply adjust the initial chain length and the number of rounds to match your measurements.
5. How can I make my cozy more festive?
Add decorative stitches, ribbons, appliqués, or even beads for sparkle.
6. Can I reuse this cozy every year?
Yes! If stored properly, it will last for many holiday seasons.
The Crochet Christmas Tree Cozy – TUTORIAL offers a wonderful opportunity to create a functional yet decorative piece that enhances your holiday décor. From selecting yarn and stitches to adding personal touches, every step allows you to infuse your own style into the project. This cozy not only hides your tree base but also serves as a handmade treasure that adds warmth and personality to your festive space.
If you decide to make your own, I’d love to hear about your experience! Share your thoughts, ideas, and suggestions so we can inspire each other and keep the holiday crafting spirit alive.