
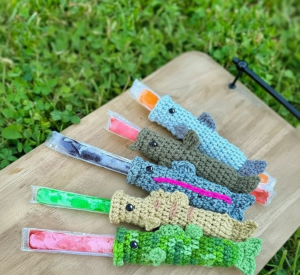
Turtle Baby Blanket – Tutorial


Creating a Crochet Candy Ornament for Christmas – TUTORIAL is a delightful way to bring handmade warmth and charm to your holiday decorations. These adorable little sweets make perfect additions to your Christmas tree, gift wrapping, or festive garlands. Using just a few simple crochet stitches and colorful yarn scraps, you can create cheerful ornaments that spread the joy of the season. Whether you’re a beginner or an experienced crocheter, this project is fun, quick, and perfect for using leftover materials.
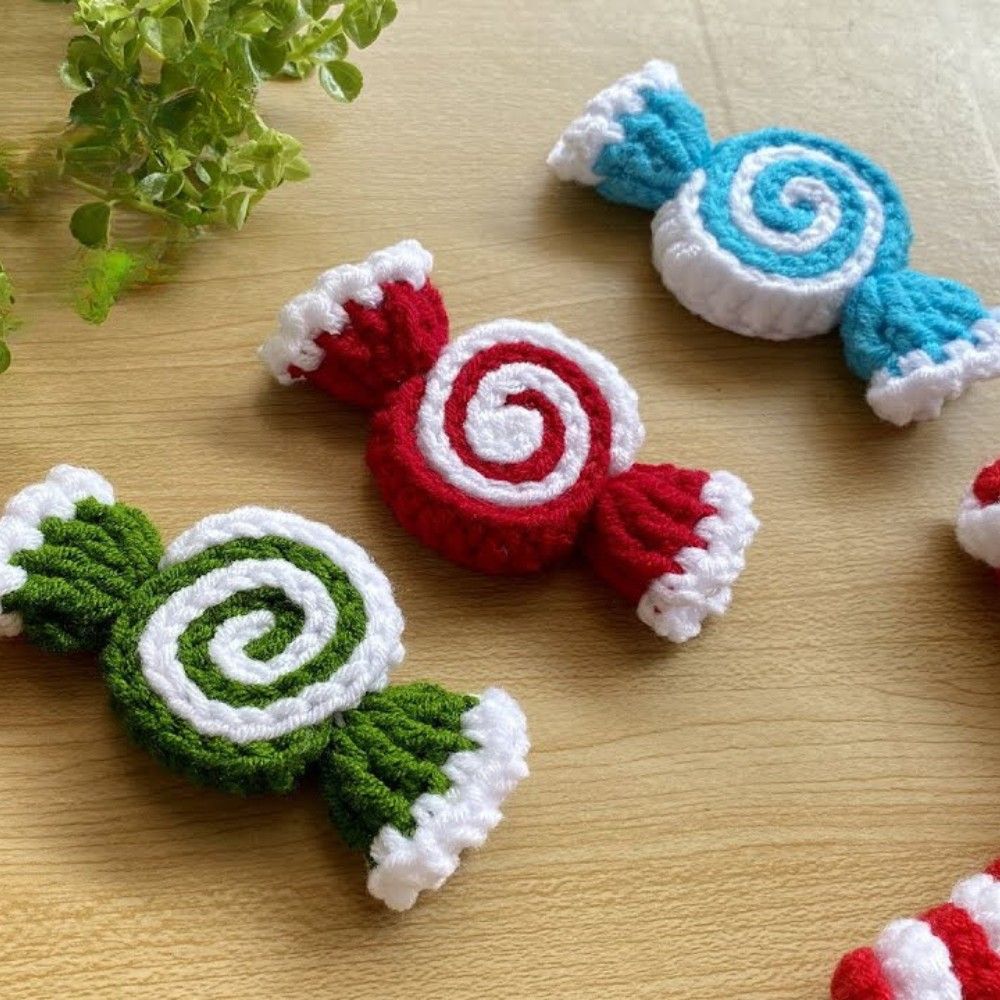
The beauty of the Crochet Candy Ornament for Christmas – TUTORIAL lies in its simplicity and versatility. You can make them in various colors, sizes, and textures to match your holiday theme. From traditional red and white peppermint swirls to playful pastel tones, the possibilities are endless. These ornaments also make wonderful handmade gifts for family, friends, and coworkers.
Beyond being festive, this project helps build essential crochet skills. Working on small pieces improves precision and teaches you how to manage color changes and shaping. It’s a great pattern to practice your technique while creating something truly meaningful for the holidays.
To start your Crochet Candy Ornament for Christmas – TUTORIAL, you’ll need just a few basic supplies. Gather cotton or acrylic yarn in your preferred Christmas colors—red, white, green, gold, or even metallic shades add a festive sparkle. Choose a lightweight yarn if you want delicate ornaments or a thicker one for larger decorations.
You’ll also need a crochet hook that matches your yarn size, a tapestry needle for sewing, and a small amount of stuffing if your design includes a puffed candy shape. Some crocheters also use ribbons, beads, or glittery thread to add extra flair.
Before starting, take a moment to plan your color combinations. Traditional candy designs look charming with red and white stripes, but experimenting with unexpected hues—like turquoise and silver—can create a modern twist.
Make sure to keep your yarn ends tidy by weaving them in as you go. This keeps your finished Crochet Candy Ornament for Christmas – TUTORIAL neat and professional-looking.
If you’re making multiple ornaments, consider preparing all your materials in advance. Having your yarn cut and hooks ready will make the crafting process smoother and more enjoyable.
Finally, set up a cozy workspace with good lighting. Crocheting small items like these requires clear visibility, especially when working with detailed stitches or multiple color changes.
To begin the Crochet Candy Ornament for Christmas – TUTORIAL, start with a simple circle base. Create a magic ring, then crochet six single crochets into the ring and pull tight. Continue working in rounds, increasing evenly to form a small, flat circle—this will be the center of your candy.
Next, introduce your second color to create the striped effect. Alternate between your chosen shades every few stitches or rounds to mimic a candy swirl. This technique not only looks beautiful but also gives your ornament that classic holiday feel.
Once your circle reaches the desired size, stop increasing and continue crocheting evenly for one or two rounds. This will give the ornament a slightly domed appearance if desired. You can lightly stuff the center with fiberfill before closing to make it more three-dimensional.
When you’re happy with the shape, fasten off and weave in the loose ends carefully. If you’re making wrapped candies, crochet or tie small rectangles at both sides to form the “twist” ends of the wrapper. Secure them firmly so they don’t unravel.
To make your ornament easy to hang, attach a yarn loop or decorative ribbon to the top. A small bow tied around the middle can add an extra touch of sweetness.
Remember, each candy ornament is unique. Don’t worry about perfection—the charm lies in its handmade look and festive character. Your Crochet Candy Ornament for Christmas – TUTORIAL should reflect your creativity and joy.
The Crochet Candy Ornament for Christmas – TUTORIAL offers endless opportunities for personalization. You can adapt this pattern to fit any style of Christmas décor, from traditional to modern or rustic.
For a peppermint swirl look, alternate red and white stripes using slip stitches or color changes every few rows. For a caramel or chocolate theme, use shades of brown, cream, and gold. Add metallic thread for shimmer or sparkly yarn for a magical holiday touch.
If you prefer a softer aesthetic, try pastel shades like mint, pink, and baby blue for a vintage candy shop vibe. These look especially pretty when combined with frosted or glass ornaments on your Christmas tree.
For a whimsical twist, turn your candy ornaments into lollipops by attaching a wooden stick and a bow at the base. This playful variation looks adorable as table décor or in gift baskets.
You can also combine several small candies into a garland. Crochet them in different colors and string them together with a long chain stitch. It’s a charming and sustainable alternative to store-bought holiday garlands.
Finally, don’t be afraid to experiment with textures. Try using velvet or glitter yarn for a luxurious look, or mix matte and shiny finishes for added contrast. These creative choices make your Crochet Candy Ornament for Christmas – TUTORIAL truly one-of-a-kind.
Once your ornaments are complete, it’s time to finish and display your Crochet Candy Ornament for Christmas – TUTORIAL with pride. Start by checking all the seams and ensuring every yarn end is securely woven in. This helps your creations last for many Christmases to come.
Lightly block your ornaments by dampening them and letting them dry flat to help them hold their shape. If you’ve stuffed them, shape them gently by hand before drying.
Add a touch of holiday magic by sprinkling a bit of glitter or sewing on tiny beads to mimic sugar crystals. These details catch the light beautifully when hung on your Christmas tree.
When it comes to displaying, hang them individually as tree decorations or attach them to gifts for an extra handmade touch. They also make lovely wreath accents or table centerpieces.
If you want to give them as gifts, consider packaging them in clear bags tied with ribbon or in small festive boxes. Handmade gifts like these are meaningful, eco-friendly, and full of love.
Lastly, store your Crochet Candy Ornament for Christmas – TUTORIAL creations carefully after the holidays. Keep them in a cool, dry place away from moisture so they remain fresh and vibrant for the next festive season.
FAQ – Crochet Candy Ornament for Christmas – TUTORIAL
1. What yarn is best for candy ornaments?
Cotton or acrylic yarn works best since both hold their shape well and come in vibrant holiday colors.
2. Can beginners make these ornaments?
Absolutely! This pattern is beginner-friendly and a great way to practice basic stitches and color changes.
3. How do I make the candy look more realistic?
Use high-contrast colors like red and white and alternate them frequently for a traditional peppermint appearance.
4. Can I use leftover yarn for this project?
Yes! This is a perfect scrap yarn project since each candy ornament requires very little material.
5. How can I add sparkle to my ornaments?
You can use metallic or glitter yarn, or even lightly coat your finished ornament with fabric-safe glitter glue.
6. Can these ornaments be washed?
Hand washing is best to preserve their shape and colors, especially if they contain embellishments.
Conclusion
The Crochet Candy Ornament for Christmas – TUTORIAL is a joyful and creative way to celebrate the holiday season. With simple stitches, colorful yarn, and a touch of imagination, you can craft beautiful handmade decorations that add warmth to your home.
PATTERN VIDEO:
Whether you make them for yourself or as heartfelt gifts, these crochet candies will bring smiles and festive cheer. We hope you enjoyed this tutorial—don’t forget to leave your honest feedback and suggestions below. We’d love to hear how your crochet candy ornaments turned out!

