Valentine Heart Granny Square - PATTERN

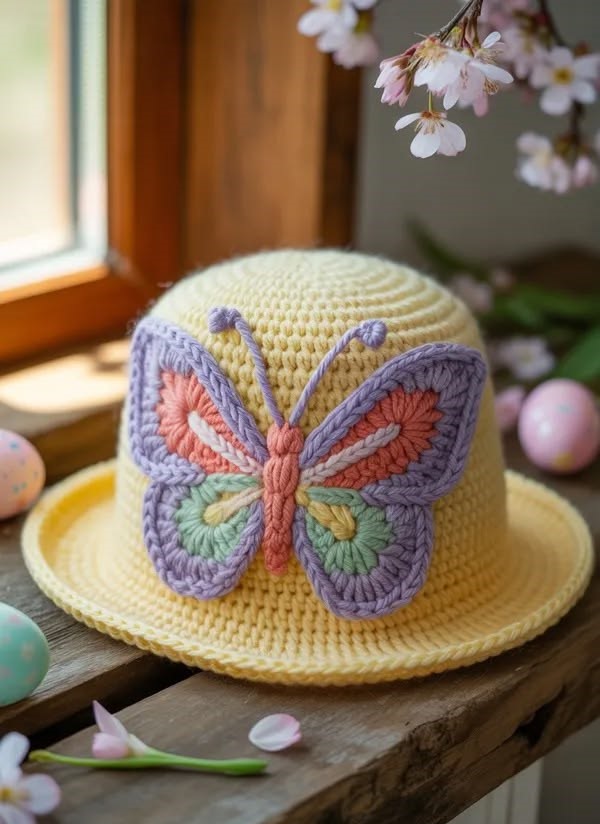
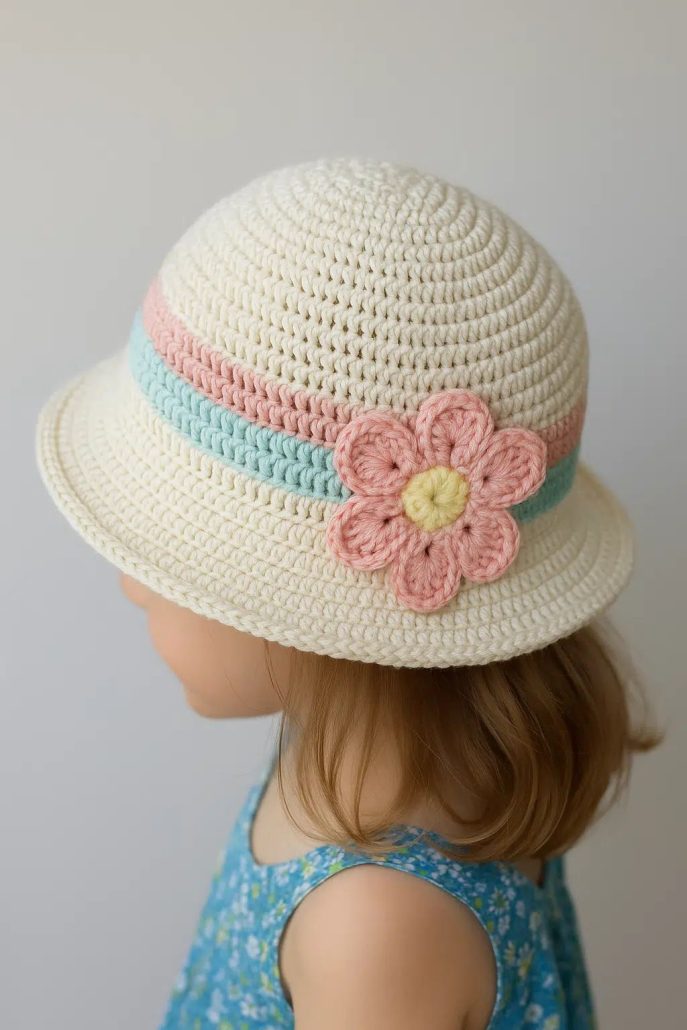
The Children’s Crochet Hat – Tutorial is a wonderful and practical crochet project that combines comfort, style, and creativity. Perfect for keeping little ones warm while adding a handmade touch to their outfits, this project is both functional and fun to create.
With the Children’s Crochet Hat – Tutorial, you can customize colors, sizes, and stitch patterns to suit any child’s personality or seasonal need. Whether you’re making a cozy winter hat or a lightweight accessory for cooler evenings, this pattern offers endless possibilities.
In this complete guide, you will learn how to create your own Children’s Crochet Hat – Tutorial step by step. Designed for beginners and experienced crocheters alike, this tutorial will help you achieve a polished and comfortable result.
To begin your Children’s Crochet Hat – Tutorial, choosing the right yarn is essential. Soft, hypoallergenic yarn such as cotton or acrylic is ideal for children’s sensitive skin.
Selecting the appropriate yarn weight will determine the thickness of the hat. Lightweight yarn is perfect for mild weather, while thicker yarn is better for colder seasons.
You will need a crochet hook that matches your yarn weight. Using the correct hook ensures consistent stitches and a comfortable fit.
Basic tools such as scissors, a yarn needle, and stitch markers are important for keeping your work organized and neat.
Measuring the child’s head circumference is crucial for achieving the correct size. This ensures your Children’s Crochet Hat – Tutorial fits snugly without being too tight.
Before starting, review your pattern and plan your color choices. This preparation helps create a smooth and enjoyable crocheting experience.
The Children’s Crochet Hat – Tutorial typically begins with a magic ring or a small chain loop to form the top of the hat.
Work in the round, increasing stitches gradually to create a flat circular crown. This step determines the overall size of the hat.
Once the crown reaches the desired diameter, continue crocheting without increases to form the body of the hat.
Maintain consistent tension throughout to ensure an even texture and proper fit.
You can add simple stitch patterns or textures as you build the body. This enhances the design and adds visual interest.
When the desired length is reached, finish with a neat edge or decorative border to complete your Children’s Crochet Hat – Tutorial.
One of the best parts of the Children’s Crochet Hat – Tutorial is the ability to personalize the design. You can experiment with different colors to create fun and vibrant hats.
Adding embellishments such as pom-poms, bows, or appliqués can make the hat more playful and appealing to children.
You can also try different stitch patterns to create unique textures, such as ribbing or shell stitches.
Adjusting the length allows you to create various styles, including beanies, slouchy hats, or fitted caps.
For themed designs, consider incorporating animal ears or character-inspired elements.
Creating matching sets with scarves or mittens can enhance the overall look of your Children’s Crochet Hat – Tutorial.
Finishing your Children’s Crochet Hat – Tutorial properly ensures durability and a professional appearance. Start by weaving in all loose ends carefully.
Blocking the hat can help shape it and improve the overall finish, especially for more detailed designs.
Check the fit and make any necessary adjustments. A well-fitted hat should be snug but comfortable.
This project offers many practical benefits. It keeps children warm while adding a stylish handmade accessory to their wardrobe.
The Children’s Crochet Hat – Tutorial is also a great gift idea. Handmade hats are thoughtful and personal.
Additionally, this project is a great way to practice crochet skills while creating something useful and enjoyable.
Is this project suitable for beginners?
Yes, the Children’s Crochet Hat – Tutorial is beginner-friendly and uses basic crochet techniques.
What type of yarn is best?
Soft cotton or acrylic yarn is recommended for comfort and durability.
How do I choose the right size?
Measure the child’s head circumference and adjust the pattern accordingly.
Can I wash the hat?
Yes, most yarns allow gentle washing and air drying.
How long does it take to complete?
Most hats can be finished in a few hours.
Can I customize the design?
Absolutely. You can change colors, stitches, and add decorations.
The Children’s Crochet Hat – Tutorial is a fun and rewarding project that combines creativity with practicality. In this guide, you’ve learned how to choose materials, follow step-by-step instructions, customize your design, and finish your hat professionally.
With endless possibilities for styles and colors, this project allows you to create something truly special for children. Whether for everyday wear or as a thoughtful gift, a handmade crochet hat is always appreciated.
Now it’s your turn to try the Children’s Crochet Hat – Tutorial. Share your honest feedback and leave your suggestions—your ideas can inspire even more creative crochet projects!