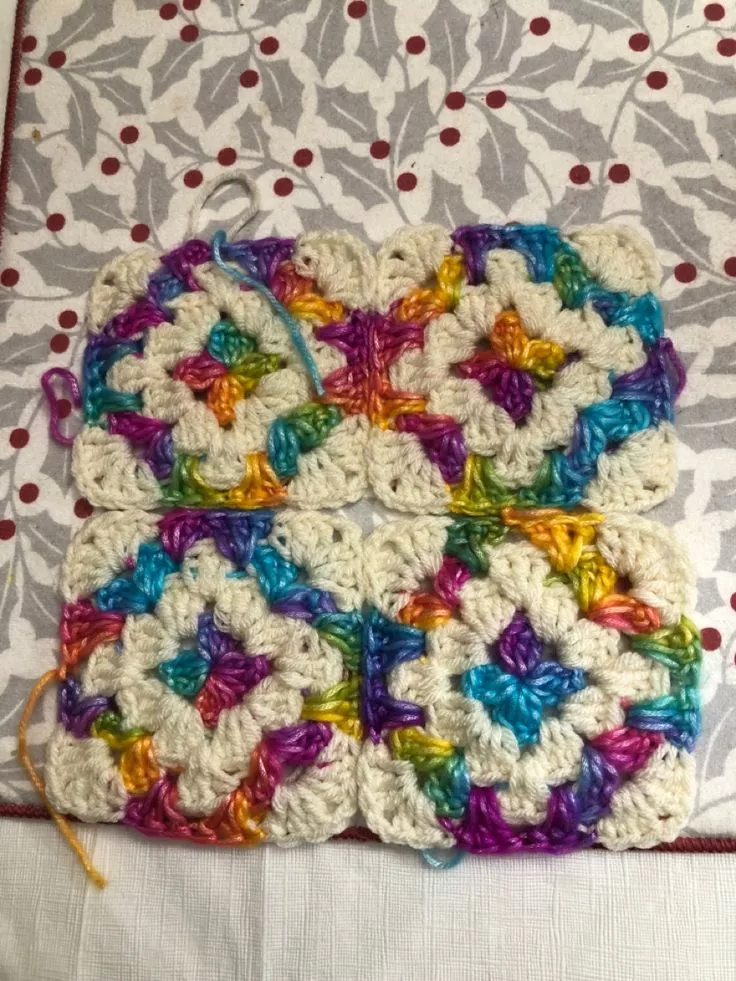
Granny squares have long been a beloved crochet technique, known for their versatility and charm. They’re perfect for creating everything from blankets to bags to home décor. If you’re looking to add a splash of color and creativity to your crochet projects, Crochet Colour Work Granny Squares – Pattern is a fantastic way to experiment with color combinations and learn new techniques. Whether you’re a beginner looking to add some vibrancy to your crochet, or an experienced crafter looking to try something new, this guide will help you master the art of color work in granny squares.
The beauty of Colour Work Granny Squares lies in their ability to incorporate multiple colors in one small, manageable motif. This technique allows you to experiment with different shades, creating stunning patterns and designs. With just a few simple stitches, you can craft intricate designs that are as colorful and unique as you want them to be. In this guide, we’ll show you how to create your own granny squares using color work, provide tips for choosing the right colors, and suggest some ways to incorporate these colorful squares into your crochet projects.
Let’s dive into the world of Crochet Colour Work Granny Squares and discover how to bring color and creativity into your next crochet project!
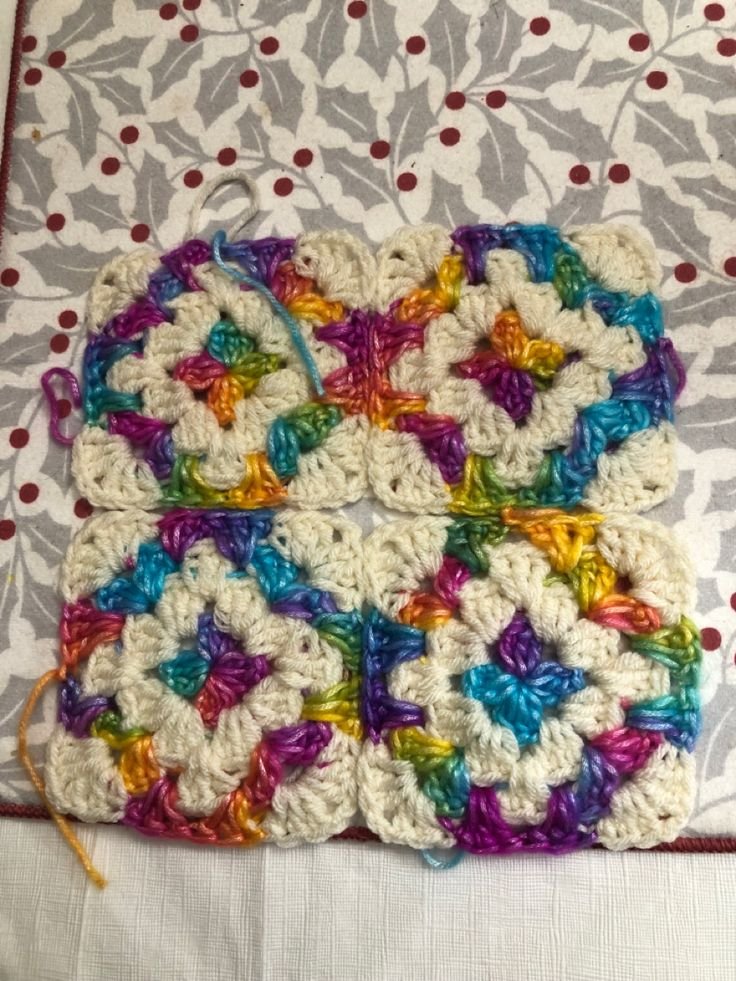
Image From Pinterest
1. Materials Needed for Crochet Colour Work Granny Squares
Before you start creating your Crochet Colour Work Granny Squares, it’s important to gather the right materials. Fortunately, this is a simple project that requires minimal supplies, but you’ll want to ensure you have everything you need to achieve beautiful results. Here’s what you’ll need:
DISCOVER MORE FREE PATTERNS HERE!
- Yarn: For a classic granny square, you’ll want to use worsted-weight yarn, though you can experiment with different yarns depending on your desired look. Choose at least two contrasting colors for your squares, though you can use more colors for a more intricate design. Choose yarns that are soft but durable, such as cotton, acrylic, or a cotton-blend yarn.
- Crochet Hook: A 4mm (G-6) or 5mm (H-8) crochet hook is ideal for worsted weight yarn. If you’re working with thinner or thicker yarns, be sure to adjust your hook size accordingly.
- Scissors: You’ll need a good pair of scissors to trim the yarn once you’ve finished your square.
- Yarn Needle: After crocheting, you’ll need a yarn needle to weave in the ends and finish off your square neatly.
- Stitch Markers: Optional, but helpful for keeping track of your rounds, especially when you’re working with multiple colors.
- Blocking Tools (Optional): To give your granny squares a professional, polished finish, you can block them to even out their shape and size. Blocking is particularly helpful when using different yarns or if you want to give your squares a crisp, uniform look.
2. How to Crochet Colour Work Granny Squares – Step-by-Step
Creating Crochet Colour Work Granny Squares is a simple process that involves working in rounds and changing colors at specific points to create a beautiful design. Below is a step-by-step guide to help you create your first granny square with color work.
2.1. Start with the Centre
- Begin with a Magic Ring: To start your granny square, begin with a magic ring (or chain 4 and join to form a ring). This will form the center of your square. The magic ring is often preferred because it gives a tighter, more secure center.
- Crochet the First Round: In the first round, use your first color to crochet a few double crochet stitches (usually 3 or 4) into the magic ring. Then, chain 2 to create a space between your groups of double crochet. Repeat this a few times, making sure you have four or more groups of double crochet, depending on the size of the square you want. Close the round by joining with a slip stitch to the top of the first stitch.
2.2. Start Adding Color
- Switch to Your Second Colour: After completing the first round, you can change to your second color to begin creating the next layer of your granny square. To change color, simply drop the current yarn, pick up the new yarn, and continue crocheting. The new color should be worked into the same stitch pattern as the previous color.
- Crochet the Second Round: Work into the spaces created by the chain-2 gaps from the first round. Crochet 2 double crochet stitches into each chain-2 space. Between each set of 2 double crochet stitches, add a chain 2 to create the corners of your granny square. You will now have 4 corners and several straight edges that make up the square.
- Continue with Additional Rounds: For each additional round, you can keep alternating colors, following the same pattern of double crochet stitches, chain-2 spaces for corners, and chain-1 spaces for the sides. Each round will expand your granny square.
2.3. Finishing the Granny Square
- Finishing with a Clean Edge: After you’ve reached the desired size for your granny square, finish off your last round by joining with a slip stitch to the first stitch of the round.
- Weave in the Ends: Use a yarn needle to weave in all loose yarn ends from each color change. This will keep your square neat and tidy.
- Optional – Blocking Your Square: For an even, professional finish, you can block your granny square. To do this, gently wet the square and pin it into a square shape on a flat surface, allowing it to dry completely.
3. Customizing Your Crochet Colour Work Granny Squares
Once you’ve got the basic technique down, you can experiment with different ways to customize your Crochet Colour Work Granny Squares. Here are a few tips for personalizing your squares:
- Choose Complementary or Contrasting Colors: You can either choose colors that complement each other for a subtle look or pick contrasting colors for a bold, striking effect. Experiment with color combinations to find the perfect one for your project.
- Play with Color Placement: In granny squares, you can choose to change colors every round or keep the same color for several rounds. Changing colors frequently will create a vibrant, multi-colored effect, while using fewer colors will create a more cohesive, elegant look.
- Incorporate Different Stitches: Instead of just using double crochet stitches, try incorporating other crochet stitches such as treble crochet, half double crochet, or even popcorn stitches for a unique texture or pattern. This will add more visual interest to your squares.
- Create Larger or Smaller Squares: You can adjust the size of your granny squares by changing the number of rounds you crochet. Smaller squares are perfect for smaller projects like coasters or patches, while larger squares work well for blankets, throws, or shawls.
- Add Decorative Elements: Try adding decorative elements such as beads, buttons, or embroidery to your finished squares. This can add a personal touch to your creations and make them one-of-a-kind.
4. Creative Uses for Crochet Colour Work Granny Squares
Once you’ve mastered creating Crochet Colour Work Granny Squares, the possibilities for using them are endless. Here are some fun and creative ideas for incorporating your colorful squares into your crochet projects:
- Make a Blanket: The most common use for granny squares is creating a cozy blanket. You can join multiple squares together to make a larger project, such as a throw blanket, baby blanket, or lapghan. You can also create a sampler blanket by using a variety of colors and designs.
- Crochet a Bag: Crochet granny squares can be joined together to create a stylish bag. Make a simple tote bag, a crossbody, or even a small purse. The colorful squares will make your bag unique and eye-catching.
- Create Pillows and Cushions: Use granny squares to create throw pillows or cushion covers. This is a great way to add personality and color to your living room or bedroom décor.
- Decorate with Wall Hangings: Several granny squares can be joined together to form a beautiful, textured wall hanging. This is perfect for adding a handmade touch to your home décor.
- Make a Scarf or Shawl: You can connect your granny squares to make a fun, colorful scarf or shawl. This is an excellent way to showcase your color work and create a wearable piece of art.
FAQ
1. How many colors should I use in my granny square?
There’s no limit to how many colors you can use in your granny square. Some people prefer to use just two colors for a simple design, while others enjoy working with many colors for a more vibrant look. It’s entirely up to you!
2. How do I join my granny squares together?
There are several methods for joining granny squares, including whip stitch, slip stitch, or using a join-as-you-go technique. Each method results in a slightly different finish, so you can choose the one that works best for your project.
3. How do I keep my granny squares even in size?
To keep your granny squares even in size, be sure to crochet the same number of stitches in each round and check that your gauge is consistent. If you’re using different yarns, it might be a good idea to block your squares to ensure they’re uniform.
4. Can I make granny squares with different sizes of yarn?
Yes, you can experiment with different yarn weights. Thicker yarns will create larger squares, while finer yarns will result in smaller, more delicate squares.
5. How long does it take to make a crochet granny square?
On average, it takes around 20 to 30 minutes to complete one granny square, depending on your skill level and the complexity of the design.
6. Can I add other motifs or designs to my granny squares?
Absolutely! You can combine granny squares with other crochet motifs like flowers, hearts, or geometric shapes to create more intricate patterns and designs.
PATTERN HERE
Conclusion
In this article, we’ve explored the basics of Crochet Colour Work Granny Squares and how you can use them to add a vibrant, personal touch to your crochet projects. Whether you’re making a blanket, bag, or decorative item, color work in granny squares is a fantastic way to show off your creativity. Now that you’ve learned the technique, we encourage you to experiment with colors and designs to make your own unique squares. Please share your thoughts and suggestions in the comments below, and happy crocheting!