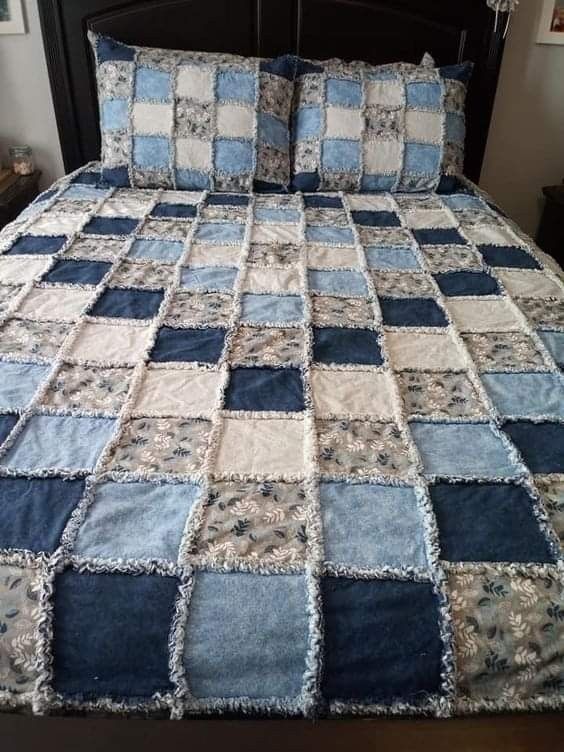
Easy Cross-Shaped Quilt

The Rainshadow Quilt – TUTORIAL is a stunning quilting project that combines geometric beauty with modern design. Inspired by the natural patterns created by shifting light and shadow, this quilt offers a sophisticated look that can elevate any space in your home.
Creating your own Rainshadow Quilt – TUTORIAL allows you to explore color contrast, fabric placement, and precision piecing. Whether you prefer bold tones or subtle gradients, this quilt design can be customized to reflect your personal aesthetic.
In this complete guide, you will learn how to create a Rainshadow Quilt – TUTORIAL step by step. From selecting fabrics to assembling and finishing your quilt, this tutorial is suitable for both beginners and experienced quilters.
To begin your Rainshadow Quilt – TUTORIAL, selecting high-quality quilting cotton is essential. Choose fabrics in contrasting shades to highlight the geometric pattern.
A well-planned color palette is key to achieving the rainshadow effect. Gradients or carefully chosen light and dark fabrics create depth and visual movement.
You will need basic quilting tools such as a rotary cutter, cutting mat, quilting ruler, pins, and a sewing machine. These tools ensure accuracy and efficiency.
Batting and backing fabric are also required. The batting provides warmth and structure, while the backing completes the quilt.
Thread selection should complement your fabric choices. A strong, neutral thread is often best for piecing and quilting.
Before starting, wash and press all fabrics. This step prevents shrinkage and ensures your Rainshadow Quilt – TUTORIAL has a clean, professional finish.
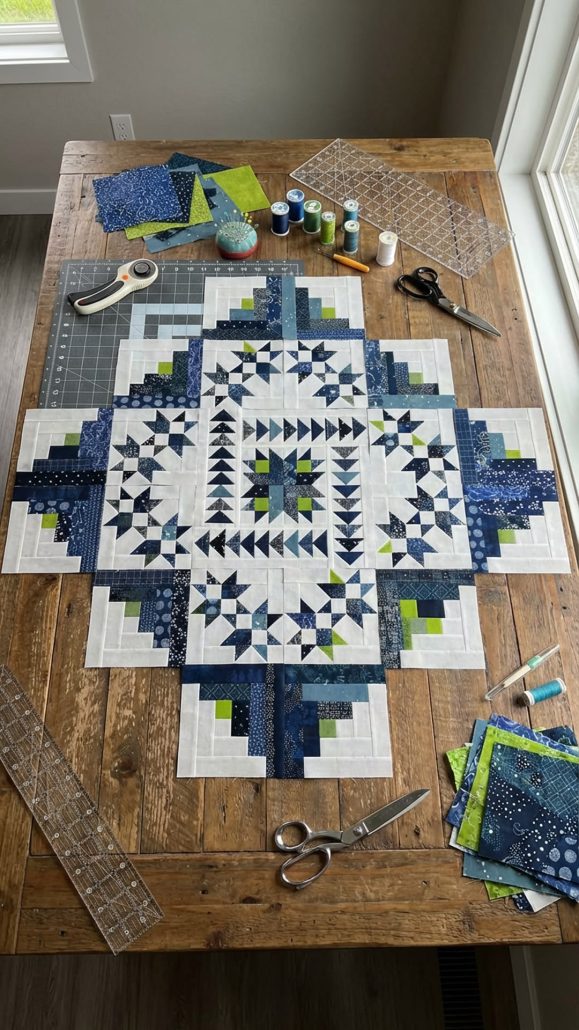
The construction of the Rainshadow Quilt – TUTORIAL begins with cutting your fabric into precise shapes, often squares or rectangles depending on the design.
Accuracy is crucial during this step. Carefully measure and cut each piece to ensure all blocks align properly.
Start assembling smaller units by sewing pieces together to form sections of the pattern. Press seams after each step to maintain a flat surface.
Once the smaller units are complete, join them to create full quilt blocks. This stage reveals the geometric pattern of the design.
Arrange the blocks on a flat surface to finalize your layout. Adjust colors and placement until you achieve the desired visual effect.
Finally, sew the blocks together row by row to complete the quilt top for your Rainshadow Quilt – TUTORIAL.
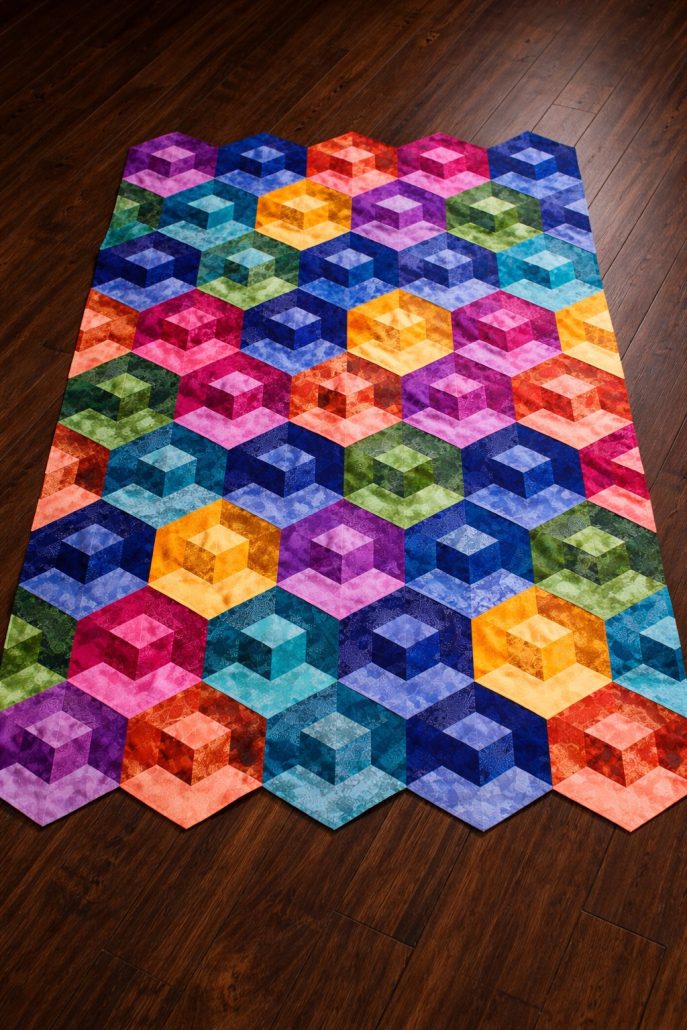
One of the most exciting aspects of the Rainshadow Quilt – TUTORIAL is the flexibility in design. You can experiment with different color schemes to create unique visual effects.
Using monochromatic shades can produce a subtle and elegant quilt, while bold contrasts create a striking modern look.
You can also vary the size of the blocks. Larger blocks make the pattern more dramatic, while smaller ones create a more intricate appearance.
Incorporating patterned fabrics alongside solids can add texture and depth to your design.
Another idea is to play with layout variations. Rotating blocks or rearranging colors can completely change the overall look of your quilt.
Adding borders in complementary colors can frame your Rainshadow Quilt – TUTORIAL and enhance its final presentation.
Finishing your Rainshadow Quilt – TUTORIAL properly ensures a durable and professional result. Begin by layering the quilt top, batting, and backing.
Baste the layers together using pins or spray adhesive to keep everything in place during quilting.
Quilt through all layers using straight lines, free-motion designs, or patterns that complement the geometric theme.
Trim the edges evenly and attach binding to finish the quilt. This step gives your project a clean and polished edge.
The Rainshadow Quilt – TUTORIAL is both functional and decorative. It can be used as a bedspread, throw, or wall hanging.
Additionally, creating your own quilt is a rewarding and sustainable process, allowing you to craft a long-lasting handmade item.
Is this project suitable for beginners?
Yes, the Rainshadow Quilt – TUTORIAL can be adapted for beginners with simple block designs.
What type of fabric should I use?
Quilting cotton is ideal due to its durability and ease of handling.
How do I achieve the rainshadow effect?
Use contrasting colors and careful placement to create depth and shadow-like patterns.
Do I need special tools?
Basic quilting tools like a rotary cutter, ruler, and sewing machine are sufficient.
How long does it take to complete?
Depending on size and complexity, it may take several days to finish.
Can I wash the finished quilt?
Yes, most quilts can be machine washed on a gentle cycle and air dried.
The Rainshadow Quilt – TUTORIAL is a creative and rewarding quilting project that combines precision, design, and craftsmanship. In this guide, you’ve learned how to select materials, piece the quilt blocks, customize your design, and finish your project professionally.
With endless possibilities for color and layout, this quilt allows you to create a truly unique piece that enhances your home. Whether for personal use or as a gift, it is a meaningful and lasting creation.
Now it’s your turn to try the Rainshadow Quilt – TUTORIAL. Share your honest feedback and leave your suggestions—your ideas can inspire even more beautiful quilting projects!