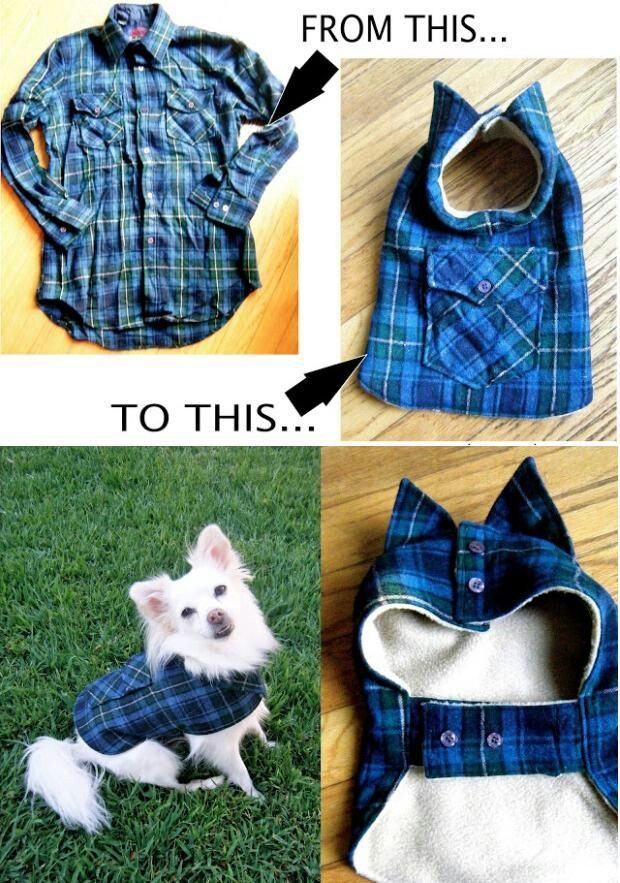
DIY Pet Coat - Pattern

The Sewing a Chair Cover – PATTERN is an excellent project for anyone looking to refresh their home décor without investing in new furniture. With the right approach, you can transform an old or worn-out chair into a stylish centerpiece that matches your interior design. This project combines creativity, practicality, and cost-effectiveness, making it ideal for beginners and experienced quilters alike.
Creating your own Sewing a Chair Cover – PATTERN allows for full customization. You can choose fabrics, colors, and textures that complement your space while also ensuring a perfect fit for your chair. Unlike store-bought covers, handmade versions offer a tailored look that enhances the overall aesthetic of your room.
In this complete guide, you’ll learn how to design, cut, and assemble your own Sewing a Chair Cover – PATTERN step by step. From selecting materials to finishing touches, this article will help you create a durable and beautiful chair cover that stands out.
To begin your Sewing a Chair Cover – PATTERN, selecting the right materials is essential for durability and comfort. Quilting cotton, canvas, or upholstery fabric are excellent choices because they provide strength and structure.
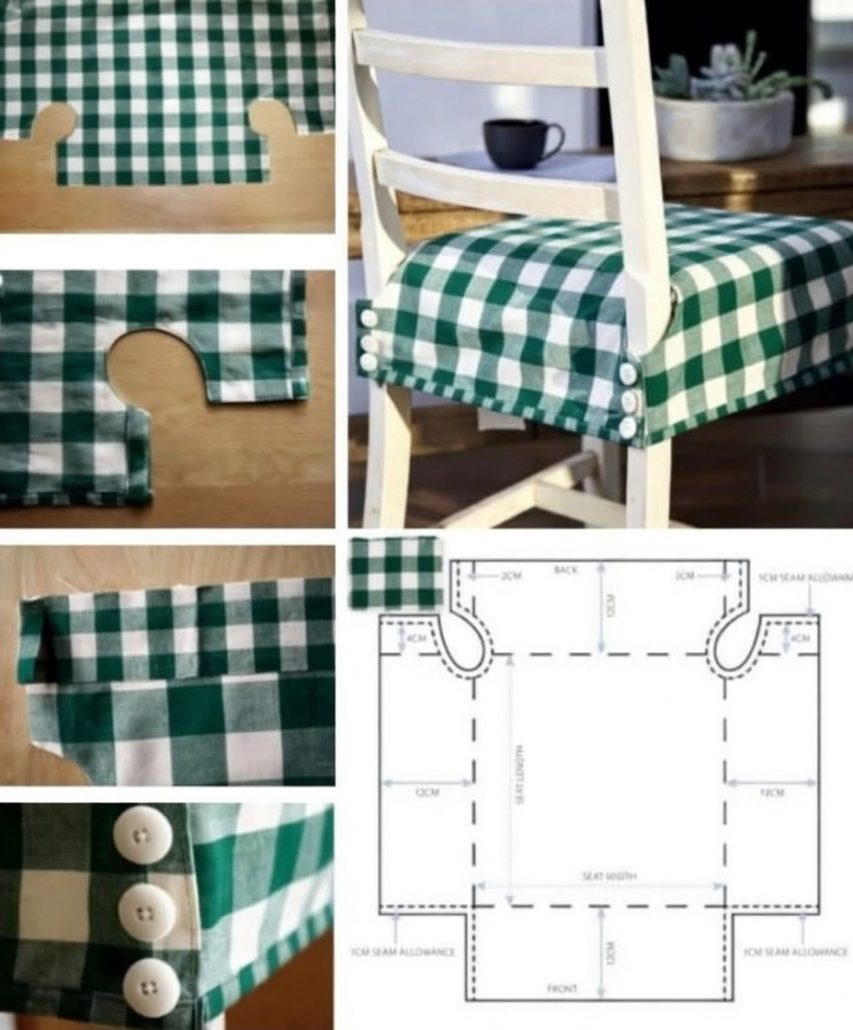
Measuring your chair accurately is the next crucial step. Take note of the seat width, depth, back height, and any curves or unique features. Precise measurements ensure that your finished cover fits snugly without slipping.
You’ll also need essential sewing tools such as fabric scissors, pins, measuring tape, and a sewing machine. These tools will make the process more efficient and help you achieve clean, professional results.
For the quilting aspect, consider using batting to add padding and texture. This layer not only improves comfort but also gives your chair cover a high-quality, structured appearance.
Thread selection is equally important. Choose a strong thread that matches or complements your fabric. This ensures durability and enhances the overall design of your Sewing a Chair Cover – PATTERN.
Finally, prepare a pattern template using paper or muslin fabric. Testing your pattern before cutting the final fabric helps avoid mistakes and ensures a perfect fit.
Once your materials are ready, it’s time to start cutting your fabric according to the Sewing a Chair Cover – PATTERN. Lay your fabric flat and use your measurements to mark each section carefully.
Cut separate pieces for the seat, backrest, and side panels. If your design includes quilting blocks or patchwork, assemble those sections first before attaching them to the main structure.
Begin sewing by joining smaller quilted pieces together. This step allows you to build the decorative elements of your chair cover while maintaining accuracy.
Next, attach the seat panel to the side sections. Make sure to align edges properly and secure them with pins before sewing to prevent shifting.
Once the seat is complete, move on to the backrest. Sew the front and back panels together, leaving space for turning and adjustments.
After assembling all sections, connect them to form the full chair cover. This stage brings your Sewing a Chair Cover – PATTERN to life and reveals the overall shape of the project.
One of the highlights of the Sewing a Chair Cover – PATTERN is the ability to customize every detail. You can experiment with colors, textures, and quilting styles to match your décor.
Patchwork designs are a popular choice. Combining different fabric pieces creates a visually interesting and unique look that stands out in any room.
You might also consider adding decorative stitching or embroidery. These details enhance the design and give your chair cover a handcrafted feel.
For a more modern style, use solid colors with geometric quilting patterns. This creates a clean and sophisticated appearance that works well in contemporary spaces.
Adding functional elements like ties, elastic edges, or buttons can improve the fit and usability of your chair cover. These features help keep it securely in place.
Seasonal themes are another great option. You can create multiple covers using the same Sewing a Chair Cover – PATTERN and switch them throughout the year for a fresh look.
Finishing your Sewing a Chair Cover – PATTERN properly ensures a polished and professional result. Start by trimming excess fabric and reinforcing seams for added durability.
Hem all edges neatly to prevent fraying. A clean finish not only improves appearance but also extends the lifespan of your chair cover.
Press your seams with an iron to give the cover a crisp and structured look. This step makes a noticeable difference in the final presentation.
Test the fit on your chair and make any necessary adjustments. A well-fitted cover enhances both comfort and visual appeal.
One of the biggest advantages of this project is its practicality. Chair covers protect furniture from wear, stains, and damage, making them a smart investment.
Additionally, the Sewing a Chair Cover – PATTERN allows you to update your décor easily and affordably. Instead of replacing furniture, you can simply change the cover for a new style.
What type of fabric is best for chair covers?
Durable fabrics like canvas, upholstery fabric, or quilting cotton are ideal for long-lasting results.
Is this project suitable for beginners?
Yes, the Sewing a Chair Cover – PATTERN can be adapted for beginners with simple designs and basic sewing techniques.
How do I ensure a perfect fit?
Accurate measurements and testing your pattern with muslin fabric help achieve a precise fit.
Can I wash the chair cover?
Most fabric covers are machine washable, but always check the fabric type and care instructions.
Do I need quilting experience?
Basic quilting knowledge is helpful but not required. Simple patterns work well for beginners.
How long does it take to complete?
The time varies depending on complexity, but most projects can be completed in a few hours to a day.
The Sewing a Chair Cover – PATTERN is a versatile and rewarding project that combines creativity with functionality. By following this guide, you’ve learned how to select materials, create a pattern, assemble the quilted design, and add finishing touches for a professional result.
This project not only enhances your home décor but also protects your furniture and allows for easy updates. With endless customization options, you can create chair covers that reflect your personal style and adapt to any season.
Now it’s your turn to try the Sewing a Chair Cover – PATTERN. Share your honest feedback, ideas, and suggestions—your input can inspire even more creative projects!