Easy Cross-Shaped Quilt

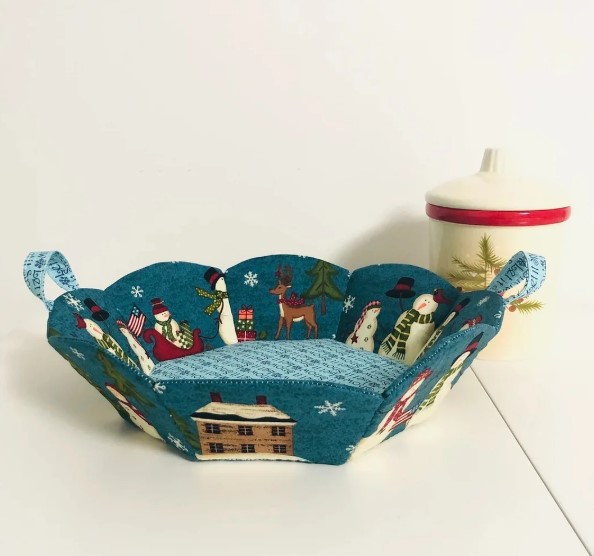
Octagonal basket – tutorial is a creative and functional quilting project that allows you to craft a unique fabric basket with a geometric shape. By following the Octagonal basket – tutorial, you can create a stylish storage solution that stands out from traditional round or square baskets.
One of the most interesting aspects of the Octagonal basket – tutorial is its distinctive design. The eight-sided structure gives the basket a modern and elegant look, making it perfect for organizing sewing supplies, home accessories, or decorative items. This project is ideal for quilters who enjoy combining structure with creativity.
In this complete Octagonal basket – tutorial, you will learn how to select materials, cut precise fabric pieces, assemble the octagonal shape, and finish your basket with professional details. This guide is suitable for beginners and experienced quilters alike.
The first step in the Octagonal basket – tutorial is gathering all the necessary materials for a smooth sewing process.
Cotton fabric is highly recommended because it is easy to work with and provides a clean finish.
Choose coordinating fabrics for the outer layer and lining to enhance the visual effect.
Batting or interfacing is essential to give the basket structure and stability.
Basic tools such as a rotary cutter, cutting mat, scissors, pins, and a sewing machine are required.
Strong thread ensures durability, especially for seams that handle weight.
An iron is important for pressing seams and improving accuracy.
Preparation is a key stage in the Octagonal basket – tutorial, ensuring all pieces are ready for assembly.
Start by cutting eight equal fabric panels for the sides of the basket.
Cut an octagonal piece for the base, making sure all sides are even.
In the Octagonal basket – tutorial, precision in cutting is essential to achieve a perfect geometric shape.
Prepare matching pieces for the lining and interfacing.
Attach interfacing or batting to the outer fabric panels to provide structure.
Press all pieces carefully to remove wrinkles and prepare them for sewing.
The next stage in the Octagonal basket – tutorial is constructing the basket shape.
Begin by sewing the side panels together, joining them edge to edge to form an octagonal ring.
Align all seams carefully to maintain symmetry.
In the Octagonal basket – tutorial, consistent seam allowances are crucial for accuracy.
Attach the side structure to the octagonal base, pinning evenly to avoid puckering.
Repeat the same process with the lining pieces.
Join the outer basket and lining, leaving an opening for turning.
The final stage of the Octagonal basket – tutorial focuses on finishing touches and personalization.
Turn the basket right side out through the opening.
Close the opening with neat stitching.
Press all seams to create a crisp and professional finish.
In the Octagonal basket – tutorial, topstitching around the upper edge adds strength and style.
Customize your basket by adding handles, decorative stitching, or labels.
You can also adjust the height or size depending on your needs.
Once completed, your octagonal basket is ready to use or display.
Is this project suitable for beginners?
Yes, the Octagonal basket – tutorial is beginner-friendly with basic sewing knowledge.
Why is accuracy important in this project?
Precise cutting and sewing ensure the octagonal shape fits together correctly.
Can I use scraps for this project?
Yes, it’s a great way to use fabric scraps creatively.
Do I need interfacing?
Yes, it helps the basket maintain its structure.
How long does it take to complete?
It can usually be completed in a few hours.
Is this a good gift idea?
Absolutely, it makes a practical and stylish handmade gift.
The Octagonal basket – tutorial is a unique and rewarding quilting project that combines geometric design with practical use. It allows you to create a functional storage solution with a modern and eye-catching appearance.
In this tutorial, you learned how to select materials, cut precise fabric pieces, assemble the octagonal structure, and finish your basket with professional details. Each step contributes to a sturdy and visually appealing final product.
Projects like the Octagonal basket – tutorial show how quilting can transform simple fabric into structured and decorative items.
If you enjoyed this tutorial, feel free to leave your honest opinion and share your suggestions. Your feedback helps inspire more creative quilting ideas and projects.