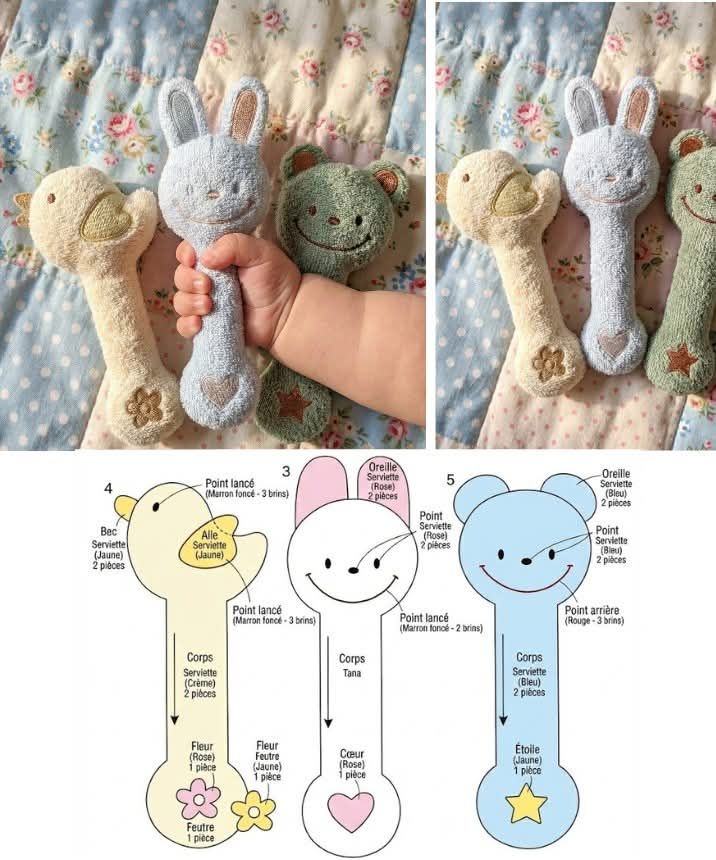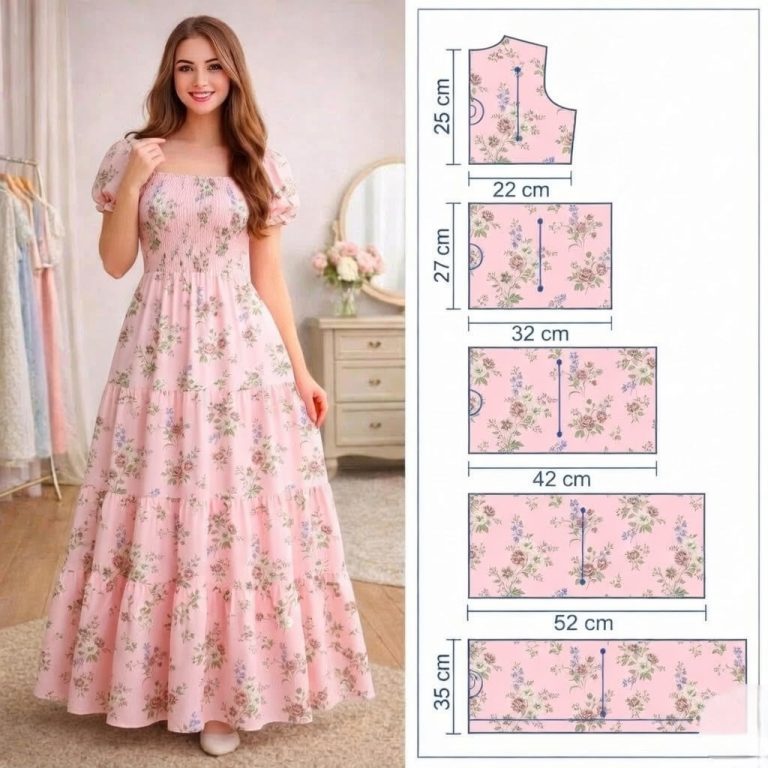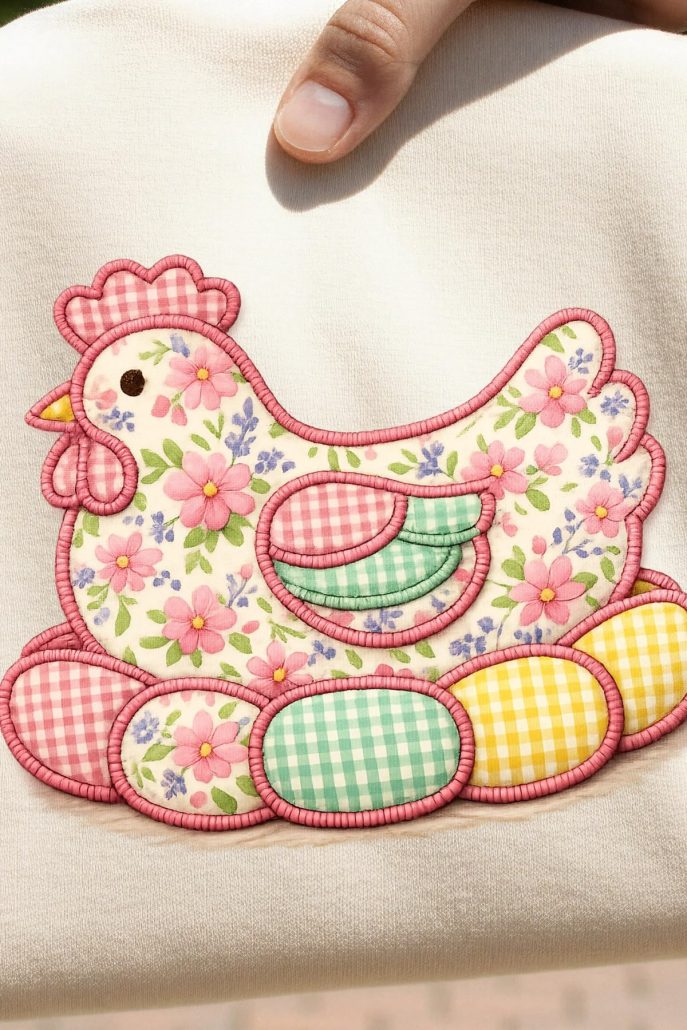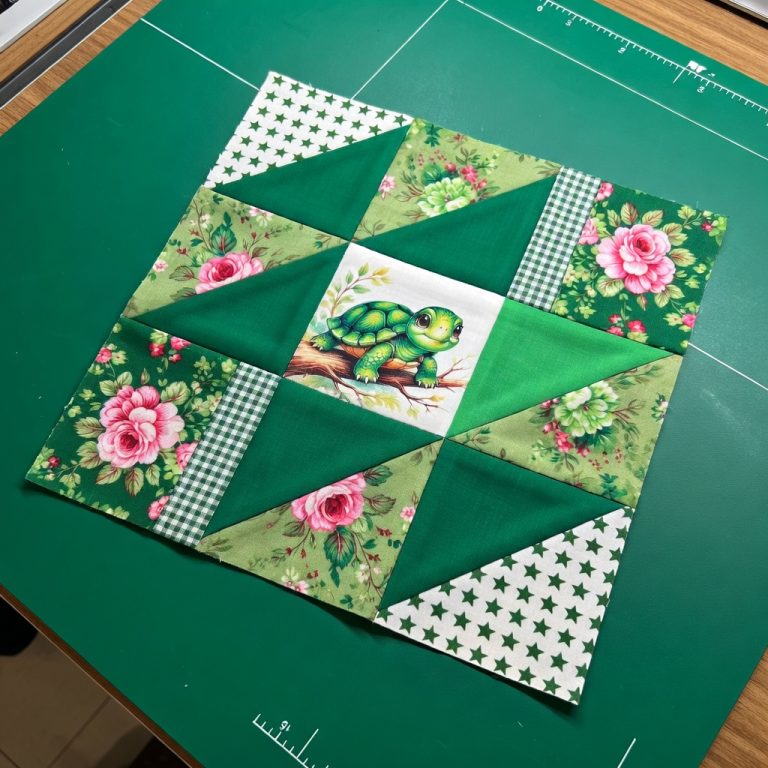
DIY - 9-Patch “Turtle Star” Quilt Block Tutorial

Husky Quilt – TUTORIAL is a creative and heartwarming quilting project that celebrates the beauty and personality of one of the most beloved dog breeds. With expressive features and bold design possibilities, the husky-themed quilt is perfect for animal lovers who want to turn their passion into a meaningful handmade piece.
The Husky Quilt – TUTORIAL combines traditional quilting techniques with modern appliqué or piecing styles to create a visually striking result. Whether designed as a wall hanging, throw quilt, or decorative panel, this pattern allows quilters to showcase detail, texture, and color in a unique way.
In this article, you will learn everything you need to know about the Husky Quilt – TUTORIAL, from understanding the design concept to construction, fabric selection, customization ideas, and care tips. This guide is suitable for confident beginners and experienced quilters who enjoy themed and character-based quilt projects.
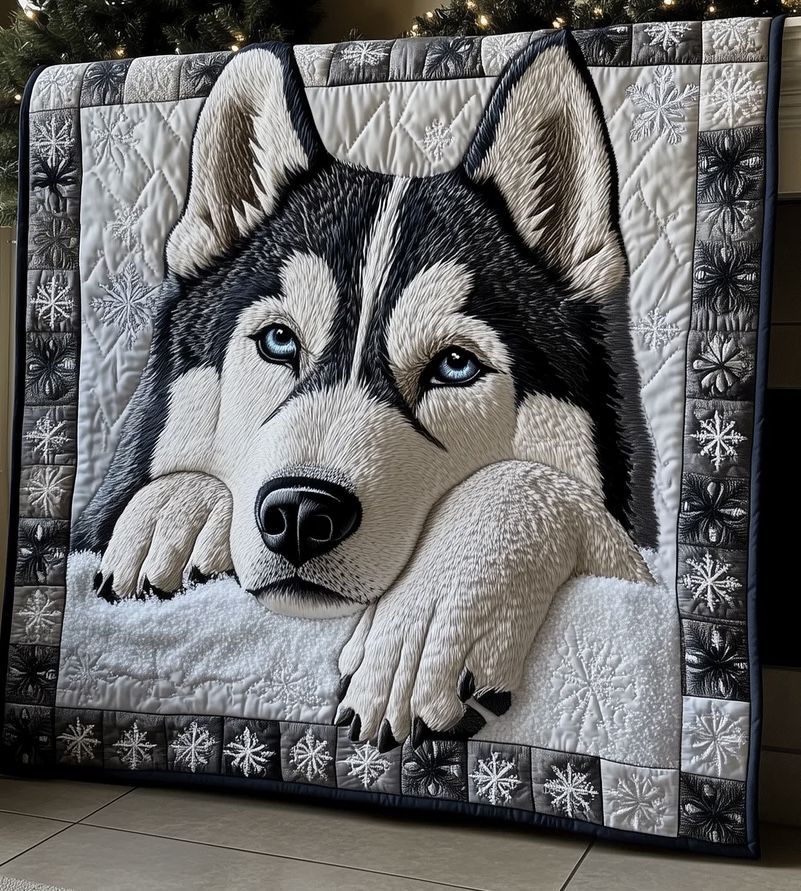
The Husky Quilt – TUTORIAL typically focuses on capturing the distinctive facial features and strong silhouette of a husky.
Many patterns use appliqué techniques to form the dog’s face, ears, and markings.
Some variations rely on foundation piecing for sharper angles and precise lines.
The block or panel is often designed as a focal point rather than a repeating block pattern.
Strong contrast between light and dark fabrics helps define the husky’s expression.
Overall, the Husky Quilt – TUTORIAL blends artistic design with quilting precision.
Fabric choice plays a vital role in the success of the Husky Quilt – TUTORIAL.
Quilting cotton is commonly used because it is easy to sew and offers excellent color clarity.
Shades of gray, white, black, and blue are popular for capturing a realistic husky appearance.
Background fabrics should complement the central design without overpowering it.
Batting choice depends on whether the quilt is decorative or functional.
Basic tools such as rotary cutters, rulers, thread, and pins ensure clean and accurate construction.
The Husky Quilt – TUTORIAL usually begins with preparing pattern templates or printed layouts.
Fabric pieces are cut carefully according to the pattern’s shapes and sizes.
Appliqué elements are assembled first, layering shapes to create facial details.
Each section is stitched securely before moving on to the next.
Once the main design is complete, it is attached to the background fabric.
The quilt top is then layered with batting and backing, followed by quilting and binding.
Customization is a highlight of the Husky Quilt – TUTORIAL. You can personalize the quilt by adjusting colors to match a specific dog.
Adding embroidered details such as eyes or whiskers enhances expression.
Borders and sashing can frame the design and add visual balance.
Finished quilts can be displayed as wall art, couch throws, or bed accents.
For care, gentle washing helps preserve color and stitching.
Air drying or low-heat drying is recommended to maintain quilt shape.
Is the Husky Quilt – TUTORIAL suitable for beginners?
It is best for confident beginners familiar with appliqué or precise piecing.
How long does it take to complete a Husky quilt?
Time varies, but most projects take several days depending on detail.
Can I resize the husky design?
Yes, many patterns allow scaling for different quilt sizes.
What techniques are commonly used?
Appliqué and foundation piecing are most common.
Is this quilt more decorative or functional?
It works well as both, depending on fabric and batting choices.
Can I personalize the quilt for a gift?
Yes, adding names or dates makes it a meaningful keepsake.
This Husky Quilt – TUTORIAL article explored the design concept, fabric choices, construction process, and customization options for creating a beautiful husky-themed quilt. You now have a clear understanding of how to approach this unique and expressive quilting project.
The Husky Quilt – TUTORIAL offers a wonderful opportunity to combine craftsmanship with love for animals in a handmade creation.
We invite you to leave your honest opinion and share your suggestions. Your feedback helps us improve future quilting tutorials and inspires new creative projects.