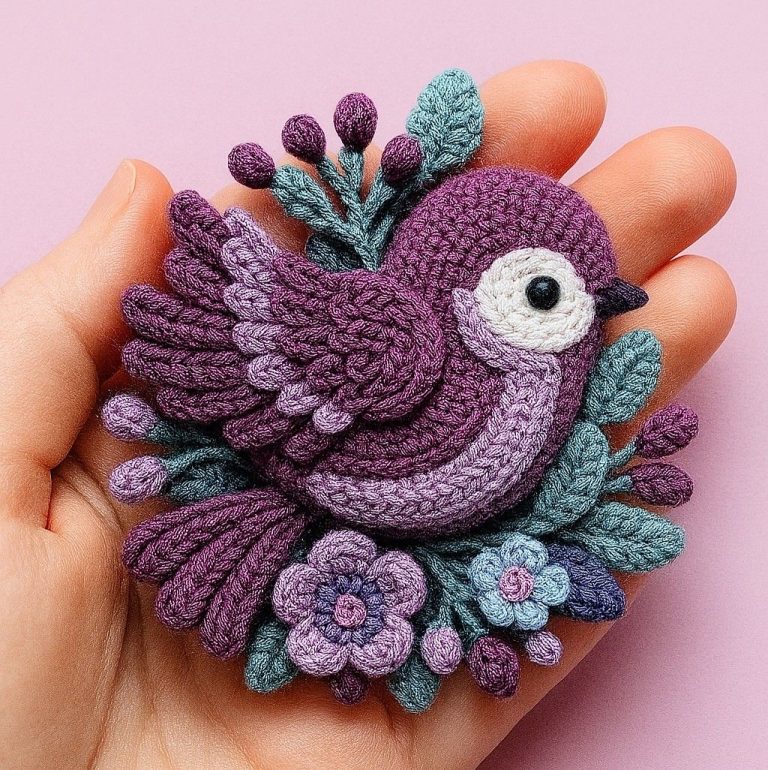
Purple Bird Brooch - PATTERN

Creating a cozy and stylish project with the Mug Cover – Tutorial is a delightful way to bring warmth, charm, and personal flair to your everyday coffee or tea moments. This crochet project has become increasingly popular because it combines beauty with practicality, helping to keep beverages warm while adding a touch of handmade elegance. By following a well-structured Mug Cover – Tutorial, even beginners can craft a charming accessory that makes an excellent gift or addition to any home décor collection.
This article provides a detailed and SEO-optimized guide to help you understand how a mug cover is designed, customized, and assembled. Using the term Mug Cover – Tutorial throughout the text also ensures that readers searching for this specific pattern can easily find and enjoy the instructions. Whether you want something festive, elegant, or fun, a mug cover is a small project that gives big satisfaction.
Before diving into the steps, this guide offers practical tips, creative variations, and expert advice to help you feel confident from start to finish. By the end of this article, you will understand why so many crafters enjoy making mug covers and how this simple project can enhance your crochet skills in a meaningful way.

A Mug Cover – Tutorial starts with the foundation of selecting the right yarn, hook size, and mug dimensions. Even though mug covers are small, choosing appropriate materials makes a difference in the final look and fit of the piece. Most crocheters prefer cotton yarn because it is durable, washable, and resistant to heat, making it ideal for mugs that may get warm during use.
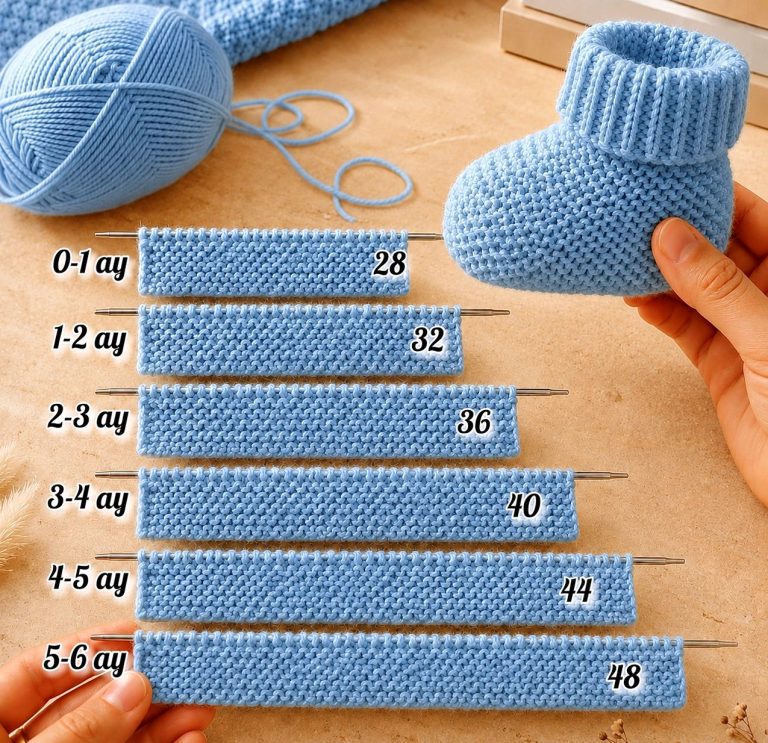
Another essential point of this Mug Cover – Tutorial is understanding how to measure your mug. Since mugs come in different shapes and sizes, taking a quick measurement before starting helps prevent a loose or overly stretched cover. A perfectly fitted piece enhances both appearance and functionality.
The next step includes choosing the style of stitch you want to apply. Mug covers can be simple with basic single crochet stitches or textured with puff stitches, cluster stitches, or ribbed designs. The versatility of the pattern is one reason why the Mug Cover – Tutorial appeals to crocheters at all levels.
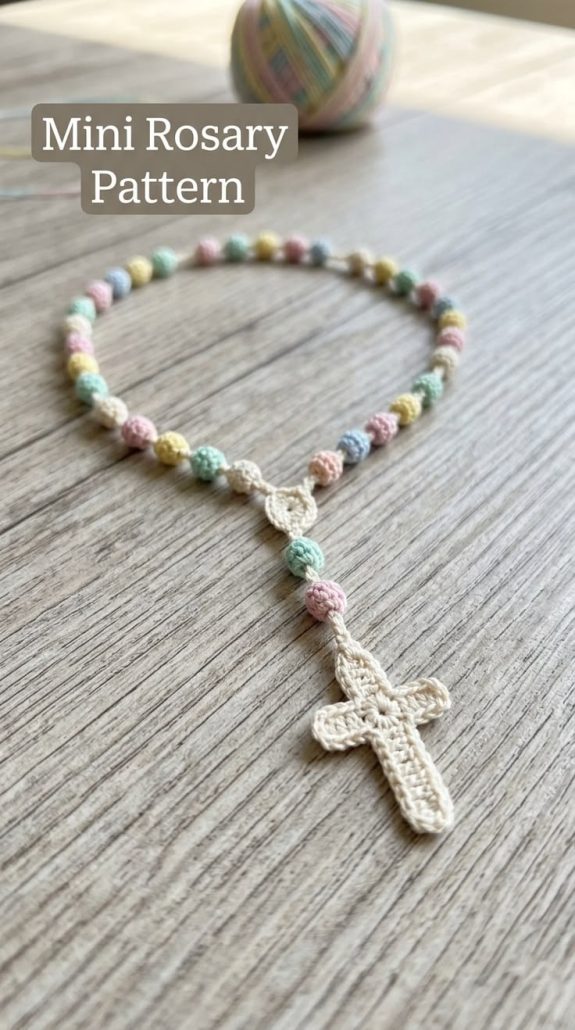
Many mug covers also include button closures or stretchy designs that make them easy to slip on and off. This adds an element of practicality, especially for gifting. Creating something cute yet functional is one of the biggest motivations behind learning the Mug Cover – Tutorial.
You may also personalize your project with hanging charms, appliqués, holiday motifs, or embroidered details. This creative freedom encourages every crafter to give their mug cover a personal touch that reflects their taste or the season.
Finally, completing the basic foundation will help you proceed confidently into more detailed techniques. Understanding the basics ensures your mug cover looks professional, fits perfectly, and lasts long while remaining stylish.
To begin following this Mug Cover – Tutorial, start by crocheting a foundation chain that matches the circumference of your mug. Make sure the chain is slightly shorter than the actual measurement, since crochet naturally stretches. This helps ensure a snug and comfortable fit.
Once the foundation chain is complete, work in rows or rounds depending on the style you prefer. Many mug covers are made in rows for easier adjustment, but working in rounds offers a seamless look. Both approaches work well, and the Mug Cover – Tutorial supports either choice.
Next, continue building the height of your mug cover until it reaches just below the mug’s rim. Avoid making it too tall, as it may interfere with drinking. This step is simple but important to maintain both function and aesthetics in your finished piece.
At this point in the Mug Cover – Tutorial, you can decide whether to incorporate decorative stitches or keep the design simple. Adding textures or patterns enhances the visual appeal without increasing difficulty. Even beginners can experiment with a few basic variations.
Adding a button loop or fastening strap is another step commonly included in mug cover designs. This feature ensures the cover stays secure during use. It also makes the project more gift-friendly, as it will fit multiple mug shapes.
After completing your stitching work, weave in loose ends and test the fit on your mug. If necessary, make small adjustments to tighten or loosen the cover. This is the final step of the foundational construction and ensures that your Mug Cover – Tutorial project is ready for use or gifting.
One of the most exciting aspects of the Mug Cover – Tutorial is the opportunity to explore creative variations. Holiday-themed mug covers with Christmas trees, hearts, or snowflakes make charming seasonal décor and thoughtful gifts. You can easily add appliqués to transform a simple design into something festive.
Color combinations also play an important role in creating a unique mug cover. Using stripes, ombré yarn, or contrasting borders brings visual interest to an otherwise basic pattern. The Mug Cover – Tutorial allows you to experiment freely with colors and textures.
You may also choose to add additional embellishments such as tiny crocheted flowers, leaves, or simple embroidery details. These additions elevate your project while enhancing your crochet skill set. Using small decorative items transforms your mug cover into a personal work of art.
Functional variations are equally valuable in this Mug Cover – Tutorial. Some crafters prefer handles that wrap around the mug, while others create full-body sleeves that slide over the mug completely. Both options provide coverage and comfort.
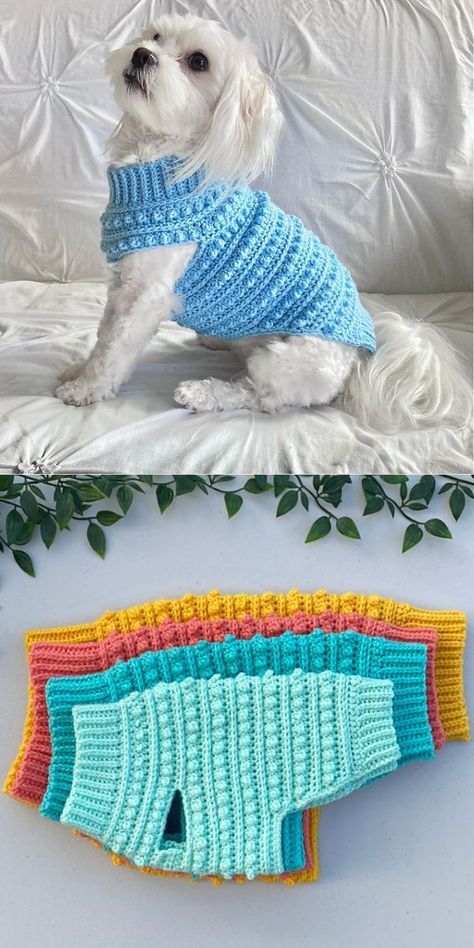
Another fun variation is transforming the mug cover into a character piece, such as an animal-inspired design. Adding ears, whiskers, or simple facial details gives the mug a playful charm, making it a delightful gift for children or animal lovers.
Finally, integrating a drink-coaster bottom is an advanced but rewarding option. By adding a crocheted base to your mug cover, you prevent spills and protect surfaces, making your handmade accessory even more functional and appealing.
Achieving great results with the Mug Cover – Tutorial depends on understanding a few key techniques. First, always maintain consistent tension throughout your work. Uneven tension may lead to a loose fit or an oddly shaped cover.
Choosing the right hook size is another important factor. If your stitches appear too loose, try a smaller hook. If they are too tight, use a larger one. Adjustments like this ensure your mug cover remains comfortable and neat.
Blocking your finished project is optional but beneficial. Light blocking helps even out stitches and improves the overall appearance of your mug cover. This final touch can make your handmade work look polished and professional.
If you are adding buttons, ensure they are heat-resistant and securely sewn. Mug covers are frequently exposed to warmth, and using appropriate materials ensures safety and durability. Button placement also affects how tightly the cover fits, so test carefully before sewing.
It is also helpful to make a second mug cover once you complete your first. Repetition improves accuracy and confidence, allowing you to make more detailed or advanced versions in the future. Many beginners find that their second project looks significantly better.
Finally, always check your mug dimensions when gifting or selling handmade mug covers. Every mug is slightly different, and taking measurements ensures that the Mug Cover – Tutorial instructions adapt perfectly to any recipient’s needs.
1. What type of yarn is best for a mug cover?
Cotton yarn is the most recommended because it is durable, washable, and resistant to heat. Acrylic can be used but may soften near warmth.
2. Do I need to measure my mug before starting?
Yes, measuring your mug ensures the cover fits snugly and comfortably without slipping or stretching excessively.
3. Can beginners follow this Mug Cover – Tutorial?
Absolutely. Mug covers are ideal beginner projects because they use simple stitches and small amounts of yarn.
4. Are button closures necessary?
No, but they add convenience. Slip-on versions also work very well and are easier for complete beginners.
5. Can mug covers be washed?
Yes. Cotton versions are machine-washable, making them practical for everyday use.
6. Is it possible to customize the design?
Yes. You can add appliqués, textures, embroidery, or themed decorations to personalize your mug cover.
The Mug Cover – Tutorial is a wonderful project that blends creativity, practicality, and crochet enjoyment in one small accessory. Throughout this article, you learned how to select materials, customize designs, apply step-by-step techniques, and explore variations that make each mug cover unique.
Whether you are creating one for yourself or crafting gifts for loved ones, this project is both approachable and rewarding. I hope this guide has inspired you—please feel free to leave your sincere opinion and suggestions so I can continue improving future tutorials!