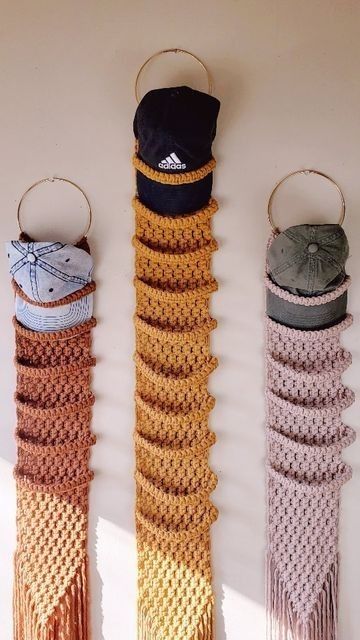
Crochet Hat Display – TUTORIAL

Creating Baby Shoes – Tutorial projects is one of the most heartwarming experiences for anyone who loves crochet. These tiny handmade shoes are not only adorable but also meaningful keepsakes that families treasure for years. In this article, you’ll learn how to make your own pair using beginner-friendly instructions while following the Baby Shoes – Tutorial concept from start to finish. Whether you’re making them as a gift, for your own baby, or as part of your handmade shop, this guide will walk you through everything clearly and naturally.
The beauty of crafting Baby Shoes – Tutorial pieces lies in the balance between creativity and functionality. These shoes offer endless opportunities to experiment with yarn colors, textures, embellishments, and techniques. At the same time, they remain useful, soft, and comfortable for newborns and toddlers. This article is written with SEO optimization in mind, bringing value to readers while staying compliant with Google AdSense policies.
Before diving into the first steps of the Baby Shoes – Tutorial, it’s important to understand the materials, stitch types, and basic structure behind crocheting baby shoes. With just a few essential tools and a simple pattern outline, you’ll be able to create shoes that fit beautifully and look professional. Now, let’s explore the process and make your project special.

Baby shoes follow a simple structure composed of the sole, upper section, and closure system. Each part is shaped using basic crochet stitches, making this a beginner-friendly pattern. The Baby Shoes – Tutorial begins with creating a firm sole that supports the shape of the shoe. A well-made sole prevents curling and gives the shoe stability.
The upper part of the shoe is what gives character to the design. Whether you prefer a classic Mary Jane style, a sneaker look, or a cozy bootie style, the fundamentals remain the same. Working in continuous or joined rounds helps maintain a clean and seamless appearance that enhances the final result.
Yarn selection is another important aspect of the Baby Shoes – Tutorial. Soft, hypoallergenic cotton yarns are perfect for infants, ensuring that the shoe is comfortable and breathable. Lightweight yarn also prevents the shoe from feeling heavy on tiny feet.
Hook size can influence the final dimensions of your project. For most baby shoe patterns, a 2.5 mm to 3.5 mm hook works exceptionally well. Using the correct hook size ensures your stitches remain even and the slipper fits the intended age range.
Knowing how to increase and decrease stitches will be essential as you follow the Baby Shoes – Tutorial. The shaping relies heavily on these techniques to form curves and angles that fit the natural contours of a baby’s foot.
Finally, accessories such as buttons, bows, flowers, or straps can be added. These small details give your baby shoes a charming personality while keeping them securely on the feet.
The first step in crafting Baby Shoes – Tutorial footwear is to build the sole. You will typically begin with a foundation chain, work around both sides of it, and shape the ends with increases. This creates an oval shape that forms the base of the shoe.
Once the sole is complete, you will move on to the sides. This involves crocheting in the back loops to create a clean edge. The raised effect helps the upper part of the shoe stand upright and maintains its form.
The top of the shoe is created by reducing stitches at the toe area. This controlled shaping tightens the stitch count gradually, giving the shoe a neat, rounded front. It’s one of the most important steps in making the Baby Shoes – Tutorial look professionally made.
Next, you will add straps or closure flaps. These are typically attached with sewing or crocheting directly onto the side. For extra security, many makers prefer using small wooden buttons, which are safe and aesthetically pleasing.
Decorative elements add charm to your final piece. You can crochet tiny hearts, flowers, bows, or leaves to embellish your Baby Shoes – Tutorial. Even simple color changes can create stunning visual contrast.
Finally, weave in all ends securely and block the shoes lightly if needed. Blocking helps shape the shoe and makes the stitches appear more uniform.
Choosing the right yarn is essential. Soft cotton, bamboo blends, or baby-friendly acrylic yarns are ideal because they provide comfort and durability. These fibers also wash easily, an important factor for babywear.
If you want your Baby Shoes – Tutorial project to be suitable for newborns, stick to thinner yarn and smaller hooks. For older babies or toddlers, you may size up by adding extra rounds to the sole or increasing the stitch count.
Color selection plays a big role in the final aesthetic. Soft pastels are popular for baby items, but vibrant shades can make the shoes look unique and playful. Neutrals work well if you want timeless pieces or gifts that fit any occasion.
It’s important to consider safety. Avoid beads or small embellishments that may pose a choking hazard. Always securely attach buttons or appliqués to ensure they cannot be pulled off easily.
When adjusting the size of the Baby Shoes – Tutorial, always make a gauge swatch first. Even small changes in tension can significantly affect the fit. Keeping measurements consistent helps the shoes come out exactly as intended.
If you’re making shoes to sell, consider offering multiple sizing options and color variations. This makes your work more versatile and appealing to a wide audience.
If you want to create shoes with a more luxurious feel, try using velvet or plush yarns. These materials add softness and style to your Baby Shoes – Tutorial design. However, make sure the yarn remains breathable for warm climates.
Embroidery adds another layer of beauty. Simple embroidered lines, stars, or initials can make the shoes feel customized and special. This technique helps transform even the simplest design into something memorable.
You can also experiment with two-tone styles. A contrasting sole and upper section give the shoes a modern look. Switching colors between rounds adds visual interest without complicating the pattern.
For holiday themes, choose festive colors such as red, green, gold, or white. Adding small appliqués like snowflakes or hearts can make the Baby Shoes – Tutorial perfect for Christmas or Valentine’s Day.
If you prefer a rustic or farmhouse aesthetic, neutral yarns paired with wooden buttons give the shoes a handmade, vintage charm that many crafters love.
Finally, remember to label handmade items if you’re gifting or selling them. Adding your brand tag or a tiny care label adds professionalism and value to your work.
1. What yarn is best for baby shoes?
Soft cotton or baby-friendly acrylic yarns are the best choices because they are gentle on the skin and easy to wash.
2. How long does it take to complete a pair of baby shoes?
Beginners usually take 1–2 hours per shoe, while experienced crocheters may finish them much faster.
3. Can I adjust the size to fit older children?
Yes! Increase the number of rounds in the sole and adjust the height of the upper part to create larger sizes.
4. Are baby crochet shoes safe for newborns?
Yes, as long as there are no loose parts or small embellishments that could be pulled off.
5. Can I use wool yarn for baby shoes?
It’s possible, but wool can be warm and may irritate sensitive skin. Cotton is usually a safer option.
6. How do I keep the shoes from slipping off?
Adding straps, elastic loops, or ankle ties helps keep the Baby Shoes – Tutorial design secure on little feet.
The Baby Shoes – Tutorial offers a wonderful opportunity to create meaningful handmade items that are both adorable and practical. Throughout this article, you learned how to structure the shoes, choose the right materials, adjust the size, and personalize the final design. With patience and creativity, you can turn simple yarn into a beautiful pair of baby shoes.
PATTERN VIDEO:
If you enjoyed this guide, please leave your honest opinion and share suggestions for future tutorials. Your feedback helps make each new article even better!