
Sewing Hearts & Nine Patch

The Fabric Christmas Tree – Tutorial is the perfect sewing project to bring handmade charm and festive spirit to your home during the holiday season. This creative quilted decoration combines simplicity with elegance, allowing you to transform fabric scraps into a beautiful, eco-friendly Christmas ornament. Whether displayed on your table, shelf, or mantle, a fabric Christmas tree adds warmth and a personal touch that store-bought decorations simply can’t match.
Creating your own Fabric Christmas Tree is not just a craft project—it’s a joyful experience that captures the magic of the holidays. It’s beginner-friendly, budget-conscious, and a wonderful opportunity to repurpose leftover fabrics from previous quilt projects. The finished tree can be decorated with buttons, ribbons, beads, or even miniature ornaments for a delightful custom look.
In this guide, you’ll learn how to make your very own Fabric Christmas Tree – Tutorial step-by-step. With just a few supplies and basic sewing techniques, you can create a stunning holiday centerpiece that reflects your unique style. Get ready to sew, decorate, and celebrate the season in true handmade fashion!
Before you begin, it’s important to gather all your materials and prepare your workspace. For this Fabric Christmas Tree – Tutorial, you’ll need a selection of fabrics in festive colors such as red, green, gold, or silver. Mixing prints like plaid, polka dots, and florals gives your tree a whimsical, layered look that feels both traditional and modern.
You’ll also need batting or felt for structure, scissors or a rotary cutter, pins, thread, and a sewing machine. If you prefer hand sewing, you can easily complete this project without a machine by using small, neat stitches. Don’t forget to have an iron on hand to press seams and keep your pieces smooth.
Next, print or draw a simple Christmas tree template on paper. You can adjust the size depending on whether you want a small ornament or a larger table centerpiece. Cut out your pattern pieces and trace them onto the back of your chosen fabrics.
It’s a good idea to prepare several layers of fabric in different patterns to create a quilted texture. You can also add interfacing between layers to make your tree stand up more firmly. Once everything is cut and ready, you’re set to begin the fun part—sewing your Fabric Christmas Tree.
To start assembling your Fabric Christmas Tree – Tutorial, place two fabric pieces right sides together and sew around the edges, leaving a small opening at the bottom. If you’re adding batting or felt, layer it between the fabric pieces before sewing. This will give your tree volume and a soft, plush feel.
Once stitched, carefully trim any excess fabric and clip around the curves to prevent bulk. Turn the piece right side out through the opening, then use a blunt object like a knitting needle or chopstick to push out the corners and edges neatly. Press with an iron to flatten and shape the tree.
Repeat this process to make multiple sections, depending on how full you want your Christmas tree to look. Three to six pieces generally create a nice, balanced design. When all sections are prepared, sew them together down the centerline to form a standing tree that fans out beautifully.
If you want to create a quilted texture, sew decorative lines across the fabric before assembling. This gives the tree extra dimension and a charming handcrafted finish. You can use metallic or contrasting thread for added sparkle.
After sewing, stuff the sections lightly with fiberfill or cotton to give them structure. Then, hand-stitch the opening closed neatly at the bottom. Now, your quilted Fabric Christmas Tree is starting to take shape, ready to be decorated and displayed.
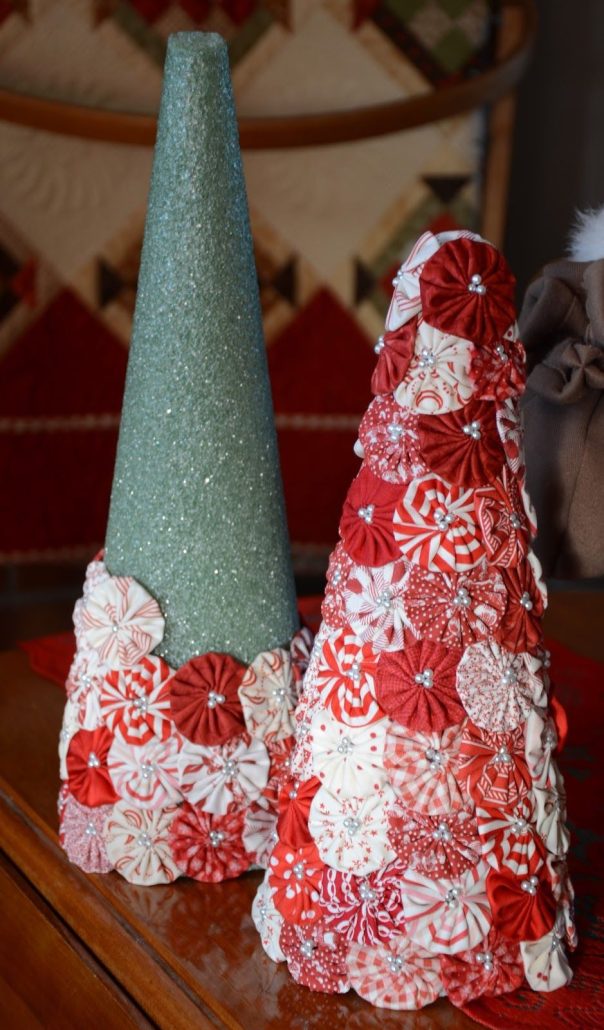
The most enjoyable part of the Fabric Christmas Tree – Tutorial is decorating your creation. This is where you can truly personalize it to match your home’s holiday style. Use small embellishments like buttons, bows, lace, ribbons, or even beads to decorate each layer of your tree.
You can also add mini pom-poms as ornaments or small sequins to give your tree a festive sparkle. If you want to go for a rustic look, tie small twine bows or glue tiny pinecones around your tree. For a modern twist, use metallic fabrics or minimalist decorations in silver, white, and soft green tones.
Another great idea is to add a star on top of your fabric tree. You can create it from felt, glitter paper, or even a small crocheted star. Attach it securely using a dab of hot glue or a few stitches.
If you plan to display the tree standing upright, attach a circular fabric base filled with rice or beans to stabilize it. This makes your Fabric Christmas Tree not only pretty but also practical, perfect for table centerpieces or holiday displays.
Personalizing your decorations is what makes this project truly special. Every stitch, color, and ornament reflects your creativity and holiday cheer.
Once you’ve finished your Fabric Christmas Tree – Tutorial, there are endless ways to use and enjoy it during the holiday season. These fabric trees make wonderful gifts for friends, family, or coworkers—especially when personalized with their favorite colors or initials.
You can also create a set of smaller trees in different heights to form a festive holiday display on your mantel or dining table. Pair them with candles, fairy lights, or pine branches for a cozy, wintery ambiance.
For a more eco-friendly Christmas, use your fabric trees instead of disposable decor. They last for years, can be easily stored, and bring a warm handmade touch to every holiday. Plus, they’re a great project to make with kids or as part of a holiday crafting afternoon.
You could even turn your fabric trees into ornaments by reducing the pattern size and attaching a string or ribbon loop. Hang them on your Christmas tree, add them to gift packages, or use them as name tags for a personalized touch.
Each Fabric Christmas Tree is unique, telling a story through the fabrics and embellishments you choose. Handmade holiday decorations like this not only brighten your space but also become cherished keepsakes for years to come.
1. Is this project suitable for beginners?
Yes! The Fabric Christmas Tree – Tutorial is beginner-friendly and requires only basic sewing skills. Even if you’re new to quilting, you can easily follow along.
2. What type of fabric works best?
Cotton quilting fabric is ideal because it’s easy to sew and holds its shape well. You can also use felt for a softer, no-fray option.
3. Can I sew it by hand instead of using a machine?
Absolutely. Hand-sewing works perfectly for this project. Just make sure to use small, tight stitches for durability.
4. How can I make the tree stand up straight?
Adding a weighted base filled with rice, beans, or small pebbles will help your fabric tree stay upright and balanced.
5. Can I wash the Fabric Christmas Tree?
Yes, but only gently by hand. Avoid using a washing machine to preserve the shape and decorations.
6. How long does it take to make one tree?
On average, it takes 2 to 3 hours to complete, depending on your sewing experience and level of detail.
The Fabric Christmas Tree – Tutorial brings together creativity, tradition, and sustainability in one delightful sewing project. It’s a joyful way to celebrate the holidays, create meaningful handmade decorations, and share your crafting passion with loved ones. Whether you’re making one as a gift or several for your own home, these fabric trees are sure to bring warmth and beauty to any Christmas setting.
We hope you enjoy making your own Fabric Christmas Tree! Share your experiences, ideas, and suggestions in the comments below—we’d love to hear how your holiday crafting turned out. May your Christmas be filled with love, creativity, and the magic of handmade art! 🎄✨


