
Sewing Hearts & Nine Patch

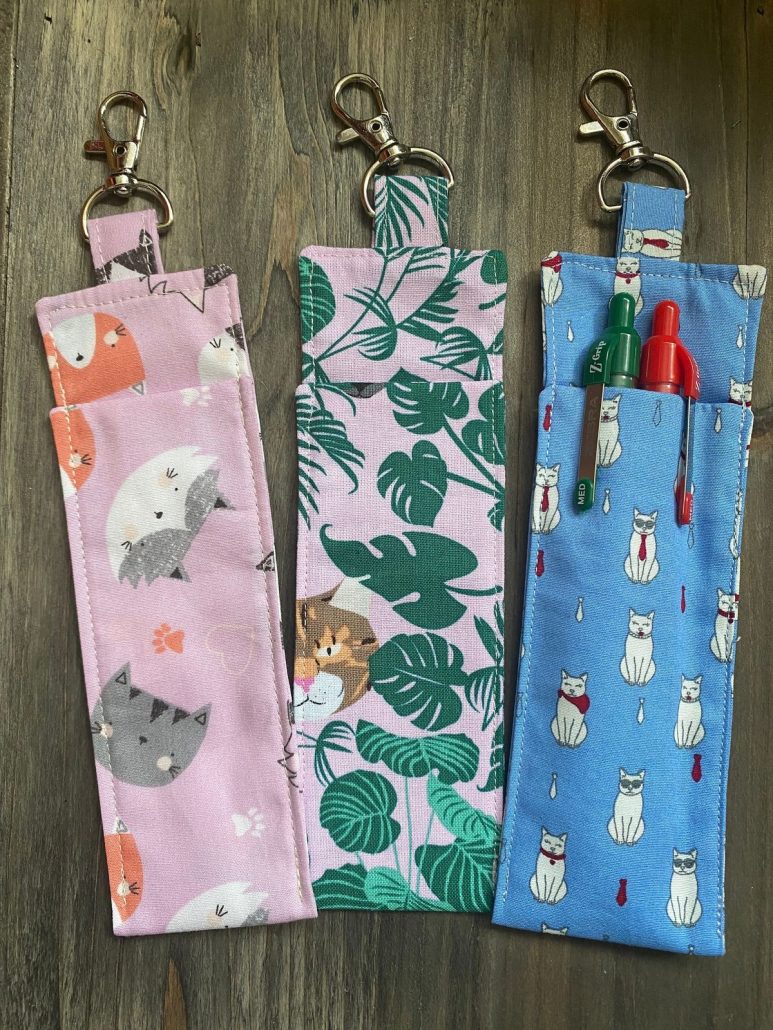
The Pen Holder – TUTORIAL is a wonderful quilting project designed to bring organization and creativity together in one practical piece. Whether you’re a quilting enthusiast looking for a quick and functional project or a beginner eager to learn the basics, this tutorial is the perfect place to start. This fabric pen holder not only helps keep your desk tidy but also adds a touch of handmade charm to your workspace. With its colorful patchwork design, you can easily match it to your style or office décor while practicing essential quilting techniques.
Making the Pen Holder – TUTORIAL is more than just sewing—it’s about transforming small scraps of fabric into something beautiful and useful. Quilters often have leftover materials from larger projects, and this is the perfect way to give those scraps new life. Each holder can be customized with different fabrics, colors, and patterns, making it unique every time you create one.
The beauty of the Pen Holder – TUTORIAL lies in its simplicity and versatility. You can create a standing fabric container, a roll-up pencil case, or even a quilted wall pocket. This flexibility makes it an ideal weekend project that also serves as a great gift for students, artists, or office workers. Ready to begin? Let’s explore the materials, steps, and tips that will help you master this creative quilted craft.
Before starting your Pen Holder – TUTORIAL, gather all your essential materials. You’ll need quilting cotton fabric, batting or interfacing for structure, matching thread, scissors, pins, and a sewing machine. You can also use a rotary cutter for precise cutting and a ruler for accurate measurements.
Choosing the right fabric is important. Go for 100% cotton, as it’s easy to sew and holds its shape well. Mixing prints or solid colors can make your pen holder more vibrant and interesting.
For stability, use batting or interfacing between the fabric layers. This adds a soft but firm texture to help your holder stand upright.
If you plan to make a roll-up version, include a ribbon or elastic band to keep it closed neatly when rolled.
Make sure to pre-wash your fabrics to prevent shrinkage later. Iron them flat before cutting for clean, professional edges.
Lastly, prepare your sewing tools. A simple straight stitch is enough for this project, but decorative stitches can add a creative touch to your Pen Holder – TUTORIAL.
Start by cutting two fabric rectangles of equal size—one for the outer layer and one for the lining. The size can vary depending on how many pens you want to store, but 10 x 12 inches is a good starting point.
Next, cut a piece of batting or interfacing slightly smaller than your fabric pieces. Layer the outer fabric on top of the batting, wrong sides together, and quilt them by sewing straight or diagonal lines. This adds strength and visual interest.
Once quilted, place the lining fabric on top of your quilted piece, right sides facing. Sew around the edges, leaving a small opening to turn it inside out.
After turning the piece right side out, press it flat with an iron and topstitch around the edges for a clean finish.
If you’re making a standing pen holder, sew the short edges together to form a cylinder and stitch the bottom closed in a circular base shape. For a roll-up case, sew fabric pockets along the width for each pen or pencil before adding your closure.
Finish your Pen Holder – TUTORIAL by adding any embellishments like buttons, ribbons, or labels to personalize your creation.
One of the best things about the Pen Holder – TUTORIAL is how easily it can be customized. You can choose themes based on seasons, colors, or recipients.
Try using patchwork techniques with leftover quilt blocks for a unique look. This gives your pen holder a beautiful, handmade character.
For a minimalist design, stick with solid fabrics and simple quilting lines. It looks elegant and professional, perfect for office use.
If you’re making one for a child, use bright fabrics with cartoon prints or animals to make the pen holder fun and lively.
Add extra pockets or compartments for erasers, scissors, or small rulers. A multi-section design adds both function and flair.
Lastly, try experimenting with embroidery or applique designs. Adding initials or small motifs makes your Pen Holder – TUTORIAL truly one-of-a-kind.
Precision matters when cutting your fabric. Always measure twice and cut once to ensure all pieces fit together neatly.
Use a walking foot if your sewing machine has one—it helps feed the quilted layers evenly and prevents shifting.
Press your seams as you go. This keeps your work flat and polished, resulting in a professional-looking finish.
Choose coordinating thread colors for a seamless look, or contrasting threads for bold decorative stitching.
If your holder feels too soft, use a heavier interfacing or double up on batting for extra stability.
Finally, take your time finishing the edges and topstitching. Small details like clean edges make a big difference in the final look of your Pen Holder – TUTORIAL.
1. Can I make the Pen Holder without a sewing machine?
Yes! You can hand sew the project using small, even stitches, though it will take a bit longer.
2. What type of fabric is best for the Pen Holder – TUTORIAL?
Cotton quilting fabric is ideal because it’s sturdy and easy to handle.
3. How can I make my pen holder stand up on its own?
Use thick interfacing or two layers of batting to give it enough structure.
4. Can I wash my fabric pen holder?
Yes, as long as you use washable fabric and thread. Gently hand wash and air dry for best results.
5. How do I size the pen holder for different uses?
Simply adjust the length and width of the fabric rectangles to fit pens, brushes, or even sewing tools.
6. Can I gift or sell these pen holders?
Absolutely! Handmade Pen Holder – TUTORIAL creations make excellent gifts or craft fair items.
The Pen Holder – TUTORIAL is a delightful quilting project that combines practicality with creativity. It’s a quick, beginner-friendly design that helps you practice quilting techniques while producing something truly useful.
Whether you create one for yourself or share it as a thoughtful handmade gift, each pen holder tells a story of craftsmanship and care. Take your time, experiment with fabrics, and enjoy the process. Don’t forget to share your experience and leave a sincere opinion or suggestion below—your feedback helps keep the quilting community inspired and creative!


