
Sewing Hearts & Nine Patch

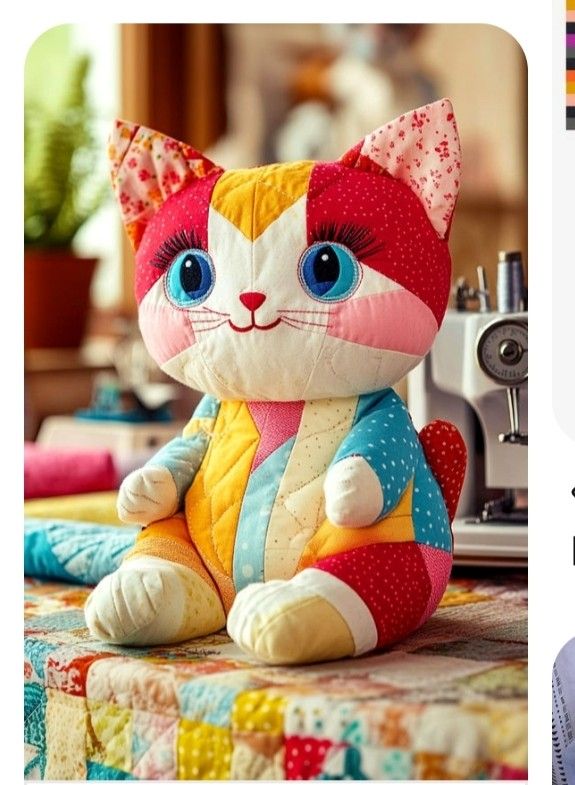
If you are looking for a creative sewing project that blends cuteness and quilting artistry, the Patchwork Kitty – TUTORIAL is exactly what you need. This charming pattern is perfect for quilters who love incorporating playful themes into their work, while also practicing essential patchwork techniques. Whether you are a beginner exploring your first quilt project or an experienced crafter searching for a fresh idea, this pattern provides the perfect balance of fun and functionality. The design focuses on a kitty motif made with patchwork blocks, making it not only adorable but also versatile for pillows, mini quilts, or even wall hangings.
The Patchwork Kitty – TUTORIAL teaches you how to use fabric scraps in a creative way, turning small leftover pieces into a beautiful design that truly stands out. One of the greatest joys of patchwork quilting is the ability to mix and match different fabric prints, textures, and colors to create something unique every time. This project invites you to experiment with your fabric stash, bringing a playful and cozy touch to your quilting journey.
Beyond the cuteness of the kitty design, this tutorial highlights quilting skills like accurate cutting, piecing, and sewing with precision. It’s a wonderful opportunity to strengthen your techniques while ending up with a project that can be displayed or gifted. The Patchwork Kitty – TUTORIAL is also a great option for themed gifts for cat lovers, children’s room décor, or even for personal use as a cheerful handmade accent.
To get started with the Patchwork Kitty – TUTORIAL, gather your essential quilting supplies. You’ll need a selection of cotton fabrics in complementary colors, rotary cutter, quilting ruler, cutting mat, and sewing machine. Preparing your fabrics is an important first step—make sure they are pressed and cut to the correct sizes for the patchwork pieces. Choosing different fabric patterns for the kitty body, ears, and background can create an engaging and dynamic effect.
Working with fabric scraps is highly recommended for this pattern since the kitty design allows freedom of creativity. You can use playful prints, solid colors, or even fabric with small motifs that reflect the theme. For beginners, sticking to a simple color palette helps keep the project cohesive and visually pleasing. Advanced quilters, however, can push the limits by blending bold prints and contrasting tones.
Another preparation step is ensuring you have the right thread colors. Using matching thread blends the seams, while contrasting thread can highlight the stitching details. Both approaches work well depending on the final look you want to achieve. Think of this kitty as a canvas where fabric and thread choices truly make a difference.
In addition to fabric and thread, having tools like pins, clips, and a seam ripper nearby will make your quilting process smoother. Even the most skilled quilters sometimes make adjustments, so don’t be afraid to redo a seam for better precision. Remember that patchwork is all about patience and enjoying the creative flow.
Printing or sketching the kitty layout before sewing can also be very helpful. This way, you have a clear guide of how each fabric piece will fit together, reducing confusion during assembly. Following this preparation ensures you’ll enjoy the process without feeling overwhelmed.
Lastly, set up your sewing space with good lighting and enough room to handle fabric pieces comfortably. Having an organized area supports accuracy and efficiency, especially in a patchwork project with multiple small blocks like the Patchwork Kitty – TUTORIAL.
The Patchwork Kitty – TUTORIAL is designed to be beginner-friendly yet detailed enough for experienced quilters to enjoy. Begin by cutting the fabric pieces according to the measurements provided in the pattern. Accurate cutting is essential to ensure the pieces align correctly during sewing.
Start by assembling smaller sections of the kitty, such as the ears and face. These smaller blocks will later be joined to form the full kitty design. Pay attention to seam allowances, as consistency here makes the entire block come together smoothly. Using a 1/4 inch seam allowance is standard in quilting.
Once the smaller parts are ready, piece them together following the layout. Pressing the seams as you go helps keep the block flat and manageable. Many quilters recommend pressing seams to one side for strength, though open seams may reduce bulk depending on your project.
After assembling the kitty block, add background pieces to frame the design. This not only highlights the kitty but also prepares the block for inclusion in larger quilt projects if desired. Whether you stop at a single block for a pillow or continue for a quilt top, the structure remains the same.
Stitch carefully around detailed areas like the ears and whisker placement if you’re adding embroidery or appliqué accents. These details bring the kitty to life and give personality to your finished work. Optional embellishments like buttons or fabric paint can also be used to customize your kitty further.
Finish by trimming the block to ensure it’s squared and ready for quilting or binding. Whether you’re turning the Patchwork Kitty – TUTORIAL into a mini quilt, a pillow cover, or part of a larger quilt, this step ensures a polished and professional look.
One of the best things about the Patchwork Kitty – TUTORIAL is its versatility. You don’t have to limit yourself to just one project idea. For example, a single block can be transformed into a decorative pillow perfect for a child’s bedroom. The playful kitty adds charm and comfort to any living space.
If you’re working on a larger quilt, repeating the kitty block in different fabric combinations can create a fun and cohesive quilt top. Using different background colors allows you to experiment with contrast and variety while keeping the kitty theme consistent.
Wall hangings are another creative way to display your finished kitty design. With a small border and some simple quilting, the block can become a statement piece for any room, especially in homes where cats are adored.
For personalized gifts, consider making smaller items such as tote bags or pouches using the kitty block. These handmade creations carry both practicality and a personal touch that recipients will love. Cat lovers especially will appreciate the effort and detail.
Seasonal projects are also possible with this pattern. By choosing fabrics in holiday colors, you can create festive Patchwork Kitties for occasions like Christmas, Halloween, or Easter. This approach makes the project adaptable year-round.
Finally, if you love mixing crafts, you can incorporate embroidery or appliqué to enhance the kitty’s features. Whiskers, eyes, or even decorative borders add an extra level of charm and uniqueness to the finished block.
When working through the Patchwork Kitty – TUTORIAL, accuracy is your best friend. Always double-check your measurements before cutting fabric to avoid mistakes that can affect the final block. Using a sharp rotary cutter and ruler ensures clean edges.
Chain piecing is a technique that can save time when sewing multiple blocks. It involves sewing several pieces in sequence without cutting the thread in between. This method is especially useful if you plan to make multiple kitty blocks for a quilt top.
If you’re new to patchwork, practice with scrap fabrics first before committing to your chosen materials. This allows you to get comfortable with the steps while reducing the risk of wasting your favorite fabrics.
Pressing plays a big role in the neatness of your final piece. Don’t skip this step, as it helps seams lay flat and improves the overall look of the block. A hot iron and a bit of steam can make a significant difference.
Patience is key. Take your time with each step and enjoy the process rather than rushing to the finish line. The beauty of quilting lies in the creativity and relaxation it provides. Mistakes can happen, but they often lead to new ideas and unique results.
Lastly, remember that personalization makes your project truly yours. Don’t hesitate to experiment with color schemes, fabric textures, and decorative details. The Patchwork Kitty – TUTORIAL is a foundation, and your creativity brings it to life.
What is the Patchwork Kitty – TUTORIAL best for?
It’s ideal for small quilting projects like pillows, wall hangings, mini quilts, or as part of a larger quilt.
Can beginners make the Patchwork Kitty pattern?
Yes, the tutorial is beginner-friendly and introduces basic quilting skills such as cutting, piecing, and sewing with accuracy.
What fabrics work best for the kitty design?
Cotton fabrics are highly recommended for their durability and ease of sewing. Scraps and playful prints add extra charm.
Do I need special tools for this pattern?
Basic quilting tools like a rotary cutter, ruler, and sewing machine are sufficient. Optional tools include clips, pins, and embroidery supplies for embellishments.
Can I personalize the kitty design?
Absolutely. You can add embroidery for whiskers, buttons for eyes, or even choose themed fabrics for seasonal versions.
How can I display my finished Patchwork Kitty block?
It can be turned into a pillow, tote bag, wall hanging, or combined into a full quilt. The versatility makes it suitable for many creative uses.
The Patchwork Kitty – TUTORIAL is a delightful project that combines patchwork techniques with a playful design perfect for quilters of all levels. From fabric preparation to step-by-step assembly and creative applications, this tutorial guides you through a rewarding process that results in a charming kitty-themed creation.
Whether you make it for yourself or as a gift, it’s sure to bring smiles and warmth. Share your experience with this project in the comments below—your honest opinions and suggestions are always welcome! Would you like me to also prepare a shorter Pinterest-style description for this tutorial with SEO keywords?


