The 9 Patch Block – TUTORIAL is one of the most iconic and beginner-friendly quilt designs in the world of quilting. This timeless quilt block has been a favorite for generations because of its simplicity, versatility, and endless creative possibilities. Whether you are just starting your quilting journey or looking for a classic pattern to add to your portfolio, the 9 Patch Block is a must-learn technique that provides both satisfaction and stunning results.
At its core, the 9 Patch Block is a simple square-based pattern made of nine smaller squares arranged in a 3×3 grid. This traditional quilt block allows quilters to play with colors, contrasts, and fabric scraps, making it ideal for practicing piecing skills while still creating something beautiful. With this tutorial, you will discover not only how to assemble the block but also ways to adapt it into larger projects such as quilts, pillows, table runners, and wall hangings.
In this guide, we will explore step-by-step instructions, essential tips for beginners, creative variations, and common mistakes to avoid. The 9 Patch Block – TUTORIAL will show you that quilting doesn’t have to be overwhelming. With patience and attention to detail, you will be able to create a masterpiece that reflects your personality and creativity. Let’s dive in and learn everything you need to know about making this beloved quilt block.

The 9 Patch Block is one of the simplest quilt blocks, consisting of nine equal-sized squares sewn together in three rows of three. Despite its simplicity, it holds a special place in quilting history and continues to inspire modern quilters.
One reason it is so popular is its adaptability. You can use solid fabrics, patterned pieces, or even fabric scraps to design blocks that feel cohesive yet unique. The contrast between light and dark fabrics often creates striking geometric designs.
Another reason it is beloved is its accessibility. Beginners find it easy to learn, while advanced quilters enjoy experimenting with variations and intricate layouts. It bridges the gap between skill levels and gives everyone a chance to succeed.
Historically, the 9 Patch Block was used by women to create quilts quickly during times when practicality was essential. Its straightforward design meant that fabric could be used efficiently with little waste.
The block also teaches fundamental quilting skills such as accurate cutting, precise seam allowance, and matching points, which are essential for more complex patterns later on.
Overall, the 9 Patch Block – TUTORIAL is not just about learning a pattern but also about connecting to quilting traditions and building skills for future projects.
To make a 9 Patch Block, you will start with cutting nine squares of equal size. Typically, quilters choose 2.5-inch or 3.5-inch squares, but you can adjust the size depending on the project.
Arrange the nine squares into a 3×3 grid, alternating light and dark fabrics for a balanced design. This arrangement ensures that your block has visual interest and contrast.
Next, sew the squares together row by row. Begin with the first row, stitching three squares together with a 1/4-inch seam allowance. Repeat this process for the other two rows.
After sewing each row, press the seams flat. A common technique is to press seams in opposite directions for each row so that the intersections align smoothly when the rows are joined.
Once your rows are prepared, sew them together carefully. Take your time to match the seam intersections, as this creates a polished and professional-looking block.
Finally, press the entire block flat. At this stage, you will have a finished 9 Patch Block that can be used individually or combined with others to create larger quilting projects.
One of the most exciting parts of this tutorial is exploring the creative variations of the 9 Patch Block. By simply changing the arrangement of fabrics or combining the block with other patterns, you can achieve entirely new designs.
A popular variation is the Disappearing 9 Patch. In this version, you create a standard block, then cut it into four smaller sections and rearrange them to form new layouts. This technique transforms a simple block into something intricate.
Another idea is to use fussy cutting, where specific motifs from fabric are cut and centered in the block. This adds a decorative touch and makes each block feel special.
You can also experiment with color schemes, such as monochrome palettes, rainbow gradients, or seasonal themes like autumn or holiday-inspired fabrics.
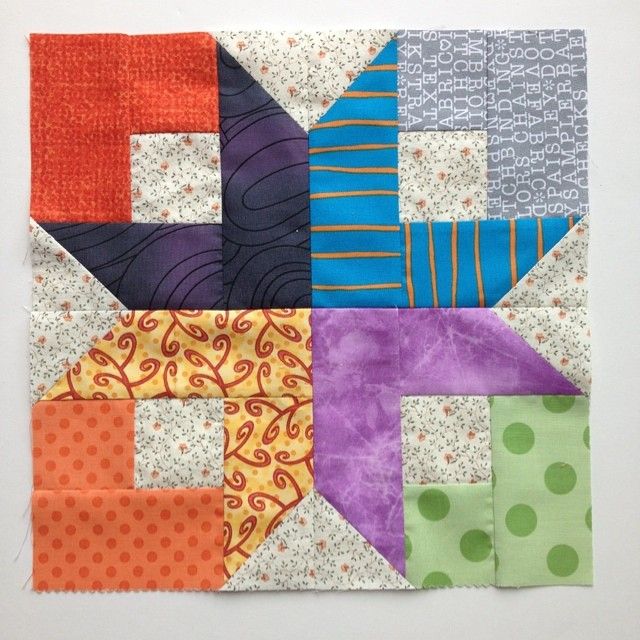
Mixing the 9 Patch with other quilt blocks creates endless possibilities. For example, combining it with half-square triangles can produce star patterns and more dynamic designs.
These variations highlight why the 9 Patch Block – TUTORIAL is so valuable. Once you master the basics, you can let your creativity run free and design quilts that are uniquely yours.
Even though the 9 Patch Block is beginner-friendly, there are some common mistakes that quilters make. Learning how to avoid them will save time and frustration.
One frequent issue is inaccurate cutting. If your squares are not the same size, the block will not align properly. Always use a rotary cutter, ruler, and cutting mat for precision.
Another problem is uneven seam allowance. Quilting relies on consistency, and even slight differences in seam width can distort the block. Stick to a 1/4-inch seam allowance at all times.
Pressing is another key factor. Skipping or rushing this step can cause bulky seams and misaligned rows. Take your time to press each row before assembling the full block.
Fabric choice also plays an important role. Using fabrics that are too similar in color or pattern can make the block look flat. Contrast is essential to bring out the design.
Patience is equally important. Rushing through piecing often results in mistakes. Slow down, measure twice, and sew once for best results.
By following these tips, your 9 Patch Block – TUTORIAL will be a smoother, more enjoyable process, and your finished block will look polished and professional.
Q1: What size squares should I use for a 9 Patch Block?
Most quilters use 2.5-inch or 3.5-inch squares, but you can adjust based on the final quilt size.
Q2: Can I make a 9 Patch Block with scraps?
Yes! This block is perfect for using up fabric scraps, especially if you want a scrappy, colorful quilt.
Q3: What is the Disappearing 9 Patch?
It’s a variation where the finished 9 Patch Block is cut into four smaller sections and rearranged to create a more complex design.
Q4: Do I need special tools to make a 9 Patch Block?
A rotary cutter, ruler, and cutting mat are highly recommended for accuracy, but you can use scissors if necessary.
Q5: How many 9 Patch Blocks do I need for a quilt?
That depends on the quilt size. For a lap quilt, you may need around 20–30 blocks, while a bed-sized quilt will require more.
Q6: Is the 9 Patch Block good for beginners?
Absolutely. It teaches essential quilting skills like cutting, piecing, and pressing, making it an ideal starting point.
The 9 Patch Block – TUTORIAL is more than just a quilting lesson—it’s an introduction to the heart of quilting itself. From its rich history to its modern variations, this block offers endless creative opportunities. By learning the step-by-step process, experimenting with variations, and avoiding common mistakes, you can create beautiful quilt projects with confidence.
We hope this tutorial has inspired you to start or continue your quilting journey. Share your thoughts, experiences, and suggestions in the comments—we’d love to hear your honest opinion and see how you make the 9 Patch Block your own.