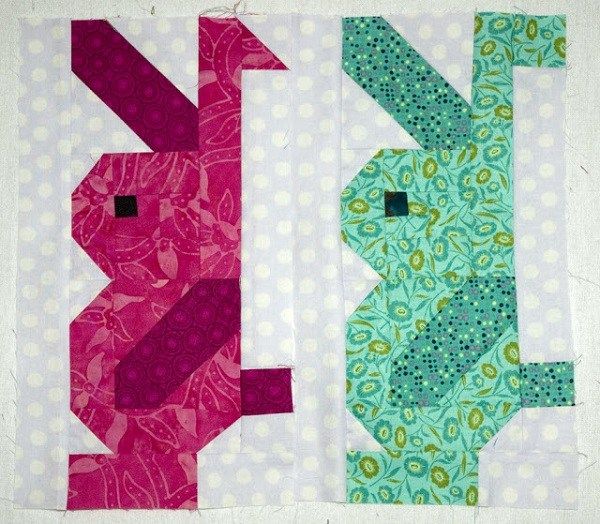
Sewing Bunnies - PATTERN

The patchwork Christmas ornament – tutorial is a festive and creative way to combine your love for quilting and the holiday season. These small, charming decorations are perfect for adding handmade warmth to your Christmas tree, gifting to friends and family, or even selling at holiday craft fairs.
In this tutorial, we’ll guide you through every step of creating a beautiful patchwork Christmas ornament, from selecting fabrics to assembling and finishing your piece. These ornaments are not only fun to make but also a fantastic way to use up fabric scraps and explore new patchwork techniques on a small scale.
If you’re looking for a simple and joyful sewing project to celebrate the holidays, this patchwork Christmas ornament – tutorial is the perfect starting point.
When it comes to making a patchwork Christmas ornament, choosing the right fabrics is key to achieving a festive look. Think holiday colors like red, green, white, gold, and silver. Prints with snowflakes, stars, holly, or reindeer are especially popular.
Select 100% cotton quilting fabric for the best results. Cotton is easy to handle, cuts cleanly, and holds its shape well—important for small, detailed patchwork work. You can even use leftover scraps from other holiday quilting projects.
Aside from fabric, you’ll need a few basic supplies: a rotary cutter, cutting mat, quilting ruler, sewing machine (or needle and thread if hand-sewing), iron, and stuffing or batting for filling the ornament.
A fabric marking pen or chalk will help with placement and alignment. Ribbons or cord are also useful if you want to hang your ornament on the tree.
Decide on the shape of your ornament—round, square, heart, or even a star. Once you have your design in mind, you can plan your patchwork pattern accordingly.
Gather all your materials before you start. Having everything on hand makes the project flow smoothly and keeps you in the creative holiday spirit.
Now that you have your materials, it’s time to dive into the actual patchwork process. In this part of the patchwork Christmas ornament – tutorial, we’ll cut and arrange the fabric pieces.
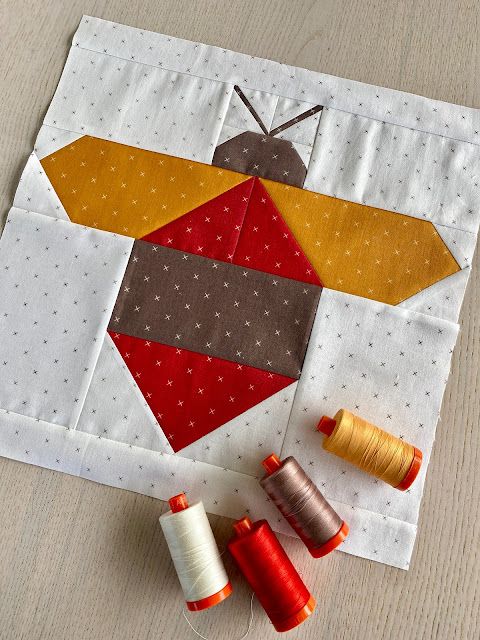
Begin by deciding how many pieces you want in your patchwork pattern. A simple 4-patch or 9-patch design is perfect for small ornaments. If you’re comfortable, you can try triangles, hexagons, or log cabin styles.
Use your rotary cutter and ruler to cut precise squares or shapes, typically around 1.5” to 2” in size. Remember to include a 1/4” seam allowance on all sides.
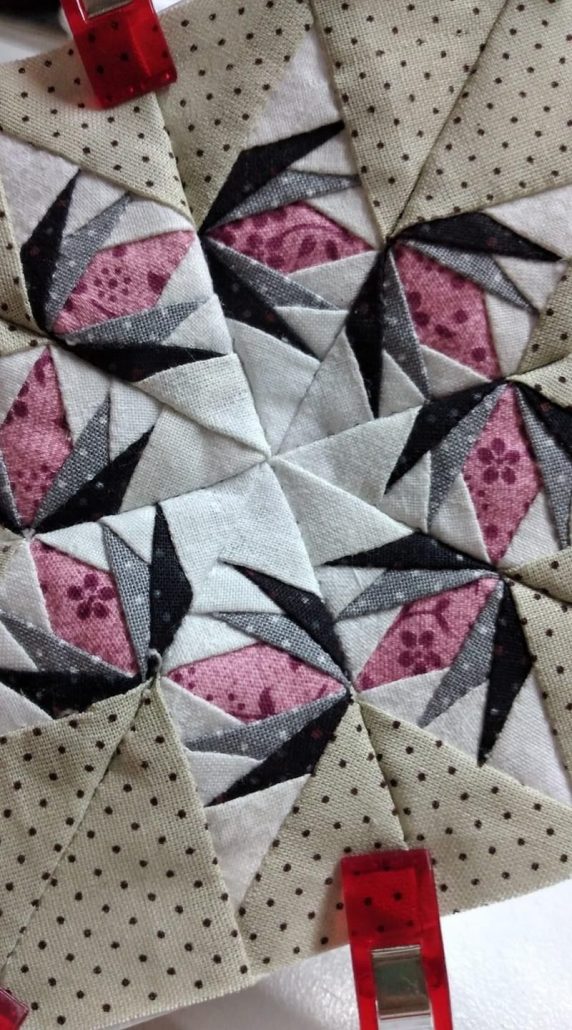
Arrange the fabric pieces on your work surface to see how they look together. This visual layout step is important for checking color balance and symmetry.
Sew the pieces together in rows using a 1/4” seam. Press seams flat after each row, either open or to one side, depending on your preference and pattern.
Join the rows to complete your patchwork front. Keep checking that the seams align well—this gives your patchwork Christmas ornament a polished look.
Repeat the process if you want the back of your ornament to also have a patchwork design. Otherwise, a solid backing fabric works just as well.
With the patchwork top ready, the next step in the patchwork Christmas ornament – tutorial is turning your flat block into a finished ornament.
Trace your desired ornament shape onto the patchwork top and your backing fabric using a fabric pen or light chalk. Place right sides together and pin them in place.
Sew around the edges, leaving a small opening for turning and stuffing. A 1/4” seam allowance works well here. Clip any curved edges carefully to ensure smooth lines after turning.
Turn the ornament right side out through the opening. Use a pointed tool (like a chopstick or knitting needle) to gently push out corners or curves.
Stuff the ornament lightly with polyester fiberfill or batting scraps. Don’t overfill—it should be soft and lightweight so it hangs well on the tree.
Once stuffed, hand-stitch the opening closed with an invisible ladder stitch for a clean finish. Take your time here for neatness.
If desired, attach a ribbon loop at the top with a few secure stitches. This will allow you to hang your patchwork Christmas ornament with ease.
Now that your ornament is assembled, let’s move on to the fun part: decorating! This part of the patchwork Christmas ornament – tutorial is all about creativity and personal flair.
You can add embroidery stitches around the edges or between patchwork sections. Use metallic thread for a sparkly holiday touch.
Buttons, sequins, or tiny beads can be sewn onto the patchwork front for added dimension and charm. Just be sure they are secured well if the ornament is for a child or pet-accessible area.
Try adding decorative topstitching with a contrasting thread. This not only looks lovely but can also reinforce seams.
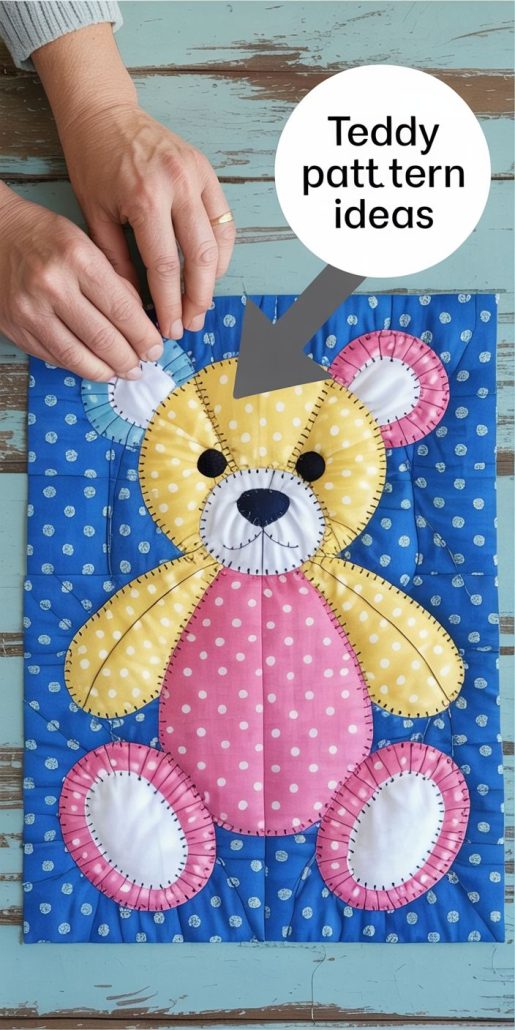
Use fabric glue to add tiny appliqué shapes like stars, trees, or snowflakes. These can give your ornament a playful or elegant feel depending on the shapes and colors you choose.
Personalize your ornament with initials, dates, or messages using fabric paint or hand-stitching. These make perfect keepsake gifts for loved ones.
Finally, consider making a set of matching ornaments in different shapes or colors to create a cohesive theme for your tree or gift sets.
What size should a patchwork Christmas ornament be?
Most ornaments are between 3” to 5” across, but you can adjust the size depending on the design and purpose.
Can I use hand-sewing instead of a sewing machine?
Yes, hand-sewing is perfectly fine for small projects like this. It may take a little longer, but it adds a lovely personal touch.
Do I need to quilt the patchwork ornament?
Quilting is optional. Since it’s a small project, just piecing and stuffing the ornament is usually enough for structure and design.
What’s the best stuffing for ornaments?
Polyester fiberfill is commonly used because it’s lightweight and easy to shape. You can also use leftover batting or even fabric scraps.
How do I keep the edges smooth when turning the ornament?
Clip curved edges and corners before turning. Then use a blunt tool like a knitting needle to gently push out the shape.
Can I make these ornaments with kids?
Absolutely! This patchwork Christmas ornament – tutorial can be adapted for simple hand-sewing and glue options for kids, making it a great holiday activity.
This patchwork Christmas ornament – tutorial has walked you through every step of creating festive, handmade ornaments that bring a personal touch to the holiday season. From selecting fabrics and assembling the patchwork to stuffing and decorating, you now have everything you need to start your own collection.
Whether you’re decorating your tree, gifting handmade treasures, or selling at holiday markets, these ornaments are a joyful and rewarding project. If you enjoyed this tutorial, please leave your honest opinion and share your suggestions for future holiday projects!