Crochet Heart Pattern – Tutorial

Creating personalized and handmade items for children can be a fun and rewarding experience. If you’re looking to make something special for a little one, a Owl Children’s Bag is an adorable and practical option. This unique project not only allows you to make a beautiful bag but also helps to develop valuable crafting skills. Whether you are an experienced crafter or just starting, this tutorial will guide you step-by-step to create a charming owl-themed bag that children will love to carry.
In this guide, we will walk you through each stage of the process to ensure that you can complete this craft successfully. The tutorial will be detailed, and it will cover everything from the materials you need to the techniques you’ll use. We’ve included key tips for sewing and assembly that are perfect for beginners but also provide enough information for experienced crafters. By the end, you’ll have an adorable owl bag ready for any child.
Throughout the tutorial, we’ll also focus on SEO optimization so that those searching for owl-themed children’s bags can easily find this helpful guide. We will make sure to emphasize the importance of using high-quality materials and child-friendly safety measures in the construction of the bag.
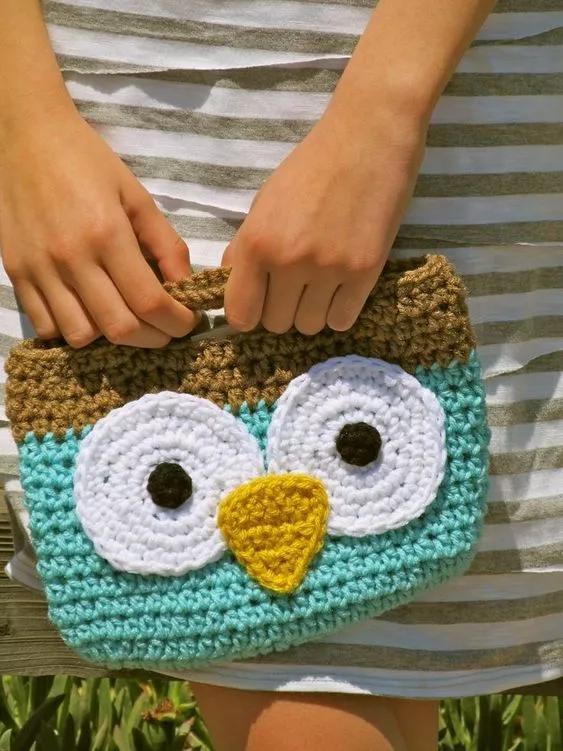
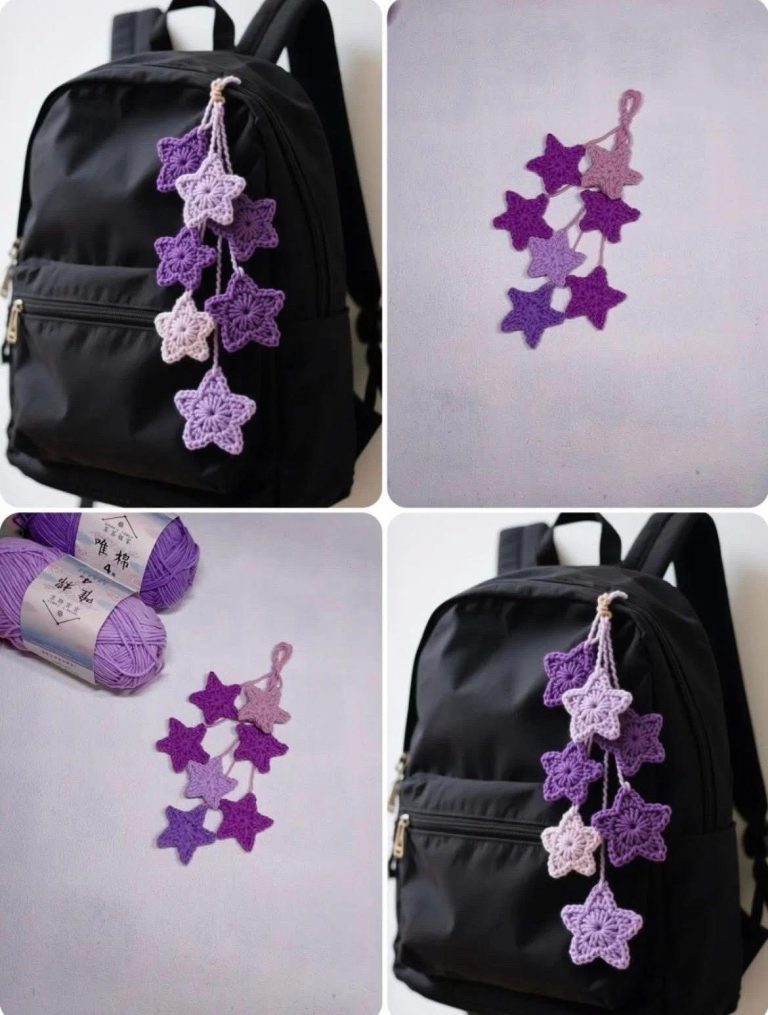
Image From Pinterest
To start crafting your Owl Children’s Bag, it’s essential to gather all the necessary materials. A well-planned project begins with the right supplies. Here’s what you’ll need to make this owl-themed bag:
With these supplies ready, you’re now set to start sewing. Let’s move on to the next step: assembling the pieces.
The first step in making your Owl Children’s Bag is cutting out all the necessary pieces for the owl. This step is crucial, as precision will ensure that the bag turns out looking neat and well-constructed. Here’s how to do it:
Once you’ve cut out all the pieces, lay them out to ensure they match and make any necessary adjustments before you start sewing.
Now that you have all your pieces cut out, it’s time to sew them together to create the owl bag. Follow these steps carefully to ensure everything comes together properly:
Once all the pieces are sewn together, you should have a functional and charming owl-shaped bag. Let’s move on to the final step.
To make the Owl Children’s Bag even more special, you can add a few final touches to personalize it. These little details can elevate your design and make the bag even more charming. Here’s how to finish off your owl bag:
With these final touches complete, your Owl Children’s Bag is now ready for use!
1. How long will it take to make the Owl Children’s Bag?
It typically takes about 2 to 3 hours to make the owl bag, depending on your sewing skills and how detailed you want the design to be.
2. What age is the Owl Children’s Bag suitable for?
The bag is suitable for children aged 3 to 8, but it can be adjusted in size to suit older children if needed.
3. Can I make this bag without a sewing machine?
Yes, you can sew the bag by hand. However, a sewing machine will make the process faster and more efficient, especially when attaching larger pieces.
4. Can I use different fabrics for the bag?
Absolutely! Feel free to use different fabrics such as felt, cotton, or even recycled materials. Just make sure they’re durable enough for everyday use.
5. How can I ensure the bag is safe for children?
Always ensure that any buttons or small embellishments are securely attached. Use fabric that’s non-toxic and safe for children, and double-check the strength of the straps.
6. How do I clean the Owl Children’s Bag?
The bag can usually be spot cleaned with a damp cloth or, if necessary, machine washed on a gentle cycle. Make sure to check the fabric care instructions before washing.
In this tutorial, we’ve covered the entire process of creating your very own Owl Children’s Bag, from gathering materials to adding final touches. We hope this guide was helpful in providing you with the skills and inspiration to create a one-of-a-kind bag that any child would love. If you have any suggestions, feedback, or want to share your experience with us, feel free to leave a comment below. We’d love to hear your thoughts! Happy crafting!