
Sewing Hearts & Nine Patch

If you love crafting and want to add a unique touch to your kitchen, the Kitty Potholder – Easy Pattern is an ideal project for you. This adorable and functional piece of handmade kitchenware is not only a conversation starter but also a practical solution to protect your hands from hot pots and pans. Whether you’re a seasoned crafter or a beginner, this easy-to-follow pattern will guide you through creating your own cute and practical kitty potholder.
Crafting a potholder may seem like a simple task, but when you add a fun design like a kitty, it takes the project to a whole new level. You’ll be able to combine your love for cats with your crafting skills to create something that’s both charming and useful. The best part is that the pattern is beginner-friendly, making it a great starting point for those who are new to crocheting or sewing.
In this article, we’ll dive into the details of creating your very own Kitty Potholder – Easy Pattern. From gathering materials to mastering the stitches, we’ll cover everything you need to know to successfully complete this adorable craft. Not only will you learn the steps involved, but we’ll also share some helpful tips and tricks to ensure your potholder turns out perfect every time.
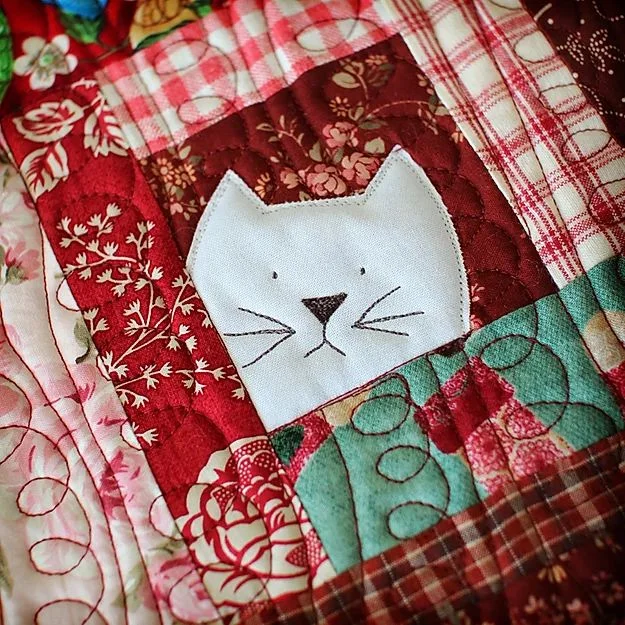
Image From Pinterest
Now, let’s take a closer look at the steps you’ll need to follow to create your very own Kitty Potholder.
Before diving into the actual crafting process, it’s essential to gather the right materials and tools. For this project, you’ll need a few basic supplies, all of which are easily accessible at your local craft store. Here’s what you’ll need to get started:
Once you have all your supplies, it’s time to start crafting. If you’re new to crochet, don’t worry—this project uses simple stitches that are easy to learn. The beauty of the Kitty Potholder – Easy Pattern lies in its simplicity, making it an enjoyable experience for all skill levels.
Now that you have everything ready, let’s break down the process of creating your Kitty Potholder – Easy Pattern. The pattern itself is straightforward, consisting of just a few basic steps to assemble your cute and functional potholder.
Start by crocheting the base of the potholder using a simple double crochet stitch. This will create a sturdy and thick foundation to protect your hands from heat. Work in rounds until you’ve achieved the desired size for the potholder. Once the base is complete, you can begin shaping the kitty’s face.
To create the cat’s features, use embroidery thread to stitch on the eyes, nose, mouth, and whiskers. You can use black for the eyes and whiskers, while the nose can be pink for a cute effect. For the ears, crochet small triangles and attach them to the top of the potholder. This gives your Kitty Potholder its signature look.
As you work through the project, be sure to leave enough space for the hanging loop at the top of the potholder. This is where you’ll attach a small piece of yarn to hang your finished kitty on a hook in your kitchen. The final step is to sew everything together and add any finishing touches, like a little bow or decorative accents, to make your potholder extra special.
Creating your Kitty Potholder – Easy Pattern can be a fun and rewarding experience, but there are a few tips that can make the process smoother and help you achieve a better result. Here are some tricks to keep in mind:
These tips will help you create a Kitty Potholder that’s not only cute but also practical and safe to use in the kitchen.
After all your hard work, it’s important to take proper care of your Kitty Potholder to ensure it lasts a long time. Here are a few tips for caring for your new creation:
By following these care instructions, you’ll ensure that your Kitty Potholder stays in great condition for years to come.
1. Can I use other types of yarn for the Kitty Potholder?
Yes, while cotton yarn is recommended for its heat resistance, you can experiment with other yarns. Just keep in mind that the yarn should be thick enough to provide adequate protection from heat.
2. How do I know if my potholder is heat-resistant enough?
Once you’ve completed your Kitty Potholder, test it by placing a hot object on it to ensure it provides sufficient insulation. The thicker the potholder, the better it will handle heat.
3. Can I make the kitty design larger or smaller?
Absolutely! You can adjust the size of the potholder by adding or removing stitches in the base and adjusting the proportions of the cat’s features to fit your desired size.
4. What’s the best way to make my potholder last longer?
Using high-quality yarn, adding filler for insulation, and caring for the potholder properly will all help increase its longevity. Avoid using it with extremely hot surfaces or leaving it in direct heat sources.
5. How long does it take to make the Kitty Potholder?
The time it takes to complete your Kitty Potholder will vary based on your experience level and the complexity of the design. On average, it could take a few hours for a beginner and a couple of hours for an experienced crafter.
In this article, we’ve shown you how to create your own Kitty Potholder – Easy Pattern, offering a fun and functional craft project for your kitchen. We covered everything from the materials needed to the step-by-step instructions, and provided helpful tips to make the process easier. Remember, this project is perfect for both beginners and more experienced crafters, and you can add your own personal flair with colors and details.
Now it’s your turn to get creative and start making your own adorable kitty potholder! If you enjoyed this tutorial, we’d love to hear your feedback. Please leave a sincere opinion or suggestions in the comments below. Happy crafting!


