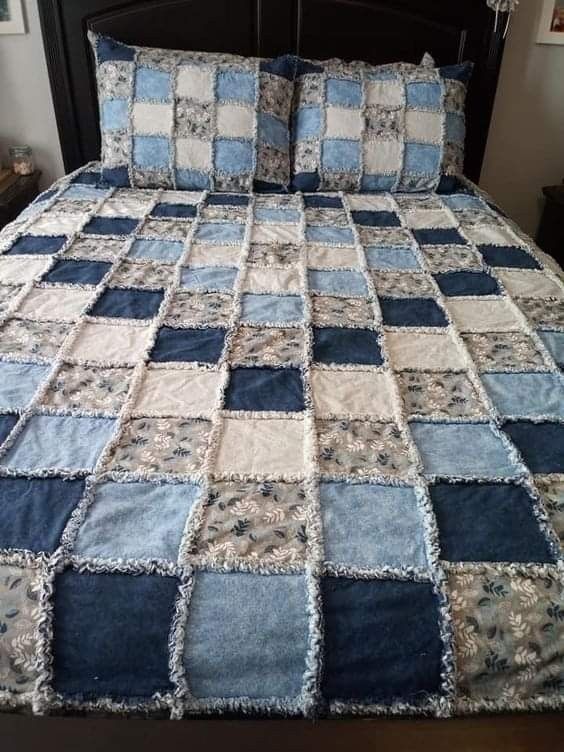
Easy Cross-Shaped Quilt

The Cats in the Attic quilt block is a playful and charming design that’s perfect for cat lovers and quilters alike. This block brings together the cute and mischievous nature of cats with the cozy, nostalgic feel of an attic space.
Whether you’re an experienced quilter or just starting out, this Cats in the Attic block will provide a fun challenge and create a beautiful, whimsical quilt. In this step-by-step tutorial, we will walk you through all the materials, cutting instructions, and techniques needed to bring this delightful pattern to life.
The Cats in the Attic design consists of adorable cat shapes tucked into an attic setting, with lots of space for creativity and personalization. From the playful cat faces to the cozy, cluttered attic backdrop, this quilt block can be as simple or as intricate as you like. By following this tutorial, you’ll learn how to make your own Cats in the Attic quilt block and incorporate it into a larger quilt design.
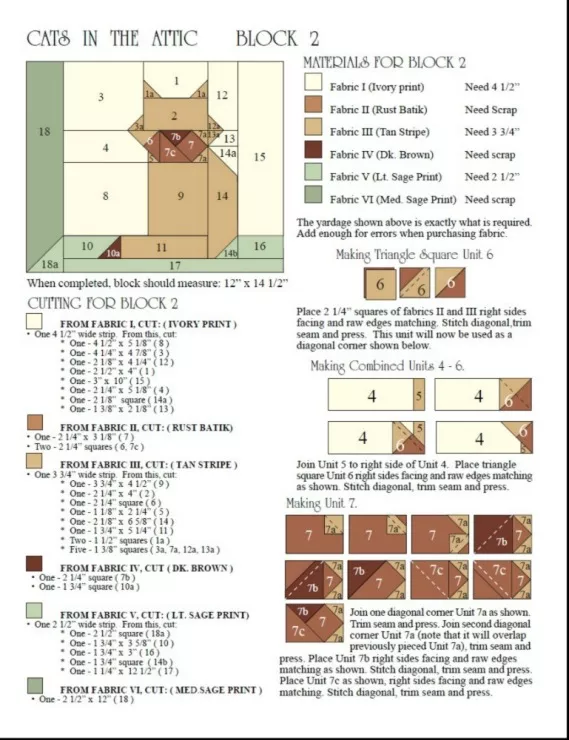
Image From Pinterest
Let’s jump right in and get started on this delightful project!
Before you begin assembling your Cats in the Attic quilt block, gather all the necessary materials to ensure a smooth and successful project. Here’s a list of what you’ll need:
Choose fabric that complements the whimsical theme of the Cats in the Attic block. Here are some recommendations:
A rotary cutter allows you to make precise cuts and speed up the process. A cutting mat ensures your work surface is protected and helps keep your cuts straight.
A quilting ruler is essential for cutting your fabric into accurate shapes, especially for the smaller details in the Cats in the Attic block.
A sewing machine is necessary for piecing the fabric together. If you have a machine with a quarter-inch foot, this will ensure your seams are consistent.
Choose a thread that matches or complements your fabric colors. A neutral color like beige or gray works well for most fabrics, but you can use brighter threads to match accent colors.
Pressing your seams as you go is crucial for neat and accurate piecing. An iron will help flatten the fabric and ensure your seams are crisp.
If you plan to make a full quilt, you’ll need batting and backing fabric. For a Cats in the Attic quilt, a lightweight batting works best for a soft, cuddly feel.
Now that you have all the materials, let’s dive into cutting the fabric and assembling the block.
To create the Cats in the Attic quilt block, you’ll need to cut several fabric pieces into specific shapes. Here’s how to get everything ready:
If you plan to add a border around your block, cut strips of fabric to go around the edges of the block. A typical border strip is 1.5-inch wide.
Once your fabric is cut, you’re ready to start assembling the block.
Now that the fabric pieces are prepared, it’s time to start assembling your Cats in the Attic quilt block. This block is made up of several smaller sections that will come together to form the whole design.
Start by sewing the cat’s head to the body. Take the 3-inch by 3-inch square (cat head) and sew it to the 4-inch by 5-inch rectangle (cat body). You should align the edges of the fabric and sew along the top edge, creating the cat’s head and body section.
Next, take the two 2-inch by 2-inch squares you cut for the ears. Fold each square in half diagonally, right sides together, to form a triangle. Sew along the diagonal edge, then press the seams open. Attach the ears to the top corners of the cat’s head, positioning them where you’d like. Sew them in place.
Take the 6-inch by 6-inch square for the attic background and begin placing your attic details. You can add the small 2-inch by 2-inch squares as boxes or vintage items within the attic. Arrange them creatively in the bottom corners or center of the block.
Once you’re happy with the placement, sew the pieces into place, securing them to the attic background.
Now that the cat and attic details are complete, it’s time to assemble everything. Sew the cat section (head and body) to the attic background, ensuring that the cat is positioned neatly within the attic space. Press the seams to flatten everything.
If you want to add a border around your block, now is the time. Take the strips of fabric you cut for the border and sew them to the edges of the block. You can add a border to all four sides or just a top and bottom border to frame the design.
Give the entire block a final press to smooth out any wrinkles and set the seams. This will help your Cats in the Attic quilt block look crisp and clean.
Once you’ve completed your Cats in the Attic block, you can use it as part of a larger quilt or create a small project like a pillow or wall hanging.
To make a full quilt, create multiple Cats in the Attic blocks. You can arrange the blocks in a grid layout for a balanced design, or scatter the blocks randomly for a more whimsical look. Once your blocks are arranged, sew them together, adding sashing between the blocks if desired.
Consider adding a border around the entire quilt. You can use a coordinating fabric that complements the colors in the blocks. This final touch will frame the quilt and give it a polished appearance.
Once your quilt top is assembled, add quilt batting and backing fabric. You can machine quilt, hand quilt, or even try free-motion quilting. Quilting along the seams or using a simple geometric pattern will highlight the playful design of the Cats in the Attic blocks.
Finish the quilt by adding the quilt binding. Cut strips of fabric and sew them around the edges of the quilt to give it a neat, finished look. Press the binding for a crisp finish.
1. How many Cats in the Attic blocks do I need for a full quilt?
The number of blocks needed depends on the desired size of your quilt. For a throw-sized quilt, you’ll likely need around 12-16 blocks. Adjust based on your quilt’s dimensions.
2. Can I make the cat designs different for each block?
Yes, feel free to get creative! You can make each cat unique by using different fabrics, facial expressions, or adding accessories like scarves or hats.
3. What is the best way to add details to the attic?
You can add small print fabrics to represent vintage items or even embellishments like embroidery for a more personalized touch. Don’t be afraid to get creative with your attic details!
4. Can I use different sizes for the block?
Yes! If you want a larger or smaller block, adjust the fabric pieces accordingly. Just make sure to keep the proportions of the cat and attic elements balanced.
5. How do I keep my seams straight?
Use a quarter-inch seam allowance for all piecing, and press each seam as you go. A quilting ruler and a steady hand will help you keep everything aligned.
In this Cats in the Attic tutorial, we walked through how to create a whimsical, cozy block that brings the charm of cats and attics together. By following the steps, you can create your own unique quilt that’s full of personality and warmth.
We hope you enjoyed making your Cats in the Attic quilt block! If you have any questions or suggestions, feel free to leave a comment. Happy quilting!