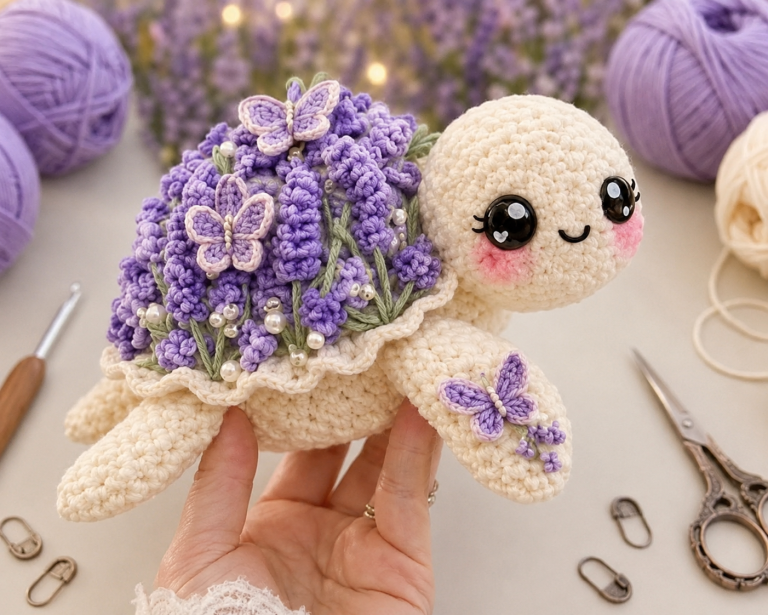
Lavender Turtle Crochet Pattern

Creating your very own Winnie the Pooh Amigurumi is a delightful way to bring this beloved bear to life through crochet. Fans of the classic character will love the opportunity to make a cuddly, handcrafted version of Pooh, who has captured the hearts of generations. Whether you’re a beginner or an experienced crocheter, this guide will take you through every step of making your very own Winnie the Pooh amigurumi, with tips, tricks, and detailed instructions to ensure your project turns out just right.
The Winnie the Pooh Amigurumi pattern is perfect for those who want to create a special handmade gift or simply add a whimsical touch to their home décor. Pooh’s endearing features, including his round belly and red shirt, make him an adorable addition to any collection. By following this easy-to-follow crochet guide, you can bring your own version of the loveable bear to life.
Crochet is not only a relaxing and enjoyable hobby, but it’s also a fantastic way to create heartfelt, personalized gifts. Winnie the Pooh Amigurumi gives you the opportunity to use your skills to make a beloved character, and with a little creativity, you can make Pooh uniquely your own. Let’s dive into the steps to create this charming bear!
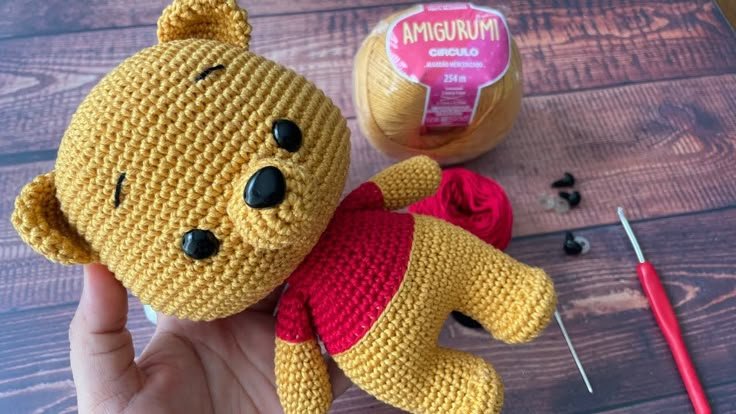
Image From Pinterest
Before you begin crocheting your Winnie the Pooh Amigurumi, it’s important to gather all the necessary materials. Having everything prepared will ensure a smooth and enjoyable crafting experience. Here’s a list of what you’ll need:
DISCOVER MORE FREE PATTERNS HERE!
Having these supplies on hand will set you up for success. Once everything is ready, you’ll be all set to start crafting your Winnie the Pooh Amigurumi!
Now that you have all the materials, let’s start creating your very own Winnie the Pooh Amigurumi. This guide breaks down each step, from the head to the body, arms, and more, to help you achieve the perfect Pooh bear.
To create Pooh’s adorable round head, begin with a magic ring and work six single crochet (sc) stitches into it. From there, continue increasing in rounds, adding more stitches as you go to form a ball shape. Keep your tension tight to ensure the stuffing doesn’t show through.
The body is worked in a similar manner to the head. Once you’ve finished the head, move on to the body, crocheting in rounds. The body will be slightly larger and cylindrical, but remember to keep your stitches even. As you work, stuff the body lightly with fiberfill to maintain its shape.
For Pooh’s arms and legs, you’ll crochet small tubes. Start with a magic ring, then increase and decrease to shape the arms and legs. Stuff them lightly with fiberfill and sew them onto the body after completion.
Pooh’s signature red shirt can be created by crocheting a simple rectangular shape and sewing it onto his body. You can add a small collar or simple sleeves for extra detail, but the basic shirt design is easy to follow.
Once the head and body are complete, it’s time to add Pooh’s cute face. Start by attaching the safety eyes, placing them symmetrically on the head. Then, use black yarn to embroider his nose and mouth. Pooh’s face should have a warm, friendly expression, so take care when positioning the features.
Finally, it’s time to sew all the parts of Pooh together. Start with attaching the head to the body, then add the arms and legs. Be sure to securely stitch each part to prevent any wobbling or detachment. You can adjust the positioning of the arms and legs to give Pooh the right pose.
With the body complete and all the parts assembled, you’ll have a cuddly Winnie the Pooh Amigurumi ready to brighten your day!
While the standard Winnie the Pooh Amigurumi pattern is already adorable, there are several ways you can customize him to add your own personal touch. Here are some ideas to make your Pooh even more unique:
Pooh is famous for his love of honey, so why not crochet a small hunny pot for him to hold? You can create a simple cylinder shape in brown yarn and add “Hunny” in embroidered letters on the front. Attach the pot to Pooh’s hands for a fun touch.
While traditional Pooh bears are yellow with a red shirt, you can experiment with different shades of yellow or even multicolored yarns for a more playful look. You could create a special edition of Pooh with pastel or variegated yarn for a unique twist!
If you’re up for a challenge, consider creating other characters from the Winnie the Pooh universe to accompany Pooh! You could crochet Piglet, Tigger, Eeyore, or even Rabbit to complete the set of beloved friends.
Add tiny details such as a small bow tie, a scarf, or even a little jacket to give Pooh a distinctive look. If you’re giving your amigurumi as a gift, you can customize it with the recipient’s favorite colors or accessories.
These customization options allow you to add your personal flair to your Winnie the Pooh Amigurumi, making it a truly one-of-a-kind creation.
Crocheting the perfect Winnie the Pooh Amigurumi requires some patience and practice, but there are a few tips to help make your project easier and more enjoyable.
Maintaining consistent tension is crucial for a neat, uniform finish. If your stitches are too tight, the fabric will be stiff, while loose stitches may cause gaps. Aim for a balance that results in a smooth and squishy texture.
To keep track of your rounds, use stitch markers at the beginning of each round. This will prevent you from losing your place and help maintain the even shape of the head and body.
When it comes to adding features like the eyes, nose, and mouth, take your time to get the positioning just right. Small details like this can make a huge difference in the final look of your Winnie the Pooh Amigurumi.
Stuffing is a key part of the amigurumi process. Add small amounts of fiberfill at a time to ensure an even and smooth shape. Be careful not to overstuff the body, as it could affect the appearance of the final product.
When attaching parts like the arms, legs, and head, be sure to sew them on securely. You don’t want any loose parts that might fall off or shift during play or display.
The time it takes to make your Winnie the Pooh Amigurumi will depend on your skill level and how much time you dedicate to the project. On average, it may take a few hours over the course of several days.
Yes, you can sell your amigurumi, but remember to credit the pattern creator if necessary. You should also be mindful of any copyright regulations regarding the character design.
You can adjust the size of your Winnie the Pooh Amigurumi by changing your yarn and hook size. Using thinner yarn and a smaller hook will result in a smaller Pooh, while thicker yarn and a larger hook will produce a bigger version.
While the traditional Pooh has a red shirt, you can use any color you like for his shirt to give your amigurumi a fun twist. Customize the shirt with stripes or patterns for a unique look.
If your stitches are too tight, try switching to a larger hook to loosen up the tension. If they’re too loose, consider using a smaller hook to create a tighter stitch and prevent stuffing from showing through.
Creating your own Winnie the Pooh Amigurumi is a rewarding and enjoyable crochet project that allows you to bring this iconic character to life. With simple steps, careful attention to detail, and a little creativity, you can craft a Pooh bear that’s both cuddly and charming. Whether you make it for yourself or as a gift, this amigurumi is sure to bring a smile to anyone’s face.
We’d love to hear your thoughts on this project! Please leave a comment below with your feedback or any ideas for future patterns. Your input is always welcome!