Amigurumi Christmas Pointer - TUTORIAL

Crocheting your own Stitch and Angel Amigurumi characters is a delightful project that brings the charm of these beloved characters to life in the form of handmade creations. Inspired by the characters from Disney’s Lilo & Stitch, these crochet patterns allow you to create your very own versions of Stitch and Angel, complete with all their unique features and personalities. This guide will walk you through the process of creating these adorable amigurumi characters, from gathering supplies to adding those final, magical touches.
Crocheting amigurumi is a fun and therapeutic hobby that combines creativity with craftsmanship. The Stitch and Angel Amigurumi pattern is perfect for fans of the movie and those who enjoy making cute, personalized dolls. Whether you’re a beginner or an experienced crocheter, this pattern offers a fulfilling and enjoyable crafting experience that results in two very lovable characters. Let’s dive in and learn how to make these characters step-by-step!
By following the pattern and learning how to crochet Stitch and Angel, you can add your own unique twist to the design. The beauty of crochet is in its flexibility—you can experiment with different yarn colors, textures, and sizes to make your characters truly your own. Now, let’s explore how to bring Stitch and Angel Amigurumi to life with these easy-to-follow instructions!
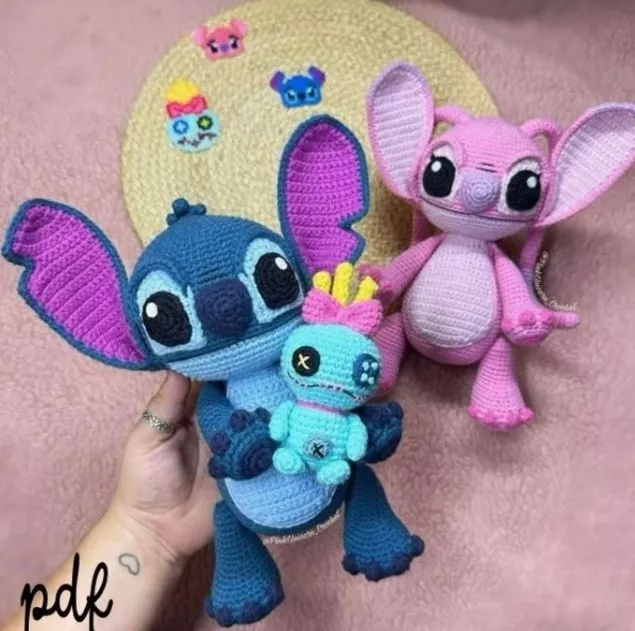
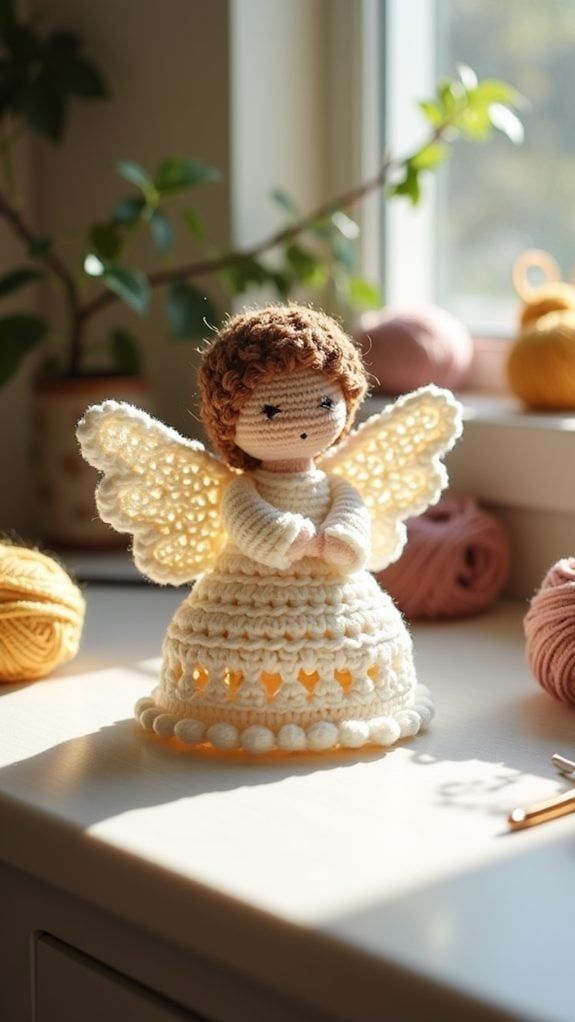
Image From Pinterest
Before you start crocheting Stitch and Angel Amigurumi, you’ll need to gather a few materials. Having everything ready ensures that the process goes smoothly and you won’t run into any interruptions.
DISCOVER MORE FREE PATTERNS HERE!
Having all your supplies in place will ensure a smooth and enjoyable crafting experience. You can easily find these materials at any craft store or online. With everything ready, you’re now prepared to begin your Stitch and Angel Amigurumi crochet adventure.
Creating Stitch involves several key steps. By following the pattern, you can craft a Stitch that resembles the one from Lilo & Stitch, complete with his big ears and mischievous smile.
Begin by crocheting the head of Stitch. Work in a magic ring, then increase in each round to create a spherical shape. Make sure to keep your stitches tight, especially around the eyes and face area, so that the features stay in place.
Once you finish the head, move on to the body. The body of Stitch is larger than the head and has a rounded, slightly elongated shape. Work in rounds to create the body and be sure to stuff it lightly as you go along.
Stitch’s long ears are one of his signature features, so make sure to follow the pattern carefully to create two large, floppy ears. The arms and legs are smaller and should be crocheted in the round, with the legs being slightly larger than the arms.
Stitch’s face is essential to his look. Sew on the safety eyes, add a cute nose with black yarn, and embroider his mouth with a simple stitch to give him a joyful expression. You can also use a bit of pink yarn to add details to his cheeks for an extra touch of cuteness.
Once all the individual parts are completed, sew them together using your tapestry needle. Make sure the limbs, ears, and face are securely attached to the body and head. You can adjust the positioning to give Stitch his signature stance.
With Stitch’s body and face complete, you can now move on to making Angel!
Just like Stitch, Angel is a fun and adorable character to crochet. She has a soft, pink color and a playful yet sweet demeanor. Let’s look at how to create Angel step-by-step.
The head of Angel is worked in the same way as Stitch’s. Begin with a magic ring and increase to form a rounded shape. Keep your stitches tight to maintain a smooth, even texture, especially for the face.
Angel’s body is also worked in the round, with a slightly slimmer and more delicate shape than Stitch’s. Once the body is complete, stuff it lightly with fiberfill to help give it a soft and squishy feel.
Angel has two smaller, pointy ears, which you can crochet separately and attach to her head. The arms and legs are also small and delicate, with the legs being slightly longer to give Angel a balanced look.
To bring Angel to life, focus on the finer details of her face. Use safety eyes for her bright, expressive eyes, and crochet her tiny nose and mouth with pink yarn to match her cheerful personality.
Once you’ve completed the different pieces, sew them all together. Ensure that each part is securely attached and positioned well to give Angel a complete and adorable appearance. Once everything is in place, you can add final touches like extra detailing on the ears or limbs to make her even cuter.
With Angel completed, both Stitch and Angel will make the perfect duo, ready to share their charm with your friends and family.
Creating Stitch and Angel Amigurumi requires attention to detail and patience, but there are several tips and tricks to help you along the way:
Choosing the right yarn is crucial for creating a smooth finish. Wool, cotton, and acrylic yarns are great options, but ensure they are soft enough for the texture of amigurumi.
Consistent stitch tension is key to creating neat and uniform pieces. If your stitches are too tight, the fabric will be stiff; if they are too loose, it may not hold its shape.
Using a stitch marker can help you track your rounds and prevent mistakes, especially when working in the round.
Amigurumi requires time and care, so don’t rush the process. Take your time to get each stitch right and enjoy the creative process!
Feel free to add your own creative touches, such as different yarn textures or additional accessories like hats or scarves.
Once you’ve mastered the patterns for Stitch and Angel, why not try making multiple characters? They would make wonderful gifts or decorations for fans of the movie.
The time it takes to complete the project depends on your skill level and how much time you dedicate to it. On average, creating each character can take a few hours over a couple of days.
Yes, you can sell the Stitch and Angel Amigurumi dolls you create, but be sure to credit the original pattern creator if specified. Respect any licensing guidelines that may apply.
You can crochet the eyes if you prefer, especially if you’re making these dolls for younger children. Safety eyes are a great option for a more polished look, but they are not mandatory.
Worsted weight yarn is typically best for amigurumi, but you can experiment with different types to create unique textures and finishes.
If you make a mistake, you can unravel the stitches carefully and start over from the point of error. Using a stitch marker can help prevent mistakes in the first place.
The Stitch and Angel Amigurumi project is an exciting and fulfilling crochet pattern that brings the magic of Lilo & Stitch right into your hands. From gathering your materials to sewing together the final pieces, you now have all the knowledge you need to create these lovable characters. Remember, crochet is about having fun and expressing your creativity, so don’t be afraid to make these characters your own.
We’d love to hear your thoughts! Feel free to leave a comment below with your feedback or any suggestions for future patterns. Your input is always welcome!