Using fabric scraps in a creative and purposeful way is an excellent approach to sustainable crafting, and one of the best projects to try is making Matching Scraps patterns. Whether you are an experienced sewer or a beginner, this pattern will help you turn those leftover pieces of fabric into something beautiful and functional.
In this article, we will show you how to use your fabric scraps to create a stunning Matching Scraps design that you can use for home decor, accessories, or even as gifts.
The idea behind this pattern is simple: you mix and match different fabric scraps to create a cohesive and charming design. The beauty of this project lies in its versatility, as you can customize it to suit your personal style.
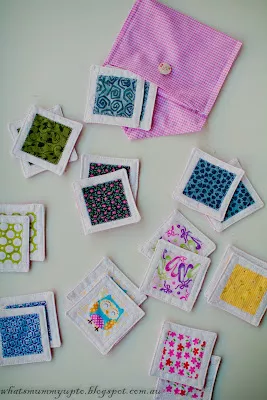
Image From Pinterest
1. Materials Needed for Matching Scraps Pattern
Before you begin crafting, gather all the materials needed for the Matching Scraps pattern. This project is ideal for using up fabric scraps you may already have at home, so it’s a great way to reduce waste while creating something beautiful.
SEE OTHER FACE PATTERNS HERE!
- Fabric Scraps:
- Gather various fabric scraps in different colors, patterns, and textures. You can use cotton, linen, flannel, or any other fabric you prefer. Try to use fabric that coordinates well, whether through complementary colors or shared patterns.
- Scissors:
- A sharp pair of fabric scissors is essential for cutting your scraps into neat and accurate shapes.
- Rotary Cutter and Mat (optional):
- A rotary cutter and mat can help you cut perfect strips and squares quickly and accurately. This tool is especially useful if you’re working with multiple layers of fabric.
- Sewing Machine or Needle and Thread:
- If you plan to sew your scraps together, you can use a sewing machine for quicker results. Otherwise, a needle and thread for hand stitching will work just fine.
- Pins:
- Use pins to keep your fabric pieces in place while sewing, especially if you’re piecing together small sections.
- Iron and Ironing Board:
- An iron will help you press your fabric pieces flat, making them easier to sew together and giving your finished product a professional appearance.
- Quilt Batting or Interfacing (optional):
- If you’re planning to make a more structured item like a tote bag or a quilt, quilt batting or fusible interfacing will add stability to your project.
- Measuring Tape or Ruler:
- A measuring tape or quilting ruler will ensure that your fabric pieces are cut to the correct size and that your pattern lines are straight.
2. Step-by-Step Guide to Creating Matching Scraps Patterns
Now that you have all the materials ready, let’s get started on making your Matching Scraps project. Follow this easy, step-by-step guide to piece together a beautiful design.
2.1. Choosing Your Fabric Scraps
The first step in creating a Matching Scraps pattern is selecting your fabric pieces. The key here is to choose fabrics that work well together in terms of color, pattern, and texture.
- Select a Color Scheme:
- If you want a cohesive look, select a color palette to guide your fabric choices. For instance, you can choose warm tones like reds, oranges, and yellows for a fall-inspired design, or go for pastel shades for a soft, spring-like effect.
- Mix and Match Patterns:
- Don’t be afraid to mix different patterns such as stripes, florals, polka dots, and solids. The idea is to create a balanced combination of fabrics that complement each other while still offering visual interest.
- Consider Fabric Weight:
- If you’re using a variety of fabric weights (for example, a heavier canvas with a lightweight cotton), make sure to balance them out so they sew together smoothly and the finished product is sturdy.
2.2. Cutting Your Fabric Scraps
Once you’ve chosen your fabrics, it’s time to cut them into the desired shapes for your Matching Scraps project. The shapes you cut will depend on what you’re making – whether it’s a patchwork quilt, a pillow, a tote bag, or any other item.
- Cut Squares or Rectangles:
- A common approach for Matching Scraps projects is cutting fabric into squares or rectangles of uniform size. This helps create a tidy and uniform appearance. You can decide on the size depending on your project. For example, 3” squares work well for smaller items, while 6” or larger squares can be used for quilts.
- Cutting Strips:
- Another option is to cut fabric into strips. This works especially well for projects like table runners, tote bags, or wall hangings. Strips can be of equal width or vary slightly for a more dynamic look.
- Pressing Fabric Pieces:
- After cutting, use an iron to press your fabric pieces flat. This will make the edges sharp and prevent any wrinkles that could affect your sewing.
2.3. Arranging the Fabric Pieces
Once your fabric pieces are cut, it’s time to arrange them into the pattern you want. The beauty of Matching Scraps patterns is that you have the freedom to design your own layout.
- Lay Out the Fabric Pieces:
- On a flat surface, arrange your fabric pieces in the pattern of your choice. You can alternate colors, create a gradient effect, or even go for a random arrangement. Play around with different designs until you’re happy with the composition.
- Ensure Balance:
- While mixing and matching fabrics, try to create a sense of balance by spreading out similar patterns and colors. You don’t want one area to feel too busy or too plain compared to the rest of the design.
- Pin the Pieces:
- Once you’re satisfied with your layout, pin the pieces in place to prevent them from shifting while you sew.
2.4. Sewing the Pieces Together
Now that your fabric pieces are arranged and pinned, it’s time to sew them together.
- Sew the Pieces:
- Start by sewing the fabric pieces together, either by hand or using a sewing machine. If you’re working with squares or rectangles, sew them in rows first, and then sew the rows together. For strips, sew them side by side to create the length you want.
- Press the Seams:
- After each row or strip is sewn, press the seams flat with an iron. This will ensure that the fabric lays flat and the seams don’t shift.
- Assemble the Sections:
- Once all of your fabric pieces are sewn together into a cohesive unit, sew the individual sections or strips together to complete your design.
2.5. Adding Finishing Touches
Depending on the type of project you’re creating, you might want to add some finishing touches to give your Matching Scraps pattern an extra flair.
- Add Border or Edging:
- If you’re making a quilt, tote bag, or similar project, consider adding a border or edging around the entire design. This can be done using solid fabric or by piecing together additional fabric scraps.
- Quilting or Topstitching:
- For added texture and dimension, you can quilt the fabric pieces together using a sewing machine, or topstitch along the seams. This will not only secure the fabric pieces but also give your project a polished look.
- Attach a Lining (Optional):
- If your project requires extra structure, such as in the case of a bag or pouch, consider adding a lining. You can use a coordinating fabric or a solid color that complements the scraps.
3. Creative Ideas for Matching Scraps Patterns
The possibilities with Matching Scraps patterns are endless! Here are some creative ideas for how you can use this technique in your projects:
- Patchwork Quilts:
- One of the most popular uses for the Matching Scraps technique is creating patchwork quilts. By combining different fabric scraps in a variety of sizes and shapes, you can create a warm, colorful quilt perfect for any season.
- Decorative Pillows:
- Use the scraps to create a patchwork pillow cover that will add charm to any couch or bed. Mix and match fabrics in different patterns to create a unique design that complements your home decor.
- Tote Bags and Pouches:
- Create a stylish, eco-friendly tote bag by piecing together fabric scraps. This makes for a great project that’s both functional and fashionable.
- Wall Hangings:
- Turn your Matching Scraps pattern into a beautiful wall hanging by creating a simple patchwork design and adding a wooden dowel for hanging.
Join Now!!
🌟Join our exclusive Quilt broadcast list on Messenger! Receive the best patterns, tips, and updates directly in your inbox. Our team is ready to send you delightful content that will inspire your projects. Don’t miss this opportunity to stay updated and create amazing pieces. Join now and be part of this passionate quilt community!✨📩
4. FAQ
1. Can I use different types of fabric for this project?
Yes! You can use a variety of fabric types such as cotton, linen, denim, or felt. Just make sure to use fabrics of similar weight for easier sewing.
2. How do I ensure the fabric pieces stay together while sewing?
Pinning the fabric pieces before sewing or using fabric glue for a temporary hold will help keep everything in place.
3. Can I make a Matching Scraps pattern without a sewing machine?
Absolutely! You can hand sew the pieces together using a simple running stitch or whip stitch. It will take a bit longer, but the result will be just as beautiful.
4. What should I do with my leftover scraps?
Don’t throw away leftover scraps! You can use them for smaller projects like keychains, scrapbooking, or even make a fabric bookmark.
5. How do I care for my finished project?
Most Matching Scraps projects can be machine washed, but always check the fabric care instructions. If you’ve used delicate fabrics like silk, hand wash or dry clean to preserve the material.
PATTERN HERE
Conclusion
The Matching Scraps pattern is a versatile and enjoyable project that allows you to use up fabric scraps creatively. Whether you’re making a quilt, a pillow, or a tote bag, this technique is a great way to add a personal and eco-friendly touch to your crafting. We hope this guide has inspired you to dive into your fabric stash and create something beautiful. Feel free to share your creations and leave any comments or suggestions below! Happy sewing!


